Home Blog Page 83

How to Calibrate Your Coffee Scale for Accurate Measurements

Consistency is the secret ingredient to a perfect cup of coffee and that starts with accurate measurements. Even the most advanced coffee scales can lose precision over time. That’s why calibration isn’t just a technical step; it’s a brewing essential.

In this guide, we’ll walk you through the process of calibrating your coffee scale at home and explain why it matters for every serious home barista.


Why Calibration Matters for Coffee Brewing

Have you ever brewed a cup that tasted a bit off even though you followed the same steps as always? The culprit might be your scale. An uncalibrated scale can throw off your coffee-to-water ratio, leading to over-extracted bitterness or under-extracted sourness.

read more: Essential Skills Every Aspiring Home Barista Should Develop

Calibration ensures that:

  • Measurements are accurate and reliable
  • Recipes yield consistent results
  • You avoid wasting coffee and time

Especially when you’re experimenting with brew ratios or dialing in espresso shots, even a 1-gram error can make a noticeable difference.


How Often Should You Calibrate Your Coffee Scale?

It depends on how often you use it. Here’s a simple guideline:

  • Daily Use: Calibrate every 2–4 weeks
  • Occasional Use: Calibrate every 1–2 months
  • After Travel or Impact: Calibrate immediately

If your scale is giving inconsistent readings or you notice minor differences even when using the same amount of coffee, that’s your sign.


What You Need to Calibrate a Coffee Scale

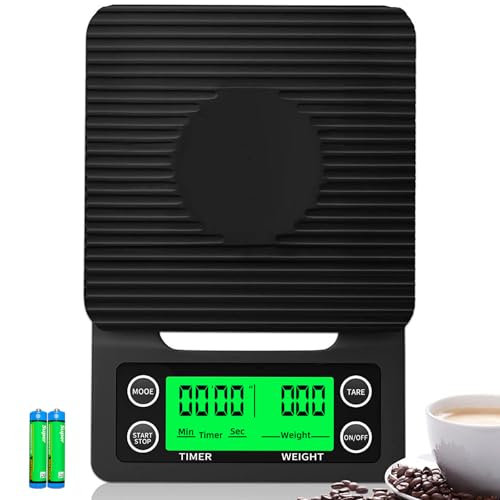
Most modern digital coffee scales come with built-in calibration functions. You’ll also need:

  • A calibration weight commonly 100g, 200g, or 500g, depending on your scale
  • A flat, stable surface
  • Fresh batteries or full charge, to avoid power fluctuation errors

If your scale didn’t include a weight, you can find precise calibration weights online for under $10.


Step-by-Step Guide to Calibrating Your Scale

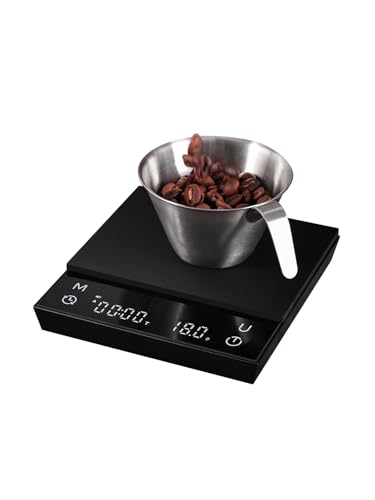
  1. Turn on the Scale: Make sure it’s on a level surface.
  2. Enter Calibration Mode: This usually involves holding down a specific button (check your scale’s manual).
  3. Wait for the Display Prompt: The screen will show the expected calibration weight (e.g., 200g).
  4. Place the Calibration Weight: Gently set it in the center of the weighing platform.
  5. Confirm and Wait: The scale will automatically adjust and confirm when calibration is complete.
  6. Test the Scale: After calibration, weigh the same object a few times to check for consistency.

Tips to Keep Your Scale Accurate

  • Avoid Overloading: Never exceed the max weight limit.
  • Use in Stable Conditions: Temperature and humidity can affect accuracy.
  • Store Carefully: Keep it in a padded or secure location when not in use.
  • Clean Regularly: Dust and coffee grounds can interfere with the sensor.

You’re chasing consistency

A properly calibrated scale is a small detail that makes a big difference especially if you’re chasing consistency in your brews or working with specialty beans. Calibration only takes a few minutes, but the payoff in flavor clarity is huge.

Whether you’re pulling espresso shots or perfecting your pour-over, don’t let inaccurate measurements sabotage your cup. Make calibration a regular part of your coffee ritual you’ll taste the improvement.

Best Coffee Scales for Home Baristas: Top Picks for Precision Brewing

In the world of home brewing, precision is everything and a good coffee scale is your secret weapon. Whether you’re perfecting your pour-over or dialing in espresso shots, the right scale helps you achieve accuracy, consistency, and better-tasting coffee.

To help you find the best fit for your brewing setup, we’ve compiled a list of top-rated coffee scales that balance performance, price, and practical features.

What Makes a Great Coffee Scale?

Before we dive into specific models, let’s break down what you should look for:

  • High Precision (0.1g or better): Accuracy is critical, especially for espresso and pour-over brewing.
  • Built-in Timer: Helps you track bloom time and total brew time.
  • Responsive Tare Function: Allows you to quickly reset the scale during steps.
  • Water Resistance: A helpful feature in messy brewing environments.
  • Size and Portability: It should fit your brew method compact for espresso, slightly larger for pour-over.
  • Battery Life or Rechargeability: USB charging is a plus for regular use.

read more: How to Choose the Right Coffee Scale: Precision Matters

Top Coffee Scales for Home Baristas

1. Acaia Pearl

Best for serious brewers

  • Precision: 0.1g
  • Timer: Yes
  • Rechargeable: USB-C
  • Price: $$$

The Acaia Pearl is the gold standard among specialty coffee enthusiasts. It’s fast, highly responsive, beautifully designed, and integrates with a mobile app for extra features. Ideal for pour-over lovers seeking full control.

2. Timemore Black Mirror Basic+

Best value for money

  • Precision: 0.1g
  • Timer: Yes
  • Rechargeable: USB-C
  • Price: $$

A favorite among budget-conscious home baristas, the Timemore Black Mirror offers sleek design and impressive precision. Its water resistance and minimalist interface make it a reliable daily driver.

3. Hario V60 Drip Scale

Best for pour-over beginners

  • Precision: 0.1g
  • Timer: Yes
  • Batteries: 2 AAA
  • Price: $$

Made by the same company behind the famous V60 dripper, this scale is a trusted choice for manual brewing. It’s slower than Acaia or Timemore but still accurate enough for excellent pour-overs.

4. Brewista Smart Scale II

Best for espresso setups

  • Precision: 0.1g
  • Timer: Yes
  • Waterproof: Fully water-resistant
  • Price: $$$

This compact, waterproof scale fits perfectly under espresso machines. Its fast response and multiple modes make it ideal for shot timing and dose tracking.

5. Fellow Tally Precision Scale

Best for design and usability

  • Precision: 0.1g
  • Timer: Yes
  • Rechargeable: USB-C
  • Price: $$$

Fellow’s entry into the scale market combines aesthetics with function. The Tally’s intuitive interface and solid build make it great for those who value form and function equally.

The right coffee scale

The right coffee scale depends on your brewing style, budget, and precision needs. From the pro-level Acaia Pearl to the budget-friendly Timemore Black Mirror, there’s a perfect option out there for every home barista.

Whether you’re just starting out or fine-tuning your espresso workflow, investing in a quality scale can help you brew like a pro consistently, confidently, and deliciously.

The Role of an Espresso Shot Glass in Dialing In Your Brew

If you’re serious about improving your espresso at home, there’s one tool that often gets overlooked: the espresso shot glass.

This simple accessory does more than just look good on your counter it provides critical feedback that can elevate your brewing precision and help you consistently nail your espresso shots.

What Is an Espresso Shot Glass?

An espresso shot glass is a small, heat-resistant glass typically marked with measurement lines in milliliters and/or ounces. It’s designed to fit under your espresso machine’s spouts and collect the extracted coffee.

Many shot glasses also have double spouts, making it easy to split a shot if needed.


Why It Matters

1. Precision in Measurement

Dialing in espresso is all about ratios and consistency. A shot glass allows you to visually monitor:

  • Shot volume
  • Timing
  • Layer separation (crema, body, heart)

This feedback is invaluable when adjusting grind size, dose, or tamp pressure.

2. Consistent Results

Using a marked glass helps ensure you’re pulling the same volume every time. This builds consistency in flavor and reduces waste from poorly extracted shots.

3. Training Your Eye

Over time, a shot glass helps you develop an intuitive sense of volume, so you’ll know what a proper shot looks like even without a scale.

Glass vs. Scale: Do You Need Both?

Yes a shot glass and a scale serve different purposes.

  • A scale tells you weight, which is critical for accurate brew ratios.
  • A shot glass shows volume and flow, which tells you how your machine is behaving.

Used together, they create a complete picture of your extraction process.

Features to Look For

  • Clear, durable glass (borosilicate preferred)
  • Measurement markings that are easy to read
  • Spouted lip for easy pouring
  • Low height to fit under spouts

Some espresso enthusiasts even use dosing cups that double as shot glasses, combining form and function.

If you’re aiming for more control

It may be small, but the espresso shot glass is a powerful diagnostic tool. If you’re aiming for more control and consistency in your espresso brewing, it’s absolutely worth adding to your setup.

The Underrated Espresso Tool: Why a Shot Mirror Matters

At first glance, a mirror for your espresso machine might seem unnecessary maybe even a bit excessive. But if you’ve ever wanted to really see what’s going on beneath the portafilter, a shot mirror can offer a whole new level of insight.

Whether you’re trying to diagnose channeling or simply dial in your perfect shot, this small tool can make a big difference.


What Is an Espresso Shot Mirror?

An espresso shot mirror is a small, adjustable mirror placed underneath a bottomless portafilter. Its purpose? To give you a clear view of how your shot is extracting from the bottom up literally.

Some come with magnetic bases or flexible necks, allowing you to position them exactly where needed.

Why It’s a Game-Changer for Home Baristas

1. Visualize Extraction

Seeing the shot from below helps you identify channeling, uneven flow, or over/under-extraction zones as they happen—something impossible to catch from above.

2. Improve Puck Prep

By watching your shots, you can directly link visual cues to the steps you took in puck preparation. Are your tamping or distribution techniques off? The mirror will tell you.

3. Refine Your Technique Over Time

Regular use of a shot mirror encourages intentionality. It turns espresso into a visual science—something you can observe, adjust, and perfect.

Who Needs a Shot Mirror?

If you’re using a bottomless portafilter and you’re aiming for consistent, competition-level shots, this tool is for you. It’s especially useful for:

  • Home baristas chasing perfection
  • Anyone experimenting with grind size or distribution tools
  • Beginners wanting to learn visually

What to Look for in a Good Shot Mirror

  • Adjustable arm or gooseneck for easy placement
  • Anti-fog, high-clarity glass
  • Magnetic or weighted base for stability
  • Compact design to fit in tight setups

Final Thoughts

An espresso shot mirror may not pull the shot for you, but it might just help you pull your best one yet. It’s a low-cost tool that gives real-time feedback something that’s priceless when chasing the perfect pour.

What Is a WDT Tool and Why Every Espresso Enthusiast Needs One

Making excellent espresso isn’t just about grind size and tamping pressure. One of the lesser-known but highly effective tools in a home barista’s kit is the WDT Tool. Short for Weiss Distribution Technique, this tool can dramatically improve your espresso consistency by solving a problem you might not even know you had: uneven coffee distribution.

What Is the WDT Tool?

A WDT Tool is a simple device made of thin needles (often acupuncture or stainless steel) attached to a handle. It’s used to stir and distribute ground coffee in the portafilter before tamping. This breaks up clumps and ensures an even density across the entire bed of coffee.

Why Does Coffee Distribution Matter?

When coffee grounds are unevenly distributed, water channels through the path of least resistance during extraction—this is called channeling. Channeling leads to:

  • Under-extracted areas (sour, weak flavors)
  • Over-extracted spots (bitter, dry taste)
  • Inconsistent shots from one pull to the next

The WDT tool solves this by fluffing and evenly redistributing grounds before you tamp. The result? Better saturation, even extraction, and sweeter, more balanced espresso.

Benefits of Using a WDT Tool

  • Reduces clumping in fine espresso grinds
  • Promotes even extraction and better crema
  • Improves consistency across multiple shots
  • Minimizes channeling and wasted coffee
  • Increases the success rate of espresso dialing-in

Even beginner home baristas can notice a difference from the very first use.

How to Use a WDT Tool (Step-by-Step)

  1. Grind your coffee into the portafilter.
  2. Use the WDT tool to gently stir the grounds. Move in circular or up-and-down patterns.
  3. Level the surface by tapping or using a distribution tool.
  4. Tamp evenly and brew.

Pro Tip: Keep the needles clean to avoid coffee residue buildup.

Choosing the Right WDT Tool

When selecting a WDT tool, consider:

  • Needle Thickness: Thinner needles (0.3–0.4mm) reduce clumping more effectively.
  • Needle Flexibility: Slight flexibility helps stir without compacting grounds.
  • Ergonomic Handle: Comfort matters during daily use.
  • Replaceable Parts: Some models allow needle replacement for long-term use.

There are also DIY options, but for consistent quality and ease of use, professionally designed tools are recommended—many of which are affiliate-friendly and affordable.

If you’re serious about improving your shots

The WDT tool might look like a quirky little gadget, but its impact on espresso quality is real. It addresses a silent culprit in bad shots uneven distribution and empowers home brewers to make café-quality espresso at home. If you’re serious about improving your shots, this is a small but mighty upgrade you shouldn’t skip.

The Best Coffee Grinders for Every Brewing Method

If your coffee still doesn’t taste quite right even with fresh beans and the perfect water temperature your grinder might be the culprit. The grind size directly affects extraction, which impacts flavor, body, and balance. That’s why choosing the right coffee grinder for your brewing method is essential.

Whether you’re making espresso, pour-over, or French press, here’s how to find the perfect grinder for your needs.

Blade vs. Burr Grinders

  • Blade Grinders: These chop beans with a spinning blade. They’re affordable, but produce uneven grinds, leading to inconsistent brews.
  • Burr Grinders: Use two abrasive surfaces (burrs) to crush beans evenly. They provide precise control over grind size and are ideal for serious brewers.

Verdict: Always go burr for better flavor and consistency.


Types of Burr Grinders

  • Flat Burr Grinders: Create uniform grounds and are great for espresso.
  • Conical Burr Grinders: Quieter, less messy, and better for most home users.

Best Grinders by Brewing Method

Espresso

  • Baratza Sette 270: Excellent grind consistency with programmable dosing.
  • Rancilio Rocky: A solid, reliable choice for espresso lovers.

Pour-Over / Drip

  • Fellow Ode Gen 2: Quiet, stylish, and optimized for filter brews.
  • Baratza Encore: Beginner-friendly with consistent results.

French Press / Cold Brew

  • 1Zpresso JX-Pro (Manual): Outstanding hand grinder for coarse grinds.
  • Capresso Infinity: Reliable entry-level electric burr grinder.

Manual vs. Electric Grinders

  • Manual Grinders: Portable, quiet, and affordable but require effort.
  • Electric Grinders: Faster, more convenient, especially for daily use.

Key Features to Consider

  • Grind Size Settings: More settings = more control.
  • Consistency: Even grind particles matter for proper extraction.
  • Noise Level: Electric grinders can be loud check decibel ratings if that matters.
  • Ease of Cleaning: Some models are easier to disassemble and clean than others.

Matching your grinder

A quality grinder does more than crush beans it unlocks flavor. Matching your grinder to your brew method is one of the most impactful upgrades you can make. Whether you’re a casual coffee drinker or a dedicated home barista, the right grinder will elevate your entire experience.

Classic Meals

How to Make Your Own Citrus Enzyme Cleaner for a Zero-Waste...

Turning food scraps into effective cleaning agents is an easy way to tackle cleaning up in the kitchen without using harsh chemicals or excessive...
- Advertisement -