Home Blog Page 59

Why Every Home Barista Needs a Portafilter Stand

If you’re building your dream coffee setup at home, you’ve already probably invested in a decent espresso machine, a good grinder, and maybe even a fancy tamper. But there’s this one small tool that tends to get overlooked and it can make a noticeable difference: the portafilter stand.

What Is a Portafilter Stand?

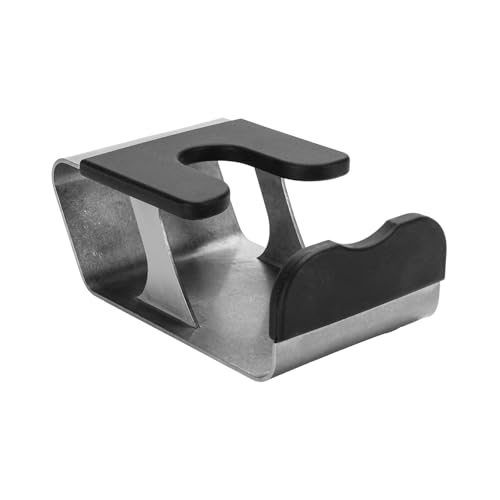
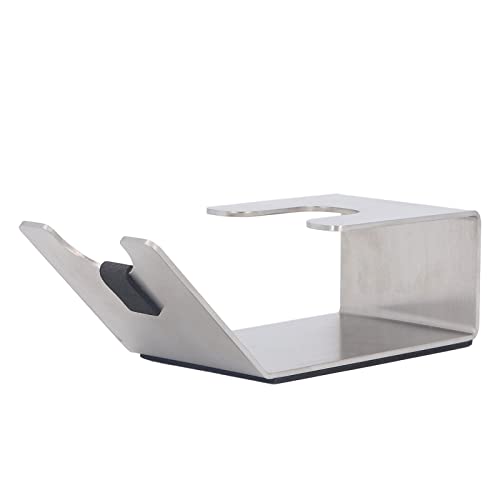
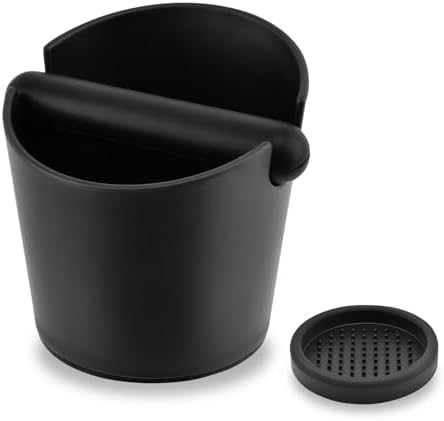
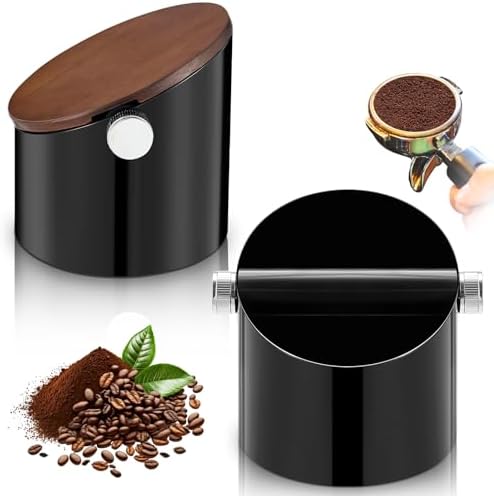
A portafilter stand is a small, sturdy accessory that will hold your portafilter steady while tamping. It typically includes rubber or silicone padding to prevent slipping and reduce wear on your portafilter handle or counter.

It might seem like a “nice to have,” but veteran baristas know it’s one of the behind-the-scenes heroes to consistent, mess-free espresso.

Key Benefits of Using a Portafilter Stand

  1. Consistent Tamping Pressure
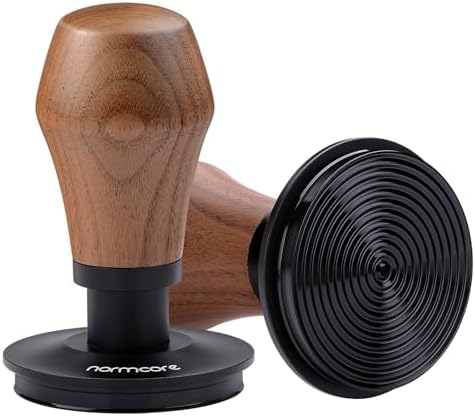
    Employing a portafilter stand holds the portafilter firm during tamping. This allows you to tamp under even pressure, which is very important to avoid channeling and achieve perfect extraction.
  2. Protects Your Equipment and Countertop
    Tamping on a hard surface is cumulative and will damage your counter and portafilter handle over time. A stand absorbs the shock and takes the pressure, saving your equipment.
  3. Cleaner Workflow
    When you’re dealing with multiple tasks grinding, dosing, tamping, and brewing things can get messy. A portafilter stand offers a stable, dedicated surface for tamping, which keeps coffee grounds from scattering across your work surface.
  4. Ideal for Single-Dosing
    If you’re grinding your beans one shot at a time (single dosing), a portafilter stand can make you more efficient. With the portafilter held firmly in place, you can distribute and tamp more precisely without needing to balance it in your hands.
  5. Ideal for Beginners and Professionals Alike
    Whether you’re a newcomer or already up to your eyeballs in espresso geekdom, a portafilter stand encourages proper form and can even build up muscle memory over time.

read more: Being a Home Barista: Hobby or Lifestyle?

How to Choose the Right Portafilter Stand

When choosing a portafilter stand, remember:

Compatibility: Make sure it fits your portafilter size (likely 58mm or 54mm).

Material: Stainless steel, wood, and thick plastic are common.

Padding: Inserts made of rubber or silicone provide extra grip and protection.

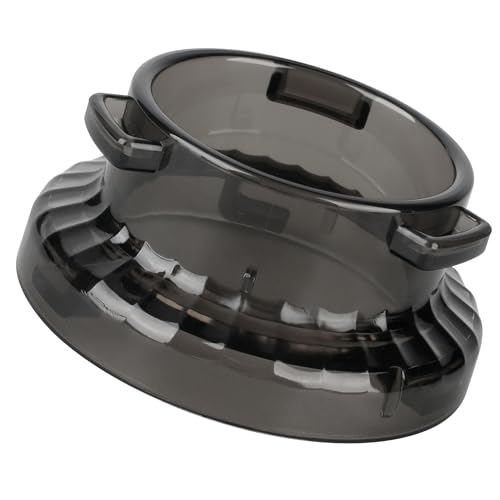
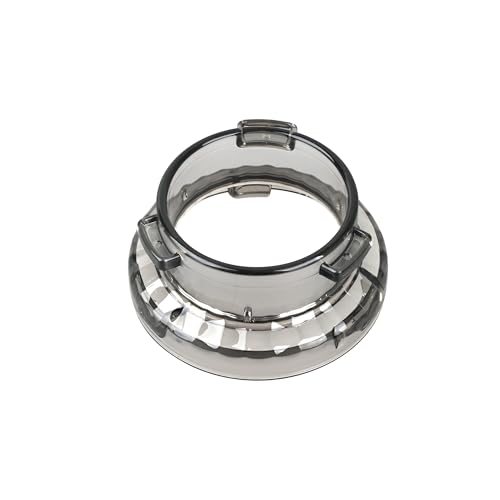
Design: Certain stands also function as tamping stations or feature slots for accessories.

The benefits are tangible

Incorporating a portafilter stand into your home espresso routine may appear to be a small thing but the benefits are tangible. It professionalizes your routine, enhances consistency, and makes your coffee station organized and streamlined.

For those seeking to elevate their workflow without great expense, alter stand is an excellent place to start. Sometimes, it’s the little things that make the biggest difference.

Coffee Accessories on Amazon

What Is a Dosing Funnel and Do You Really Need One?

Dosing coffee into a portafilter can look simple-looking until coffee grounds start flowing all over the place, wasting precious espresso and making a mess. That’s where a dosing funnel steps in to save your shot and your countertop.

Let’s take a closer look at what a dosing funnel is, what it does, and if it’s worth investing in your espresso routine.

What Is a Dosing Funnel?

A dosing funnel is a small ring usually stainless steel or food-grade plastic that rests on top of your portafilter basket. It acts as a guide to keep your coffee grounds from spilling over when dosing and leveling, especially when grinding or when using a WDT tool.

Why Use a Dosing Funnel?

Reduces Waste: No more coffee grounds on your countertop.

Even Distribution: Helps with even leveling when dosing with a WDT tool or shaking technique.

Clean Workflow: Avoids need for constant cleaning and wiping.

Single Dosing Perfection: Especially helpful for precision espresso making.

Do You Really Need One?

If you want to master precision and consistency, a dosing funnel can be a game-changer especially if:

You have a thin portafilter.

You grind directly into the basket.

You distribute or use a WDT tool.

But if your grinder already is just as accurate or if you do have a dosing cup system, you might not need it.

How to Choose the Right Funnel

Size Compatibility: Funnel sizes are usually 58mm or 53mm. Ensure that yours is compatible with your portafilter.

Material: Stainless steel will be longer-lasting; plastic is lighter and cheaper.

Magnetic or Non-Magnetic: Some funnels are magnetic so they stay stuck on solidly during distribution.

Bonus: Funnel + WDT = Better Extraction

A dosing funnel is perfect to use in combination with a WDT (Weiss Distribution Technique) tool, which breaks up clumps. The funnel keeps the whole coffee within the basket while you groom the grounds for equal extraction.

read more: Why a Coffee Scale Is Essential for Consistent Brews

Coffee Accessories on Amazon

Coffee Knock Boxes Explained: Why Every Espresso Setup Needs One

If you’ve ever struggled with disposing of used coffee grounds from your portafilter, a knock box might be the simple upgrade your coffee station needs. While it might seem like a minor accessory, a good knock box can significantly improve your brewing workflow and keep things tidy.

Let’s break down what a knock box is, how to use it properly, and why it’s an essential tool for home baristas.

What Is a Coffee Knock Box?

A coffee knock box is a small bin with a padded bar across the top that you use to receive spent espresso grounds (or pucks) from your portafilter. You knock the portafilter against the bar to neatly deposit the puck into the bin—no fuss, no mess.

Why You Need One

Keeps Your Workplace Clean: Instead of banging your portafilter against a sink or trash can, a knock box contains the mess.

Saves Your Equipment: The padded bar is gentle on your portafilter, reducing wear and tear.

Streamlines Cleanup: One quick knock and the puck is gone no scraping with a spoon required.

Eco-Friendly Use: Grounds collected can be reused in your garden or composted instead of going straight to the trash bin.

Key Features to Look For

  1. Size

Compact enough for small counters, or large capacity for high use.

  1. Build Quality

Stainless steel or heavy-duty plastic knock boxes last longer.

Rubber bases prevent them from slipping during use.

  1. Bar Design

A heavy-duty rubberized bar absorbs the shock and minimizes noise.

Removable bars make cleaning and rinsing easy.

How to Use a Knock Box

Place your portafilter over the box.

Tap it firmly against the bar to loosen the puck.

Rinse and empty the box regularly to avoid odor or accumulation.

Pro Tip: Don’t let used pucks sit for too long wet grounds can mold quickly.

More Benefits

No More Clogged Drains: Avoid rinsing grounds down your sink.

Neater Workflow: Place the knock box near your grinder or machine for a smooth flow.

Stylish Addition: Knock boxes usually have modern designs that match your coffee style.

If you’re committed

It might not be as glamorous as a grinder or espresso machine, but a knock box is one of those unsunt. If you’re committed to making great espresso, having a reliable way to dispose of your grounds is non-negotiable.

Coffee Accessories on Amazon

Understanding the Role of a Coffee Tamper: How It Affects Espresso Quality

Tamper comes in. Small but mighty, this simple tool can make or break your espresso shot. In this guide, we’ll break down what a coffee tamper does, why it matters, and how to choose the right one for your setup.

What Is a Coffee Tamper?

A coffee tamper is a tool for forcing ground coffee evenly into the basket of the portafilter of an espresso machine. The process is called tamping, and it creates a flat, dense coffee puck that water can flow through at the proper pressure.

Why Tamping Is Important

Proper tamping ensures:

Even extraction: When grounds are forced into the basket evenly, water flows evenly through the puck. This translates into equal flavor and not one spot of over- or under-extraction.

Proper resistance: A consistent firm tamp gives your espresso machine the resistance needed to produce pressure and extract properly.

Consistent shots: Sufficient tamping technique enables you to achieve the same shot every time.

Forgoing tamping or improper tamping can lead to:

Channeling (water running through weak spots or cracks)

Sour or bitter coffee

Uneven crema

Types of Coffee Tampers

  1. Flat vs. Convex

Flat tampers flatten the grounds evenly and suit most baristas.

Convex tampers are very slightly curved and can reduce edge channeling but require more practice.

  1. Calibrated Tampers

These apply the same amount of force every time, ideal for beginners who like things consistent.

  1. Palm or Push Tampers

Framed with a vertical force action (e.g., a push), these can potentially eliminate wrist strain and increase ergonomic consistency.

What to Look For in a Tamper

Size: Match the diameter of your tamper to your portafilter (usually 58mm or 53mm).

Weight: More control with a heavier tamper without having to press too hard down.

Handle Comfort: Choose a shape and material that feels comfortable in your hand.

Technique Tips for Better Tamping

Distribute first: Even out the grounds in the basket before tamping.

Tamp straight: Press down firmly and evenly vertically.

Polish the puck: A gentle turn of the end can buff the surface and avoid channeling.

Consistency is everything. Tamping technique practice is one of the simplest methods to get better at espresso.

Tamping can unlock

A coffee tamper may appear to be a small tool, but it’s essential to espresso brewing. Tamping can unlock the maximum potential of your beans and unlock deeper, richer flavors in each cup.

If you’re serious about espresso, don’t overlook the tamper it might be the difference between goo

read more: Top Entry-Level Espresso Machines for Home Baristas

Coffee Accessories on Amazon

Coffee Kettles 101: Choosing the Right Gooseneck Kettle for Precision Pouring

When working with manual brewing methods like pour-over or Chemex, your kettle isn’t just a vehicle for heating water. It’s your precision instrument. If you’ve ever struggled with controlling your pour or hitting the optimal brew temperature, a quality gooseneck kettle can be a lifesaver.

Here’s what you should know to choose the perfect one for your home bar.

Why Do You Need a Gooseneck Kettle?

A gooseneck kettle is not just a way of appearing pro on your coffee bar. It’s designed to give you a good level of control over the direction and flow of water, which you need for:

Even saturation of grounds

Control of extraction during the bloom and pour phases

Prevention of channeling or over-extraction

In short: it helps you brew tastier coffee more consistently.

Key Features to Consider

  1. Spout Shape & Flow Control

The defining feature of a gooseneck kettle is the long, narrow spout. Look for one with:

A smooth, controllable flow rate

A balanced handle that pours naturally

A design that minimizes drips or splashing

  1. Built-in Thermometer or Temperature Control

Temperature of the water is critical for optimal extraction (usually between 195–205°F / 90–96°C). Some kettles include built-in thermometers or even electric ones where you can set the exact temperature.

  1. Stovetop vs. Electric

Stovetop kettles are simple, cheap, and durable.

Electric gooseneck kettles offer better control, fast heat-up, and adjustable temperature. Great for accuracy and convenience.

  1. Material & Build Quality

The standard is stainless steel, but newer models feature:

Copper for looks and heat efficiency

Glass for modern design

Coated finishes for better grip and insulation

Top Picks by Budget

Entry-Level: Hario V60 Buono – simple and easy for beginners

Mid-Range: Fellow Stagg Stovetop – streamlined, ergonomic, with built-in thermometer

Premium: Fellow Stagg EKG Electric – temperature control, LCD display, and timer

Bonus: Personal Tip

I didn’t expect to notice as big of a difference when I initially switched from a regular kettle to a gooseneck. But after a few weeks of use, I was brewing more consistently, my bloom was more balanced, and flavors started to come through like never before.

Trust me it’s not hype.

Final Thoughts

If you’re serious about pour-over or any manual brewing method, a gooseneck kettle is a game-changer. It offers control, consistency, and confidence three things every home barista could use.

So next time your brew tastes a bit off, don’t just blame the beans. It might be your kettle.

read more: Home Barista Setup: Beginner to Pro Guide

Coffee Accessories on Amazon

Why a Gooseneck Kettle Is a Must-Have for Manual Brewing

If you’re using a pour-over method like the V60 or Chemex but still using a standard kettle, you’re holding back on your brew so much more than you even know. A gooseneck kettle is not some fancy indulgence for coffee geeks; it’s a necessary tool for anyone who desires control, consistency, and cup quality.

What Is a Gooseneck Kettle?

A gooseneck kettle features an extended, slender spout shaped like a goose’s neck how it is named. This design gives you complete control over the water flow out of the kettle, and it is ideal for hand-brewing methods.

Why It Matters

Here is why you must have a gooseneck kettle as a home barista:

  1. Precision in Pouring

The long, curved spout is how you can pour water slowly and evenly, which is essential for:

Saturating grounds evenly during bloom

Controlling flow rate in brewing

Avoiding channeling (water short-circuits grounds)

  1. Enhanced Extraction

Uneven pouring equals uneven extraction—and a subpar cup. A gooseneck kettle provides even saturation to all grounds, which leads to:

Even taste

More consistent brews

Better repeatability

  1. Best for Blooming

During the bloom phase, you need to wet the coffee bed lightly but not make it saturated. A gooseneck allows you to just do that with precision, without agitating the grounds.

  1. Improved Ergonomics

Most gooseneck kettles consider barista comfort:

Easy grip handles

Balanced weight distribution

Improved control without wrist strain

Electric vs. Stovetop Gooseneck Kettles

Electric

Faster heating

Temperature control settings (ideal for coffee)

read more: Are Coffee Tasting Notes Real or Just Marketing?

Auto shut-off features

Examples: Fellow Stagg EKG, Brewista Artisan

Stovetop

Less costly and easier

Ideal for those who don’t mind lack of manual control

Examples: Hario V60 Buono, Kalita Wave Kettle

What to Look for in a Gooseneck Kettle

Precision spout design: Look for an evenly flowing balanced spout.

Temperature control (for electric): Ideal brewing temperature of 195–205°F (90–96°C).

Capacity: 0.8–1.2 liters is the norm for home brew.

Build quality: Stainless steel or high-quality coated materials for durability.

Aesthetics: Come on appearance matters in a stylish home setup!

Do You Really Need One?

If you’re just getting your toe wet with pour-over brewing, it’s probably overkill. But try one and you’ll see why baristas love them. It’s about doing pour-over versus mastering pour-over.

Coffee Accessories on Amazon

Classic Meals

- Advertisement -