If you’re just starting your home barista journey, mastering latte art may seem like an intimidating challenge. But the truth is, latte art is a skill built through simple, repeatable patterns. With the right techniques and a little patience, you can create café-style drinks right in your own kitchen.
When learning latte art, your goal isn’t perfection at first—it’s consistency. Simple designs build the muscle memory you need for more complex pours later on. Just like learning a musical instrument, mastering the basics sets the foundation for advanced skills.
If you’re new to brewing, make sure you’ve already developed the essential skills every home barista should have before diving into latte art.
Must-Learn Beginner Latte Art Patterns
1. The Heart
The heart is usually the first pattern beginners learn. It’s a great way to practice controlling milk flow and achieving a centered design.
How to do it:
Start with a steady pour in the middle of your cup.
Once your cup is about halfway full, bring your pitcher closer and increase the milk flow slightly.
Finish the pour with a quick lift and a flick to “cut” the heart shape.
Tip: Practice your brew ratio beforehand so the espresso and milk textures are just right.
2. The Rosetta
The rosetta looks like a leaf or fern and is a stunning next step once you’ve mastered the heart.
How to do it:
Start with a low, controlled pour.
Wiggle your wrist gently back and forth to create the layered effect.
Finish by pulling the pour through the center to complete the shape.
The tulip involves stacking multiple heart shapes on top of one another, offering more practice for precise pouring and flow control.
How to do it:
Pour a small heart.
Pause slightly, then pour another heart right on top.
Repeat for 2–3 layers, finishing with a clean pull through.
This pattern helps you develop control over milk-to-espresso balance, which is crucial for all advanced designs.
Extra Tips for Faster Progress
Perfect your milk steaming first. Without creamy microfoam, no pattern will form properly.
Focus on cup tilt and pitcher height. They are often the real reasons patterns fail.
Record your practice sessions. Watching yourself can reveal small mistakes you don’t notice in real time.
Use proper brewing methods to ensure your espresso has the ideal crema layer.
Final Thoughts
Latte art is less about natural talent and more about practice and attention to detail. Master these beginner patterns first, and you’ll be ready to move on to more intricate designs like the swan or phoenix in no time. Stay patient, stay curious, and most importantly have fun with your latte art journey!
Creating latte art can feel magical, but for beginners, it often comes with frustrating mistakes. The good news is that most latte art problems are easy to identify and even easier to fix with the right techniques. Let’s explore the most common latte art mistakes and how to correct them for better results.
One of the most common latte art mistakes is improper milk texture. If the milk is too foamy, it will float on top without blending with the espresso. If it’s too thin, it won’t hold a design.
How to Fix It: Focus on creating “microfoam,” which looks like wet paint. While steaming, keep the steam wand just below the surface of the milk to introduce tiny air bubbles. Then, submerge it deeper to heat the milk evenly. Aim for a smooth, glossy texture without large bubbles.
Mistake 2: Pouring Too Fast or Too Slow
The speed at which you pour the milk affects the quality of the design. Pouring too fast causes the milk to crash into the espresso, breaking the crema. Pouring too slow, on the other hand, leads to weak patterns.
How to Fix It: Start pouring slowly to sink the milk beneath the crema. As the cup fills, increase the pour speed slightly to allow the foam to rise and form patterns. Practice adjusting your pour rhythm to match the stage of the pour.
Mistake 3: Holding the Cup or Pitcher Incorrectly
A poor grip can limit control over the pour. If your pitcher hand is stiff or your cup is tilted incorrectly, achieving clean shapes becomes difficult.
How to Fix It: Tilt the cup about 45 degrees toward the pitcher. Hold the pitcher steady, using just your wrist to guide the pour. Relax your arm to avoid shaking or jerky movements. Remember: smooth hand motion equals smoother art.
Mistake 4: Bad Starting Position
If you start pouring from too high above the cup, the milk will pierce the crema and sink instead of creating designs.
How to Fix It: Start with the pitcher spout close to the surface of the coffee. When ready to draw designs, lower the spout even closer. This allows the milk foam to stay on the surface and form clear shapes like hearts or rosettas.
Mistake 5: Rushing the Process
Many beginners feel pressured to rush through pouring because the milk is cooling. Hasty pours lead to messy, uncontrolled art.
How to Fix It: Focus more on technique than speed. Even if the latte art takes a few extra seconds, consistent practice builds better habits. Good form today will lead to faster, cleaner pours in the future.
By fixing these common latte art mistakes
Latte art isn’t just about pretty designs it’s a reflection of milk mastery, espresso care, and controlled technique. Every mistake is a stepping stone toward better skills. By fixing these common latte art mistakes, you’ll see dramatic improvements in both the look and taste of your coffee.
Stay patient, stay curious, and most importantly, keep pouring!
When brewing a fresh cup of coffee, have you ever noticed the grounds puffing up and bubbling slightly as soon as hot water hits them? That’s called the coffee bloom, and it’s more than just a pretty reaction. it’s a sign of freshness and a crucial step in getting the best flavor from your beans.
If you’re serious about becoming a home barista, understanding coffee bloom can help you improve your brewing technique and achieve more consistent, flavorful cups.
Coffee bloom refers to the quick release of gas mainly carbon dioxide (CO₂)—that occurs when hot water first makes contact with freshly ground coffee. This gas is trapped inside the beans during roasting and starts escaping the moment water touches the grounds.
The bubbling effect you see during the first few seconds of brewing is this gas escaping. It’s most noticeable in manual brewing methods like pour-over or French press.
Why Does Bloom Matter?
Here’s why blooming is important:
Releases trapped gas: Freshly roasted coffee contains CO₂, which can create barriers between water and coffee grounds. If not released, this gas interferes with proper extraction.
Improves flavor: Blooming lets the water fully saturate the coffee grounds after degassing, leading to more even extraction and a balanced taste.
Indicates freshness: A strong bloom is a sign your coffee is fresh. If there’s no bloom at all, your beans might be stale or old.
How to Bloom Coffee Correctly
In manual brewing, blooming is simple but essential. Follow these steps:
Measure your coffee grounds.
Add a small amount of hot water (about twice the weight of your grounds) evenly over the coffee bed.
Let it sit for 30–45 seconds. This is the bloom phase. You’ll see bubbles rise to the surface.
After blooming, continue with the rest of your pour or steeping as usual.
Using water at around 200°F (93°C) is ideal for the bloom phase, just like for the full brew.
Tips for Better Bloom
Use freshly roasted beans: Coffee that was roasted within the last 2–3 weeks will produce a more noticeable bloom.
Grind right before brewing: Ground coffee releases CO₂ quickly. Grinding just before brewing keeps more gas inside for blooming.
Weigh your water: Using a scale helps ensure consistency in your bloom-to-coffee ratio.
Watch the clock: Don’t rush the bloom stage. Give it at least 30 seconds to fully degas.
Brewing Methods That Benefit Most from Blooming
Although all methods can benefit, blooming is particularly important for:
Pour-Over (V60, Chemex)
French Press
AeroPress
Drip Brewers with bloom settings
In espresso and cold brew, bloom is less relevant, but for manual brewing, it’s a game changer.
Allowing your grounds
The coffee bloom isn’t just a fun visual it plays a key role in how your coffee turns out. Allowing your grounds to bloom ensures even extraction and fuller flavor. For any aspiring home barista, mastering the bloom is a small step that makes a big difference.
Next time you brew, take that extra 30 seconds to let your coffee bloom. Your taste buds will thank you.
Most people think great coffee comes down to beans and grind. While those are crucial, there’s another factor that’s often overlooked: water temperature. It might seem minor, but using the right temperature can completely change the way your coffee tastes.
If your water is too hot, your coffee can turn bitter. Too cold? It might come out sour and weak. That’s why understanding water temperature is an essential skill for every home barista.
The SCA (Specialty Coffee Association) recommends a brewing water temperature between 195°F and 205°F (90°C – 96°C). This range ensures proper extraction of the coffee’s flavors, oils, and aromatics.
Here’s a quick breakdown:
Brewing Method
Recommended Temperature
Pour-Over
195°F – 205°F
French Press
200°F
AeroPress
175°F – 185°F (for mellow taste)
Espresso
190°F – 205°F (depends on machine)
Cold Brew
Room temperature or cold
Why Temperature Matters
Coffee brewing is a chemical reaction. The heat from water helps dissolve compounds inside the coffee grounds. These compounds affect acidity, bitterness, body, and aroma. Different compounds extract at different temperatures:
Low temps (below 195°F): Under-extraction. Coffee may taste flat or sour.
High temps (above 205°F): Over-extraction. Coffee may taste bitter or burnt.
Maintaining the right temperature ensures that your brew extracts the right balance of flavors.
How to Control Water Temperature at Home
You don’t need fancy gear to control temperature, but a few tools can help:
Gooseneck kettles with built-in thermometers are ideal for pour-over brewing.
Electric kettles with temperature settings allow precision control.
No thermometer? Let your boiled water sit for 30 seconds before pouring. This usually cools it to around 200°F—a sweet spot for most methods.
Avoid pouring boiling water (212°F / 100°C) directly over coffee grounds, especially for pour-over or French press methods.
Temperature Tips by Brewing Style
Pour-Over (V60, Chemex): Stick with 200°F for a clean, balanced cup.
French Press: Use 200°F, and steep for 4 minutes for full-bodied flavor.
AeroPress: Use 175–185°F for a smooth, tea-like flavor or hotter for intensity.
Espresso Machines: Most machines self-regulate temperature, but knowing it helps with consistency.
Cold Brew: No heat needed—just patience.
Small changes in heat
Water temperature may not be the flashiest part of coffee brewing, but it’s one of the most important. Small changes in heat can bring out new dimensions in flavor. As a home barista, learning how to control this element gives you more consistency and better coffee.
Next time you brew, pay attention to the temperature. It’s a simple detail that separates average coffee from exceptional coffee.
Starting your journey as a home barista can be both exciting and overwhelming. With so many techniques, tools, and coffee styles to explore, knowing where to begin makes all the difference. While owning the right equipment is important, developing the right skills is what truly elevates your coffee game. In this guide, we’ll explore the fundamental abilities that every beginner home barista should focus on mastering.
Understanding grind size is crucial. Each brewing method requires a different level of coarseness. For example, French press needs a coarse grind, while espresso demands a fine grind. Learning how to adjust your grinder to suit each method helps prevent under- or over-extraction, both of which can ruin a cup. With practice, you’ll develop a feel for how grind size impacts flavor.
2. Brew Ratio Awareness
Brew ratio refers to the amount of coffee used in relation to water. Getting this balance right is a foundational skill. Most beginners start with a standard ratio like 1:15 (1 gram of coffee to 15 grams of water), but adjusting it based on taste is key. Accurate measurement tools, such as digital scales, can help you stay consistent.
3. Pouring Techniques
In methods like pour-over or AeroPress, how you pour water makes a big difference. Circular, even pours help saturate the grounds evenly. Learning proper pouring speed, technique, and water temperature leads to more balanced and flavorful coffee. A gooseneck kettle can improve your control dramatically.
4. Milk Frothing and Texturing
If you’re a fan of lattes or cappuccinos, frothing milk is an essential skill to develop. It’s not just about creating foam it’s about achieving microfoam, which has a silky, smooth texture. This type of milk not only enhances taste but also makes basic latte art possible. Start by practicing with a steam wand or electric milk frother.
5. Tasting and Flavor Recognition
Great baristas are also great tasters. Begin to train your palate by tasting coffee mindfully. Can you detect fruity, nutty, or chocolaty notes? Keep a journal of your brewing variables and tasting notes. Over time, you’ll learn to identify what went right—or wrong—in each cup.
6. Cleaning and Maintenance Habits
Clean tools make great coffee. Developing a habit of regular cleaning—especially of grinders, machines, and milk frothers—ensures both longevity of equipment and purity of flavor. Even small traces of old coffee oils can affect the taste of your next brew.
7. Patience and Curiosity
Skill development takes time. Instead of rushing through, approach each brew as a mini experiment. Take notes, make adjustments, and don’t be afraid to mess up. The best home baristas are those who stay curious and open to learning.
it’s about honing skills
Becoming a home barista isn’t just about buying the best espresso machine or grinder .it’s about honing skills that transform your kitchen routine into a craft. By focusing on grind size, brew ratios, pouring techniques, and sensory development, you’ll build a solid foundation for more advanced coffee-making techniques in the future. Remember, every expert barista was once a beginner. What matters most is that you keep practicing, stay curious, and enjoy the process.
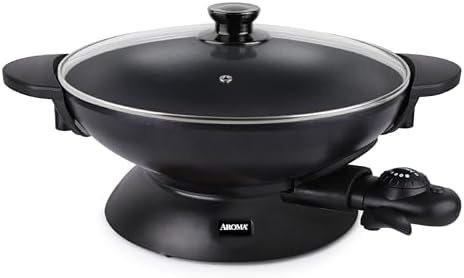
Electric woks are an innovative evolution in cookware. They differ from traditional woks that typically rely on gas stoves for heat. These appliances offer a modern twist on a classic cooking technique. They combine a cylindrical design with built-in electric heating elements. As a result, they provide uniform heat distribution. This is essential for stir-frying ingredients to perfection.
Several factors contribute to the growing popularity of electric woks. They are particularly appealing to urban dwellers and individuals in smaller kitchens. Limited kitchen space often challenges the accommodation of bulky cooking equipment. However, electric woks are generally compact and lightweight. This makes them an attractive alternative for those who prioritize convenience and portability. This mobility allows users to cook effectively in various environments. These include crowded apartments or small kitchens.
Another significant advantage of electric woks is their ease of use. Many models feature adjustable temperature settings. This enables users to fine-tune heat levels according to their cooking requirements. This feature simplifies meal preparation and enhances the appliance’s versatility. Electric woks also typically come with non-stick surfaces. These reduce the need for excessive oils and promote healthier cooking habits. Furthermore, they often include safety features like automatic shut-off switches. This adds an extra layer of security for users.
In today’s fast-paced world, quick meal preparation is increasingly essential. Electric woks excel in delivering that efficiency. They can heat up quickly and cook various dishes from stir-fries to soups. These appliances cater to the need for speed without sacrificing flavor or texture. Overall, the combination of convenience, portability, and ease of use makes electric woks a valuable addition to modern kitchens.
Advantages of Using Electric Woks
Electric woks have gained significant popularity in modern kitchens. This is due to their numerous advantages that cater to a variety of cooking needs and preferences. One primary benefit of using electric woks is their energy efficiency. Unlike traditional gas burners, electric woks use electricity to heat up quickly and effectively. This makes them an eco-friendly option. They conserve energy while delivering impressive culinary results. This efficiency not only helps reduce energy bills but also promotes a more sustainable approach to cooking.
Another key advantage of electric woks is their adjustable temperature settings. These woks often come equipped with precise controls. This allows users to customize the heat according to their cooking style. Whether frying, steaming, or sautéing, the flexibility provided by adjustable temperature settings enhances the cooking experience. This versatility makes electric woks suitable for a wide range of recipes. These range from stir-fries to slow-cooked dishes. They accommodate both novice cooks and seasoned chefs alike.
Cleanup is a critical consideration for many home cooks. Electric woks excel in this area. Typically designed with non-stick surfaces, electric woks facilitate easy cleanup. They require less scrubbing and reduce food residue. This feature is particularly advantageous for busy individuals and families. They may not have the time for extensive cleaning after meal preparation.
Electric woks also prioritize safety in the kitchen. For homes that lack gas stoves, these appliances present a safer alternative. They minimize the risk associated with open flames. Many electric woks include safety designs like automatic shut-off features. These further enhance their usability for all types of users. Overall, the combination of energy efficiency, versatile cooking capabilities, easy cleanup, and enhanced safety makes electric woks a valuable addition to any modern kitchen.
Disadvantages and Limitations of Electric Woks
Although electric woks offer numerous advantages for modern kitchens, they also have certain disadvantages and limitations. Potential buyers should consider these. One notable drawback is the heat retention capacity. Traditional woks, typically made from carbon steel, excel at retaining and distributing high heat. This is crucial for achieving the high temperatures required for authentic stir-fry dishes. Electric woks, on the other hand, may struggle to maintain such elevated temperatures consistently. This can affect the overall quality of the cooking process.
Another significant limitation is the reliance on electric outlets. Unlike traditional woks, which can be used on gas stoves, electric woks require a power source to operate. This dependence can pose challenges in kitchens with limited accessibility to electrical outlets or during power outages. Additionally, mobility can be an issue. Moving an electric wok might not be as straightforward as lifting a traditional one from the stovetop.
The cost of electric woks is another consideration for potential buyers. While budget-friendly options are available, higher-quality models can be quite expensive. Consumers may be required to invest more upfront for an electric wok that meets their cooking needs. This leads to questions about long-term value. Furthermore, the various models on the market may vary significantly in quality. This raises concerns about durability and reliability. Some lower-end models may not perform satisfactorily. This can lead users to feel disappointed with their purchase.
Ultimately, while electric woks can simplify the cooking process and offer convenience, they are not without their limitations. Understanding these disadvantages can help consumers make informed decisions when selecting the right cookware for their kitchen.
Choosing the Right Electric Wok and Usage Tips
When selecting an electric wok, several key factors should be considered. This ensures it meets your culinary needs effectively. Firstly, size plays a critical role. Electric woks typically range from 4 to 8 quarts. A larger capacity is beneficial for families or meal prepping. A smaller one may suffice for single servings or couples. Additionally, consider the shape—round or square models. This may influence cooking techniques and the types of dishes you can prepare.
The material of the electric wok is equally important. Traditional woks are made from carbon steel. This can provide superior heat conductivity and allows for high-temperature cooking. However, many electric woks are constructed from non-stick materials. This makes them easier to clean and prevents food from sticking. You should choose a model that balances durability with your cooking style. Look for one with a sturdy base. This will avoid wobbling during use.
When it comes to features, consider temperature control settings. The ability to precisely adjust heat can dramatically affect cooking outcomes. Some models come with a steaming rack. This expands their functionality. A transparent lid can also be an asset. It allows you to monitor cooking progress without releasing heat.
For effective usage, proper seasoning of your electric wok helps improve its non-stick properties. It also enhances flavors. Begin by lightly coating the surface with oil and heating it. Then, allow it to cool down and wipe the excess oil. Experiment with different cooking techniques. These include stir-frying, steaming, or braising. Each method can yield delicious dishes suited for your preferences.
Maintenance is vital for the longevity of your electric wok. Regular cleaning with warm soapy water is recommended. Avoid abrasive scrubs. These can damage the non-stick coating. Always ensure it is unplugged and completely cool before cleaning. By following these guidelines, you can enjoy high-quality meals. You will also prolong the lifespan of your electric wok.


")


