Home Blog Page 69

High-Heat Cooking with a Carbon Steel Wok: Safety Tips and Best Practices (Updated)

Understanding Carbon Steel Woks

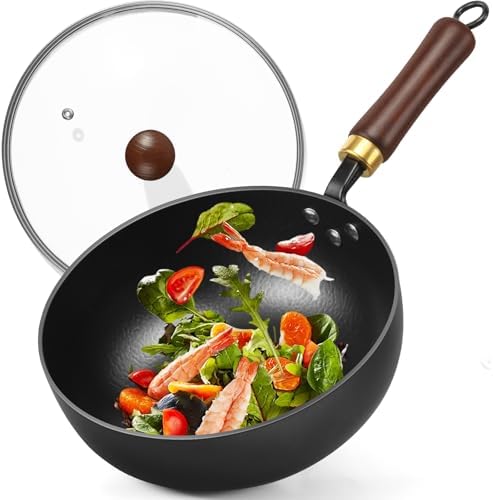
Carbon steel woks are common in every kitchen in the world, especially for high-heat cooking like stir-frying. Iron and carbon make up these durable woks known for their excellent heat conductivity. Carbon steel differs from non-stick or stainless steel because it blissfully combines a lightweight build with strong performance. It is ideal for fast cooking with high heat.
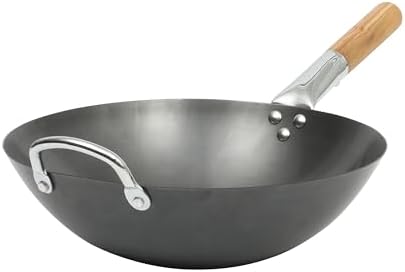
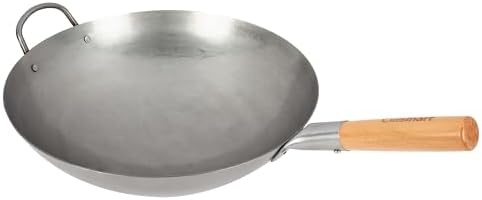
One of the big positives about a carbon steel wok is that it heats up very rapidly. It also retains heat evenly across the cooking surface. The reason even heat retention is beneficial in high-heat cooking is that ingredients need to sear immediately in order to lock in flavor. Another positive about carbon steel woks is that they develop a natural non-stick surface over time.

This is done by seasoning, where oil is applied to the wok and it is heated. This creates a polymerized layer. It widens the cooking area and enables the wok to be made durable. Carbon steel is less heavy than cast iron. It is therefore easy to handle when intensive cooking is being done. Also, it is able to withstand intense heat without distorting. This allows for better performance when cooking. Nevertheless, it is essential to season the wok prior. Unseasoned carbon steel will result in acidic foods reacting. This produces unwanted flavors.

To preserve the performance and longevity of a carbon steel wok, it needs good care. After each use, do not apply abrasive cleaners or strong detergents. These will strip off the seasoned coating. Instead, simply rinse it off with hot water and dry it thoroughly to prevent rusting. Having understood how carbon steel woks are produced and how effective they are, domestic cooks are now able to use this versatile cooking utensil confidently for high-heat cooking.

Basic Precautions When Cooking at High Heat

When a carbon steel wok is used to cook at high heat, safety comes first. This prevents accidents and results in successful cooking. One of the big safety precautions is using a cooking oil with a high smoke point. Examples include avocado oil, grapeseed oil, or refined peanut oil. Low smoke point oils can create unwanted smoke. Not only does this affect flavor in foods, but it can have breathing effects as well.
Wearing heat-resistant gloves is also a crucial safety measure. A carbon steel wok, which is designed to be cooked at high heat, may become scorchingly hot when cooking. This increases the risk of burns. You need to use heat-resistant gloves when handling the wok. This is most necessary while adding ingredients or removing it from heat. This minor safety precaution can be very effective in avoiding kitchen accidents.

Ventilation during high-heat cooking cannot be overlooked. Adequate kitchen ventilation helps distribute smoke and fumes. They can accumulate quickly. Opening a window, using exhaust fans, or having a portable fan improve ventilation substantially. This added ventilation eliminates the risk of smoke inhalation and yields a healthier cook.

Also, caution while cooking is vital. High-heat cooking requires close observation to avoid flare-ups. These may ignite fires. It’s best to avoid leaving the cooking process unsupervised. Be ready to deal with any accidents that arise immediately. Close monitoring of the cooking process ensures timely intervention. This involves adjusting heat or responding to any unforeseen events.

To provide a safe cooking environment, make sure that the cook and anyone in the vicinity are safe. Following these precautions when cooking with a carbon steel wok at high heat encourages a secure and enjoyable cooking process.

Best Practices for High-Heat Cooking Techniques

You can easily carry out high-heat cooking techniques like stir-frying, searing, and deep-frying with a carbon steel wok. The wok is particularly famous for its ability to carry out high-heat cooking. To maximize its capability, acquire critical practices that promote safety and culinary results.
Pre all ingredients prior to cooking. This includes chopping the vegetables evenly and marinating or seasoning the proteins. Preparation is key because rapid high-heat cooking. Having prep done goes a long way in avoiding burning or overcooking.

The correct temperature to cook with is crucial. For searing and stir-frying, heat the wok to a slight smoke. That indicates it is hot enough. To avoid the food sticking, always use high smoke point oils like canola or grapeseed. They help create a non-sticking surface. Also, never overcrowd the wok. This will drop the temperature and hinder correct technique of cooking.

Since you are employing deep-frying methods, ensure the oil is adequately heated. 350°F to 375°F temperature is apt for most foods deep-fried. A thermometer is recommended to be employed for best results. The temperature should be kept steady throughout cooking. This yields a golden crust on the outside and a soft inside.

Finally, and above all, the proper utensils are crucial. Wooden or silicon spatulas are ideal. They will not scratch the carbon steel surface. Maintaining the wok in good condition, for instance, seasoning after every use, will have it retain good heat conductivity and non-stick properties over time.

These recommendations maximize the effectiveness and safety of high-heat cooking in a carbon steel wok. This renders it an indispensable item in the kitchen.

Care and Cleaning Your Carbon Steel Wok for Safety

Clean and maintain your carbon steel wok well.
This not only provides it with a long lifespan but also with safe cooking. Clean your wok well after each usage to prevent food buildup and subsequent rusting. The best method of washing your carbon steel wok is by hand in hot water with a sponge or soft cloth. Never use tough detergents or abrasive scrubbers. They can remove the seasoning and defeat its non-stick properties. Dry your wok after washing to prevent moisture accumulation. Moisture causes rust. Dry it with a towel. Then heat it on low for about a minute or two. This dehydrates any remaining moisture. This dries the wok but also maintains the seasoning integrity of iron.

Its performance in cooking relies heavily on seasoning a carbon steel wok.

In order to maintain the non-stick surface integrity, you must reseason your wok periodically. Do it especially when food begins to stick or the surface feels dull. To reseason, apply a thin layer of high-smoke point oil such as flaxseed or canola oil—onto the surface. Next, heat the wok until the oil begins to smoke. Do this repeatedly a couple of times in order to build up a protective layer. This enhances the wok’s cooking performance as well as safety. Storage-wise, it’s best to store your carbon steel wok in a dry area. You can place a paper towel or dish towel between your wok and cover, or between other pots and pans. This will absorb moisture and prevent any undesirable smell from entering. These are not only the best practices to maintain your wok in the best conditions but also contribute significantly to safe high-heat cooking in the long term.

Carbon Steel Wok vs. Cast Iron Wok: Which is Better? (Updated)

An active fire. Cast iron woks take longer to warm up. But they offer great cooking properties and can be seasoned to add flavor and effectively heat “cold” foods like frozen vegetables.

Although woks are prized for their versatility, the way they are used during cooking will depend on the shape/size of the wok. They are often categorized by diameter and by use. The most common size wok is 14″-16″ in diameter with a height of 3.5″ to 5″ depending on the weight/material of the wok. The rounded shape of a wok works well with thin, high flames (i.e. the characteristics of most Asian stoves). If a wok is toroidal shaped (with a bulge), consider it a specialized tool appropriate only for cookware.

Cooking with a wok is most easily

Cooking with a wok is most easily done with a thin sauce or broth that covers the round bottom of the wok and has a mouthfeel balanced by some density (think of the balance of density of flavor available with tofu as a choice for cooking). The advantage to a toroidal shaped wok is the exterior surface area of the wok heat on both sides when submering or steeping, not to mention use for cooking and stir frying vegetables.

Consider the wok’s weight

Whichever wok you use for starting, consider the wok’s weight (especially if it is a multi-use wok) for intended use – a long handle works best with a medium-weight wok. The heaviness of a wok may consider the base (short) and the lid (long) handles, such that when one is stirring the handle(s) are opposite to the intended direction. A wider mouth, ‘high’ fire wok will trap heat much better than a shallow, wide wok. This is important in type of heat in preparation.

Use your intuition and what has worked well before, as it is a natural way to learn. Use the steam generated underneath the wok to guide on how much liquid to use and how quickly the heat is transferring. You will cook food anyway, for that reason a careful mean is not a substitute for intuition.

The Ultimate Guide to Storing and Organizing Your Carbon Steel Wok (Updated)

Why Storage Matters

In the kitchen, carbon steel woks are an incredible cooking tool because they conduct heat so well, and they can be so versatile with cooking styles. With that said, you want to ensure that you store and organize your wok in a way that allows for you to maximize your use of it over the duration of time. If you care for your wok with good storage habits, you can develop a long-lasting relationship with it that can help your cooking ability become more enjoyable.

How to Store Your Wok

When you are not cooking with your carbon steel wok, the first thing you want to do is to store your wok properly so as not to cause any damage. You can use a wok rack, or you can hang your wok on a wall-mounted rack to allow for quick easy access. Also, a great decision to keep your carbon steel wok from getting scratched is to keep it nested within other cooking pots and pans, while putting a soft cloth in between the cooking pots and pans. Both ideas allow for efficient storage in your kitchen along with space-saving capabilities.

Related article: Wok Materials Comparison: When to Choose Stainless Steel Over Carbon Steel

How to Care for Your Wok in Storage

Before you put your wok in storage, be sure to make it as clean and as dry as possible to help prevent rust, and adding a light oil will serve as an extra barrier of protection. If your wok has some seasoning on it, you want to do your best to maintain your wok by periodically adding oil while stored. The key to continuing the most optimal cooking performance for your wok is to always maintain good seasoning. 

Planner 5D Kitchen Design: Tips to Create Stunning Layouts

Have you ever dreamed of designing your own kitchen from the ground up? That is what kitchen designing using Planner 5D is all about. When I originally tried to use this software, I kind of thought, “How hard can it be?” It turns out there are just so many little things! Fortunately, Planner 5D makes it extremely simple.

For more Kitchen Design Software: 5 Free Programs for Kitchen Design

The app is Android, iOS, Windows, and Mac-friendly, so no matter the device you’re using, you can keep working on your design. You create a project first, then go to the left menu, hit “Interior” and then “Kitchen.” The kitchen setups that are presented are amazing. You simply drag and drop the one you like into your space. Easy peasy, right? Well, here’s where things get interesting.

Because in real life, each kitchen configuration is unique. I mean, I once had a client with a very small space and wanted it to appear larger. That’s where Planner 5D’s flexibility features save the day. You can insert cabinets individually, insert an island, and even change color and texture. White marble countertops or matte black contemporary style? Your choice.

And here’s one feature that I absolutely love: the measuring tool. You have the option to enter the exact dimensions of your kitchen appliances and cabinets. That way, you’re not just constructing a stunning kitchen you’re designing a functional one. Because let’s face it, you don’t want your oven door and fridge door crashing into each other when you’re opening the fridge, right? It’s a small thing, but little things count in a kitchen.

And the last bit of detail: rendering! After you’ve completed the design, you can render and have a wonderfully realistic look at your kitchen. I just feel like a professional interior designer here.

In short, it is easy and actually lots of fun to plan a kitchen with Planner 5D. It’s a great utility for planning your perfect kitchen. So go ahead and start your own plan, and let your imagination flow.

Free SketchUp Kitchen Design Software Review

In the second part of our free kitchen design software review series, we will examine the SketchUp Kitchen Design Program. In our previous article, we reviewed IKEA’s free design program. We recommend checking out that article as well. You can also look at other articles on our site for different free kitchen design software. Now let’s move on to our review and evaluation.

My need began during the process of having drawings made for a kitchen design. I couldn’t find or get the design I wanted drawn. Then I thought that in today’s world, technology would offer a solution to this, so I started researching and found SketchUp. SketchUp is not only a program for kitchen design; it can also be used to design other areas of the house. However, I mostly experienced it for kitchen design.

Thanks to the program,

You don’t need to deal with interior designers for design like me. Nor do you need to be a professional interior designer yourself. With just a few basic tools, you can create your dream kitchen and discover how it will look in 3D before even starting.

I must admit I was scared when I first opened SketchUp. I thought I would get lost in a complex engineering panel. Then I realized that I shouldn’t be prejudiced and just needed patience. Once I was patient, I understood. First, I created a simple rectangle by entering the measurements of my kitchen floor. Then, with the Push/Pull tool, I raised the walls and created the first 3D model of my kitchen.

Let me try to explain from my experience why SketchUp is so useful for kitchen design. It gives you a realistic and adjustable space to work with measurements. Cabinets, countertops, kitchen islands, or L-shaped layouts… trying out all combinations is just a few clicks away.

Here’s an important tip:

learn to work with components. It may feel difficult at first, but with a little patience, you’ll get used to it and figure it out. For example, I created a kitchen cabinet model, then turned it into a component and duplicated it. This way, I was able to create the entire cabinet set without having to deal with each measurement one by one. Even better, if you make a change to one, all of them update automatically.

Another great feature is the 3D Warehouse. This free library is full of realistic models for kitchens. You can find built-in ovens, refrigerators, kitchen islands, and even ready-made cabinet sets. Adding these to your project not only saves time but also makes your design look more realistic.

And to bring your kitchen to life, explore the materials section. Add a marble texture to your countertop, glossy white lacquer to your cabinets, and a wood effect to your floors. These small details transform your kitchen from just a drawing into a real project.

Don’t forget the navigation part. Orbiting around the model, zooming in, and panning may feel a bit tricky at first, but with practice, it gets much easier. Good camera control lets you see every angle of your kitchen and make more informed design decisions.

Here’s the best part:

SketchUp allows you to visualize your dream kitchen before you begin. From cabinet placement to color harmony, you can plan every detail. This prevents costly mistakes and saves time.

Based on my experience during the design process, I can say this: don’t try to achieve a perfect kitchen design in your first attempts. Your first design might not be flawless, but what matters is taking the step. For that, start using SketchUp, enter your kitchen measurements, and begin designing.

IKEA Kitchen Planner User Guide

We all know how hard it is to make changes in our home kitchen. This difficulty comes from breaking parts of the house, making a mess, and not being able to use it for a long time. The best way to get through this process happily is to see in advance how the kitchen will look when it’s finished and feel excited about it. In this article, we’ve prepared a guide showing how the IKEA kitchen planner can help you and make you happy. By creating the designs you want with the IKEA kitchen planner, you can easily get through this challenging process. We’ve also reviewed other design programs, not just the IKEA kitchen planner. You can check out our other articles as well. 5 Free Programs for Kitchen Design

IKEA’s User-Friendly and FREE Kitchen Planner

All you need to start using it is to create an IKEA account. After creating your membership with your email address, log in and click “Start Designing.” A clean interface will greet you, asking a few questions about your room layout. Once you answer these questions, the program will understand your needs and present the most suitable design plan for you. After that, you can start adding an open layout and real measurements: wall lengths, ceiling height, doors, windows… The tool allows you to adjust all of these.

Its Most Important Feature: You can drag and drop windows and doors exactly where they should be. Need to adjust a wall? Extend or shorten it until it matches your real kitchen. Do you have odd details like a column or a bump in the room? You can add those too. The same applies to kitchen cabinets or oven spaces.

Design Options in 2D and 3D

Another great feature is that you can design in either 2D or 3D. You can even switch between the two during the process. If you want a precise layout, the 2D view is handy, and if you need a 3D perspective, the program provides that as well. You can rotate the room, zoom in, and virtually “walk through” your future kitchen. This makes it much easier to decide whether the countertop will feel spacious or cramped.

Adding Cabinets and More

Let’s say most of the design process is complete. The fun part begins when you start adding cabinets, appliances, and those small details that make a kitchen truly functional. You can start by adding base cabinets, then wall cabinets, and pantry units. Remember, every piece is customizable. The program allows you to adjust things like width, style, and color for each item. If you’re using the IKEA catalog during the process, you’ll automatically see suggestions for fillers and panels. This isn’t essential you can remove these suggestions if you prefer.

What Makes IKEA Kitchen Planner Different?

You can see a live price list. As you add or remove items, you can watch the total cost increase or decrease. Even if you’re not planning to shop at IKEA, this helps you estimate your budget roughly. You can also experiment without any pressure move the fridge, change the countertop finish, try black cabinets instead of white. Nothing is finalized until you decide.

Honestly, it’s pretty impressive for a free tool. And it’s not just for IKEA fans you can use it simply to see whether your dream layout will actually work.

Classic Meals

How to Safely Clean a Knife Handle: Wood, Synthetic and Composite...

While much attention is given to maintaining a knife's sharp edge, the handle often gets overlooked. A clean and well-maintained handle is important for...
- Advertisement -