Home Blog Page 6

5 Meal Prep Recipes You Can Make in 10 Minutes with a Chopper

A lot of people just stop meal prepping because of all the chopping. Nobody wants to spend their Sunday afternoon, you know, their relaxing weekend time, dicing onions and peppers for two hours.

It’s not the cooking that takes forever; it’s all the chopping and dicing beforehand.

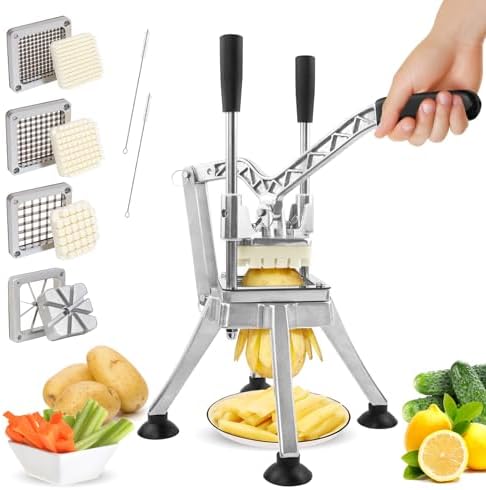
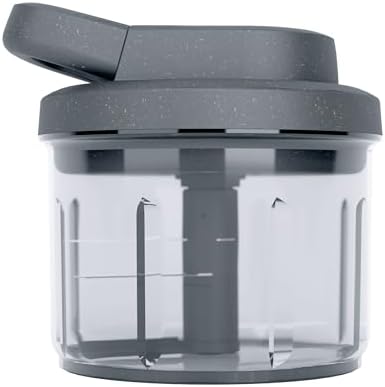
If that vegetable chopper is just sitting in your cabinet somewhere, you’ve got yourself a real time machine. I mean, I use mine to take what would be an hour of chopping and knock it down to around eight minutes.

That’s not the real secret, it’s not just about how fast you go either. It’s all the same, that’s what it is. When you cut all your peppers and onions to be roughly the same size, your salads just taste better, and your frittatas will cook more evenly.

“You can get these five meal prep basics ready in less than ten minutes with a chopper.” Okay.

The “1-Minute” Pico de Gallo

Store-bought salsa tastes like cooked tomatoes, it’s just got that unmistakable flavor. Fresh pico de gallo really makes a difference, but trying to dice all those tomatoes by hand is just awful.

Get ready: Grab the little dicing blade.

Okay, so for this, you’ll want to cut your onions into quarters. Do the same with your tomatoes, but make sure you scoop out those watery seeds beforehand. And don’t forget to quarter your jalapeños too. Just push them through the grid.

Just mix it with some lime juice, salt, and cilantro. It makes these neat, small squares that are great for scooping up with chips or putting on a chicken bowl. They just stay put, which is nice.

The Confetti Quinoa Salad

There are two of them. This is the best office lunch. It’ll be good in the fridge for four days before it gets all soggy.

Okay, to get started, just put in that tiny dicing blade.

First, chop up the cucumbers, then the red bell peppers, the red onions, and finally, the carrots. Since the pieces are so tiny, like confetti, they blend right into the quinoa really well.

Why this works: When you cut veggies yourself, you usually end up with bigger pieces. The chopper cuts them to about the same size as quinoa, which means you get that perfect grain-to-crunch mix with each bite.

Here’s the thing, it’s not really about the tools themselves; it’s about how we use them and the way they shape what we do.

Freezer-Ready Omelet Bags

If you’re craving a warm breakfast before work, just prep all the omelet fillings in bulk ahead of time.

Okay, to get started, make sure you’re using the big dicing blade.

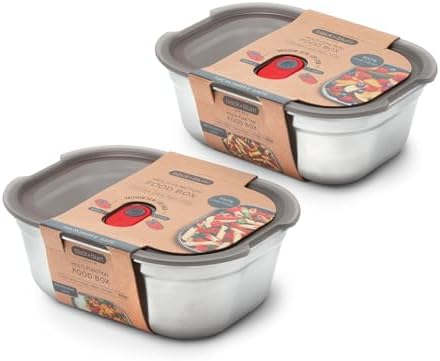
First, you’ll want to take care of the mushrooms, bell peppers, onions, and ham. Scoop out about half a cup of this mix, put it in Ziploc bags, and then pop those in the freezer.

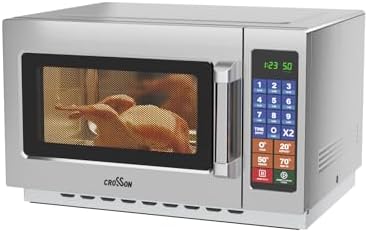
So, why does this method work so well? Simple. In the morning, all you do is empty a bag into the pan. The chopper made them all the same size so they cook up in just two minutes.

The Chunky Greek Village Salad (Horiatiki)

A real Greek salad doesn’t have lettuce in it at all. It uses pieces of sturdy vegetables.

Okay, for this, you’ll want to grab the big dicing blade.

Okay, so here’s how you do it: just take those cucumbers (leave the skin on!), green peppers, and those firm roma tomatoes, and run them through the big grater. Just mix it with some feta cubes, olives, oregano, and olive oil.

It really works because this salad is all about that satisfying crunch. The big blade helps the veggies stay crisp in the fridge for three days.

Classic Chicken Salad Base

Five. A good chicken salad really comes down to the texture, and what makes it special is that crisp bite from the celery and onions, not some mushy mess.

To start, just use the little dicing blade.

Here’s the trick: grab your celery, sweet onions, and hey, even some pickles. Just chop them all up. Just toss the crunchy stuff with your shredded rotisserie chicken and mayo.

Here’s a good reason this works: you get that deli-style crunch that’s spread out nicely. It’s not like you bite into a huge piece of onion in one spot and then nothing in another.

Just one rule for storage

The chopper really gets through those cell walls quicker than if you used a knife. This makes more liquid come out.

If you’re going to use these later in the week, just pop a folded paper towel into the bottom of your glass container. It soaks up the extra wetness and will keep your Confetti Salad nice and crisp until Friday.

How to Clean Those Tiny Blades: Maintenance Guide for Choppers

In my last article, I talked about if you should go with a manual or an electric vegetable chopper. This article is going to talk about a really important topic: staying clean. Feel free to drop your thoughts on the article down there.

The thing about having a vegetable chopper that really gets you is not the chopping itself. It’s what’s left after everything’s happened. You ever look at one of those sharp steel graters, and just know there are tiny bits of onion or pepper caught in spots you can’t possibly clean?

Most folks mess up in one of two ways right here. They’ll either leave it soaking in the sink, which is super gross, or they’ll try to scrub it down with a sponge. That’s a surefire way to ruin a sponge and risk hurting your fingers.

Keeping things clean is simply about regular upkeep. Look, even something tough like stainless steel will get messed up if you leave acidic stuff like tomato juice or onion sulfur on the blades too long. It’ll just corrode or lose its sharp edge eventually.

The best way to keep your cooking knife super sharp, without getting hurt, is to use this method.

That First Minute Counts

That first minute after you’re done getting ready? That’s when everything counts. It’s really where you win or lose the whole thing.

Vegetable starch is like a glue. When onion juice or potato starch dries on a plastic frame, it becomes a really tough cement that’s super hard to get off.

Okay, so the routine is: once you’ve dumped out the catch bin, grab that blade insert and head straight to the sink with it. Just spray it with hot water right away. Don’t scrub it right now; just get the loose stuff out before it dries. Just doing this one little thing will save you a good ten minutes of scrubbing down the road.

The Essential Toolkit

You really need the right stuff, and that means staying away from your regular kitchen sponge. It’s too squishy, and the blades would just turn it into tiny plastic bits that would clog up the grates. You gotta be firm with this.

  • The “Claw”: Most choppers usually include a little plastic cleaning tool, often called a “claw” or “comb.” Don’t lose this. It is the only material slender enough to slide between the teeth of the push-block.
  • Long-Handled Brush: You absolutely need a long-handled brush, like one for bottles or dishes. It puts your hand a safe three inches from where the action is.
  • Toothpick: A toothpick is great for those tight spots where the metal and plastic meet.

Step-by-Step Deep Clean

Just follow these simple steps for a really deep clean.

1. Get the food out

If there’s stuff stuck in those plastic teeth on the pusher lid, just grab the “Claw” tool and scrape it clean. Do this dry or under running water. If you try this with a rag, all you’ll achieve is pushing the food in even more.

2. The Directional Scrub

So, just put some dish soap right on your brush. Rub the blades in the same direction as the steel’s natural lines. Rubbing the brush against a sharp edge will dull it and mess up the bristles. Start in the middle and work your way out.

3. The “Bear Trap”

Don’t ever, ever drop a blade grid into a sink filled with soapy water. It’s an “invisible” danger. We call this the Bear Trap. You’ll totally forget about it, then reach for a spoon and just cut your hand open.

If you have to soak it, put it in a clear bowl right on the counter, not in the sink.

Is this okay to put in the dishwasher?

I’m not so sure about that. Manufacturers often say something is “top rack dishwasher safe.” As someone who’s spent a lot of time with kitchen stuff, I really wouldn’t recommend it for those blade inserts.

Dishwashers, with their high heat and strong soaps, can really mess up a knife’s super sharp edge over time. Big deal, the constant heating and cooling can make the plastic housing bend out of shape. If that plastic part warps just a millimeter, those pusher teeth won’t line up right with the blade grid, and everything will just jam up.

Okay, my tip: just put that catch bin right into the dishwasher. Wash the blade assembly by hand.

Drying and Rust Prevention

Stainless steel isn’t actually “stain-proof”; it just stains less readily than other metals. If you put a wet chopper back into a dark drawer, rust spots can form.

Give it a good shake to get rid of the extra water, then just let it air dry completely on a rack. Don’t put the unit back together until it’s really dry. If there’s moisture stuck in the container, that’s just asking for mold to grow.

Manual vs. Electric Choppers: Do You Really Need to Plug It In?

In our previous article, we examined Fullstar vs Mueller vegetable choppers to determine which one lasts longer. Both products are used to cut hard vegetables and fruits, and the durability of each is tested. In the next article, we’ll examine what to consider when using vegetable slicers. In this article, we’ve written about the difference between manual and electric slicers.

Cooking should not require a power strip for a single garlic clove. Yet, the kitchen gadget industry keeps pushing motors on us for tasks that often take ten seconds by hand.

We see this question constantly: “Should I buy a cheap pull-cord chopper or invest in a mini electric processor?”

The answer comes down to one specific variable: Texture Control.

If you buy the wrong one, you will either end up with a chunky, uneven mess or accidental baby food. We broke down the mechanics, the cleanup time, and the actual workflow to help you decide which one earns a spot on your counter.

The Case for the Manual Chopper

When we talk about manual choppers, we usually mean the “pull-cord” style (like the Kuhn Rikon) or the “push-down” grid style (like the Fullstar).

The Texture Advantage This is the biggest selling point. With a manual pull-cord chopper, you have total control. One pull is a rough chop. Three pulls is a dice. Five pulls is a mince. You can stop exactly when the onion is the size you want. You rarely get that “onion soup” liquid at the bottom of the bowl because the blades spin slower.

The Workflow It is grab-and-go. You do not need to unwind a cord, find an outlet, or assemble a heavy motor base. For a quick pico de gallo or chopping nuts for a brownie topping, it is significantly faster than setting up an electric machine.

The Downside It requires physical effort. If you are prepping five pounds of onions for a soup kitchen, your arm will get tired. Also, the capacity is usually smaller.

The Case for the Electric Chopper

Mini food processors (like the Cuisinart Mini-Prep) are powerful beasts. They rely on speed and torque.

The Consistency Advantage If you need to make a paste, a dressing, or a smooth hummus, the electric chopper wins every time. A manual chopper simply cannot generate the RPMs needed to emulsify oil and vinegar or break down chickpeas into a smooth cream.

The “Mush” Risk This is the main problem with electrics. They are aggressive. If you look away for two seconds while chopping an onion, the motor will obliterate the cell walls. You end up with a watery mush instead of crisp pieces. It requires pulsing carefully, which takes focus.

The Accessibility Factor For cooks with arthritis or limited grip strength, an electric chopper is non-negotiable. It does the heavy lifting for you.

The “Salsa Test”

We always use salsa to settle this debate because it requires chopping tomatoes without turning them into juice.

  • Manual Chopper: Wins easily. You get distinct, chunky pieces of tomato, onion, and cilantro. It looks like restaurant-style salsa.
  • Electric Chopper: Often fails. Unless you are extremely careful with the pulse button, the tomatoes turn pink and frothy. It tastes fine, but the texture is like gazpacho.

So, Which One Should You Buy?

This decision is not about price; it is about what you cook.

Buy the Manual Chopper If: You mostly chop onions, garlic, herbs, and nuts for dinner prep. You value counter space and hate dealing with power cords. You want crisp veggies, not mush. It is the best tool for daily “mis en place.”

Buy the Electric Chopper If: You make a lot of sauces, dressings, dips (like hummus or pesto), or baby food. It is also the correct choice if you need to process hard ingredients like stale bread for breadcrumbs or blocks of parmesan cheese.

Our Honest Recommendation For 90% of home cooks, a high-quality manual pull-chopper is actually more useful. It is faster to clean, easier to store, and gives you better results for basic vegetables. Save the electric motor for the big food processor.

The Finger-Saver Guide: How to Use a Vegetable Chopper Without Getting Hurt

In our previous article, we created detailed and informative content on Fullstar vs. Mueller: Which Vegetable Chopper Lasts Longer? This article focuses on what to consider when using kitchen appliances.

Vegetable choppers are responsible for a surprising number of ER visits. They look innocent enough just a plastic box with a grid of metal but those blades are often sharper than your chef’s knife. Unlike a knife, they don’t give you feedback until it’s too late.

I have seen seasoned cooks lose fingertips because they trusted the plastic guard too much or, worse, didn’t use it at all.

Safety with these tools isn’t about being slow; it’s about physics and preparation. If you respect the mechanism, you keep your fingers. If you get lazy, you get cut. Here is the operational protocol to chopping without an injury.

1. Secure Your Station

Most accidents happen before the blade even touches the onion. If the chopper slides while you are applying force, your hand slips, and your momentum carries your fingers directly into the grid or the hinge.

  • Dry the counter: Water is your enemy here. A wet countertop turns your chopper into a hockey puck.
  • The damp towel trick: Put a damp (not wet) kitchen towel or a silicone mat under the catch bin. This creates friction. If the bin moves while you are chopping, you are either using too much force or your surface is unsafe.

2. Respect the Geometry

You cannot put a whole onion in these things. I don’t care what the infomercial showed you. Round objects roll. If the vegetable rolls while you are bringing the lid down, your hand might follow it.

  • Create a flat surface: Slice a thin layer off the bottom of the potato or onion with a knife first. Place that flat side down on the blades. This prevents the vegetable from shooting out sideways when you slam the lid.
  • Pre-cut to the grid size: If your onion extends past the metal grid, you are asking for trouble. The overhang will catch on the plastic frame. This jams the unit. When you try to un-jam it with your hands, that is when the blade bites.

3. The “Slam,” Not the “Press”

This is where most beginners fail. They try to be gentle. They press the lid down slowly to see if it cuts.

This is wrong. Slow pressure allows the vegetable to compress and act like a spring. The blades get stuck halfway through. Then you have to push harder, your hand slips, and disaster strikes.

  • Commit to the movement: You need a swift, confident motion. Use the heel of your hand on the designated impact zone of the lid.
  • Watch the hinge: Keep your fingers away from the seam where the lid meets the base. I have seen pinch wounds from the hinge that were just as painful as cuts from the blade.

4. The “No-Touch” Cleaning Rule

The most dangerous time is not when you are chopping; it is when you are washing up. The blades are serrated and incredibly sharp.

  • Never use a sponge: The blades will shred the sponge and then they will shred your fingers.
  • Use the claw brush: Most choppers come with a little plastic comb or brush. Use it. If you lost it, use an old toothbrush.
  • Don’t soak it blindly: Never drop the blade grid into a sink full of soapy water. You will reach in to grab a fork, forget the blade is there, and cut yourself. Wash it immediately under running water and set it aside to dry.

When to Retire Your Chopper

A dull blade requires more force. More force means a higher chance of the unit slipping or the plastic hinge snapping under stress.

If you find yourself having to body-slam the chopper to get through a bell pepper, the blades are dead. Throw it out. It is much cheaper to buy a new $25 chopper than to pay for stitches.

Fullstar vs. Mueller: Which Vegetable Chopper Lasts Longer?

Most vegetable choppers, sadly, just end up in the trash. This is just bound to happen. When you push a bunch of steel blades through something tough like a sweet potato, you’re really twisting those plastic parts, and they often aren’t built strong enough for that kind of strain.

“We’re not really bothered about which chopper is prettier on your kitchen counter.” We care a lot about whether things are built to last.

Two big companies, Mueller Austria and Fullstar, really run the show in this market. They both claim to chop your prep time in half, but they go about managing the force with different engineering ideas. We really dug into the blade sharpness, how tough the plastic was, and if the hinges would actually last. We wanted to figure out which one could truly make it through a whole year of cooking every single day.

The Engineering Difference

Before we can pick a winner, you gotta get how the physics behind it all work.

  • Mueller usually uses a Leverage System. You push down on a handle which acts as a fulcrum. This makes you way stronger; the machine really does all the hard work.
  • Fullstar’s go-to is usually a Direct Impact System. Usually, there is no lever arm. Just push the lid straight down right onto the vegetables.

This basic difference tells us exactly how and when they’ll break.

  • The Original Pro Chopper Refined Since 2013 – Another well marketed lower quality white/black model claims to be the ori…
  • 6 Awesome Blades For the Price of 4 – Two different sized chopper blades, 4 interchangeable blades for slicing, julienne…
  • Unmatched Quality – A great pick for holiday exchanges, this kitchen essential makes an excellent choice for white eleph…

The Contender: Mueller Pro-Series 10-in-1

Mueller really wants you to know that its stuff is all about “Austrian Engineering.” So, mechanically speaking, their whole design boils down to that leverage we brought up earlier.

The lever might make things easier, but it really puts a lot of stress on those back hinge pins, and that’s usually where things break. If you use a vegetable that’s too firm or too big, the lever lets you push so hard that the plastic casing near the back pins might just break.

The blades are usually made from 420-grade stainless steel. This is pretty standard stuff for cutlery; it holds a decent edge. It’s usually made from ABS plastic. The good thing about this is the blade housing. Mueller usually goes with a thicker plastic frame for the steel grid. This stiffness keeps the blades from bending if they run into something hard.

  • The Original Pro Chopper – TikTok’s favorite veggie slicer and one of the top-rated kitchen gadgets of the season! Simpl…
  • Easy Meal Prep with Rust-Resistant Blades – Perfect for those who want to eat healthier but don’t have time to spare. Di…
  • 5-Star Design for Everyday Cooking – Built for comfort and precision. The soft-grip TPU handle offers better control, wh…

The Challenger: Fullstar All-in-1 Chopper

Fullstar really grew its share of the market by selling a ton of stuff. You get extra blades and more stuff for the same cost.

It’s a failure point because you can’t really get any leverage, so you often end up having to slam the lid down to chop through harder stuff like carrots. The jolt from the hit goes straight into the clear catch container. You know, after a while, you usually start to notice those little spiderweb cracks showing up in the bottom corners of the catch bin. That’s because it’s constantly taking the hit every single time you chop.

The Build Quality

Fullstar comes with parts made from stainless steel and TPU/ABS plastics. This plastic is stiff. This is tricky; there are good and bad sides to it. Stiff plastics don’t bend much, but if you hit them hard, they’ll probably shatter. Softer, bendier plastics handle impact a lot better.

The Sweet Potato Stress Test

The real test of a chopper isn’t chopping an onion. An onion is soft layers. We’re using a raw sweet potato for this test. This vegetable is really dense and causes a lot of drag against the blades.

Mueller: It’s all about that leverage, which helps the Mueller slice through tough root veggies more easily and with better control. The blades just slide right through instead of chopping. It can take more pressure, just don’t put too much weight on the hinge.

Fullstar: You really need some good arm strength to handle tough stuff with this one. If the blades don’t cut through the skin right away, the vegetable just stands there like a post. Slamming the unit too hard to make up for it might bend the blade grid or crack the bin.

Do you think it will make it through the year?

So, if you want something super tough, especially for chopping really hard veggies like potatoes, carrots, or beets, go with the Mueller Pro-Series. It’s built better. The lever design softens the blow to the plastic body, making it last longer before it wears out.

If you want to move fast in the kitchen and you’re mostly cutting softer things like onions, peppers, tomatoes, or zucchini, the Fullstar is a fantastic tool to have. It’s quicker for soft prep since the up-and-down movement is just faster than having to reset a lever.

If you want something that lasts, just get the Mueller. For accessories and salad prep, get the Fullstar.

“Just keep the sweet potatoes out of the Fullstar unless you boil them first.”

The Science of Freshness: Vacuum vs. Airtight Canisters for Coffee

So, what’s really happening when we talk about “freshness” and things like vacuum sealing? Even as days go by, coffee stays fresh. It goes bad because oxygen gets into it.

When those roasted beans hang out with oxygen too long, the amazing flavors start to fade away. The truth is, nothing else about how you keep your coffee matters as much as this.

Knowing this really helps when you’re trying to figure out which vacuum canister or airtight coffee container is best, so you don’t just fall for what the ads say.

Why Oxygen Matters More Than Time

Coffee beans keep letting off carbon dioxide for days, sometimes even weeks, after they’ve been roasted. This natural process is called degassing.

And right then, oxygen gets to work on the beans, speeding up how fast they oxidize. Coffee goes stale quicker if it’s often exposed to oxygen.

So, the main idea behind any storage system is really to limit how much oxygen can get in. An airtight coffee container stops this big problem by not letting much air in or out, which is good.

The real question is if taking out all the air actually makes things better for how we use them day-to-day.

Why Airtight Coffee Containers Work So Well

Airtight coffee containers are really practical and give you consistent results. Good airtight canisters are useful because they stop new air from getting in.

We don’t take out the oxygen that’s already in there, but once the lid is on tight, the oxidation process really slows down.

This setup really works for how people actually use their kitchens. Most folks reach for their coffee container every day. Every time you open something, fresh air comes in, but when you close it, everything goes back to how it was in an organized manner.

There’s another good thing people usually overlook. As beans keep letting out carbon dioxide, this gas slowly pushes out some of the oxygen that’s stuck in the container. This gradually makes things a bit safer, and you don’t even have to do anything.

If you’re a home brewer picking up new coffee every week or two, a simple airtight container should do the trick.

Where Vacuum Canisters Make Sense

Yeah, vacuum canisters are good for certain things, but they’re not a catch-all solution.

Vacuum canisters are great for keeping coffee fresh when you aren’t going to open it right away. These are handy for keeping extra beans or different kinds you don’t grab every day.

The problem crops up when you access it a lot. Each time someone opens this thing, the vacuum gets messed up, and we have to fix it again. When you use it every day, this cycle usually wipes out any theoretical perks it might have had.

Another thing is the timing. Putting beans under vacuum too quickly after roasting can mess with how they naturally release gas. That could, in turn, mess with the pressure inside the bag and how well the seal holds up.

Which Option Fits Real Kitchens Better?

The big question is, which one really fits in at your place?

When it comes to keeping coffee fresh, an airtight container usually hits that sweet spot of being easy to use and doing a good job. Vacuum storage is okay, but it’s more specialized than a lot of people realize.

Good coffee isn’t really about fancy tech. It’s more about just getting smaller batches, keeping air away from the beans, and storing them somewhere cool and dark.

Do these first, and the container just makes it easier to do things the good way.

Microwave Safe Stainless Steel Lunch Box: The Ultimate Guide

For a time the rules of cooking food at the office were easy to understand: If you want your lunch to be hot you need to use a plastic container or a heavy glass one. If you use a metal container you will probably cause a fire in the microwave in the break room. The rules of office physics are pretty clear when it comes to metal and the office microwave. It is just not an idea to use metal.

This was a problem for many of us. We did not want to use plastic. We had to find a way to heat up our leftover food. So we had to settle for the Tritan Plastic Compromise. We were not happy about using Tritan Plastic. We needed something to reheat our leftovers in. The Tritan Plastic Compromise was not ideal. It was the best option we had at the time for reheating our leftovers.

Materials science has changed a lot. Now we have kinds of lunch boxes that are really different from what we used to have. We looked at the three ways to have a hot lunch at work without using plastic. This includes steel lunch boxes and even lunch boxes that can heat up your food by themselves. We are talking about materials science and lunch boxes that are made with technology, like special steel and self-heating electronics and these new lunch boxes are what we will be looking at.

Microwave Safe
Title
Thumbnail
BLACK + BLUM Microwavable Stainless Steel Lunch Box | Multi-Function, Vacuum Sealed Container for Healthy Food | Portable and Stackable Food Storage for Office and Outdoor | 30 oz / 900ml
Price
$26.95
Buy on Amazon
Electric / Self-Heating
Title
Thumbnail
Crock-Pot 20-Ounce Electric Lunch Box, Portable Food Warmer, Blush Pink | Perfect for Travel, Car, On-the-Go | Spill-Free, Dishwasher-Safe
Price
$29.99
Buy on Amazon
Cold Food Only
Title
Thumbnail
STANLEY Classic Legendary Useful Box 1.25 qt | Metal Snack and Lunch Box | Durable Stainless Steel Travel Food Storage Container | Hiking, Camping, School, or Work | BPA-Free | Hammertone Green
Price
$35.00
Buy on Amazon

1. The Engineering Marvel: Black+Blum Stainless Steel Box

People on Reddit talk about this box. They call it the “Holy Grail”. They are right when they say that. The Reddit users think this box is really special and important; the “Holy Grail” is what they actually call it.

  • The Myth: People think that metal makes sparks fly around in microwaves. This happens because electrons get stuck on points of the metal and then jump off. The metal is like a magnet for these electrons. They build up on the edges of the metal and then suddenly jump, which is what we see as sparks. This is why metal and microwaves do not mix well. When electrons jump from the metal they make sparks. So metal is the problem when it comes to sparks in microwaves.
  • The Solution: It is really simple. Black+Blum made a box. This box has corners that are rounded perfectly. It feels really smooth. The Solution works because there are no points on the box. Normally electrons like to gather on points. Because The Solution does not have these points the electrons do not gather and that means the arcing does not happen with The Solution.
  • The Verdict: This lunch box is really something. It is made of steel that is safe to use in the microwave. The best part is that it is very light and will not break easily. This lunch box does not have any plastic except for the silicone part that helps to keep the food fresh. You can heat up your food in the office microwave with this stainless steel lunch box without worrying about it. This stainless steel lunch box is a choice because it is microwave safe and you can use it every day.

2. The “No-Microwave” Bypass: Crock-Pot Electric Lunch Box

If the office microwave is really dirty and you do not want to wait in line to use it, then you should stop searching for a container to heat your food in. Instead, you should start searching for an appliance like a toaster oven or something that you can use to heat your food. This way you can avoid using the office microwave altogether. You will not have to wait in line. The office microwave is not the thing you can use to heat your food so start looking for something else, like an appliance.

  • The Mechanism: This thing is like a slow cooker. You plug The Mechanism into a wall outlet at your desk 45 minutes before you eat lunch.
  • The Advantage: The good thing about this is that it heats up your food in a way and it does it evenly. It is not like a microwave that can make your lasagna all hard and rubbery. This thing warms up your lasagna. It still feels like it is supposed to.
  • The Trade-off: The problem with this thing is that it is really big and you need to plug it in. It can leak when you are on your way to work so you usually just leave the part at the office and take the metal part inside back and forth. The heating unit is not something you can easily carry around because it is bulky and needs a plug; the metal insert is what you end up carrying to and from work.

3. The “Cold Storage” Warning: Stanley Classic Useful Box

You can find this thing over social media. The thing looks really rugged. It has a retro style that is incredibly cool. You should not put the thing in the microwave.

  • The Reality: The truth is that the Stanley box is made of steel. This steel works like a shield. The Stanley box is like a Faraday cage. If you put the Stanley box in the microwave the waves will bounce off the metal of the Stanley box. This can hurt the microwave. It can damage the magnetron in the microwave. The sharp edges of the Stanley box can also cause sparks to fly. This is not good for the microwave. The Stanley box and the microwave do not mix well.
  • Best Use Case: This thing is really good for carrying sandwiches or salads or even boiled eggs. If you are making a ploughman’s lunch with cuts and cheese you should use this box because it is very strong.

Just remember to keep this box from the heat.

  • THE ULTIMATE SNACK BOX: It’s the sandwich container you’ve always wanted. The one you’ll never have to worry about getti…
  • DISCOVER THE VERSATILITY: We don’t call it the Useful Box for no reason. With 1.25 quarts of space, it’s good for more t…
  • LEGENDARY STANLEY QUALITY: Crafted from 18/8 stainless steel, our Useful Box withstands a life of adventure. The durabil…

Final Decision

If you want to use the microwave without worrying and you also want something safe like steel, the Black+Blum is really special. It is a clever thing that solves this problem. The Black+Blum is an idea because it gives you the convenience of the microwave and the safety of steel.

If you like food that tastes good and you have a desk with a plug, the Crock-Pot Electric Heater is better than any meal you can make in a microwave. The Crock-Pot Electric Heater is great for people who want to eat food at their desk. The Crock-Pot Electric Heater makes the food taste really good.

Just remember: Not all steel is created equal. Check the bottom of the box before you press “Start.”

Are OXO POP Containers Worth the Hype? An Honest Review (After 6 Months)

If you have ever looked at pictures of Pantry Organization on Instagram you have seen those pictures. There are rows of clear containers with white lids that are perfectly clean and they are filled with flour and pasta that is all leveled out. Pantry Organization pictures like these are really nice to look at. They look like they cost a lot of money to set up. That is why Pantry Organization can seem expensive.

The OXO Good Grips POP Containers cost a lot of money, about fifty dollars for a starter set. This is a deal. The people who sell the OXO Good Grips POP Containers say they are airtight and space-saving.

So I was thinking do these things really keep sugar soft for six months? Are you just paying extra money for the way they look? Brown sugar can get hard fast so it would be great if these things actually worked for brown sugar. I mean, who wants to pay for something that does not even work for sugar?

We did not bother with the excitement of opening these containers for the first time and instead looked at how they work after using them every day for six months in a real kitchen. Here is what we found out about how they are made.

The Mechanism: How the “POP” Actually Works

A lot of people do not really understand what the button is for. The button is something that people get wrong. They think the button does one thing. Really the button does something else.

  • The Myth: Pushing the button sucks the air out (Vacuum Seal).
  • The Engineering Reality: When you push the button it makes the silicone gasket get bigger. There is no pump that sucks out the air. The button works a part that goes down and squeezes the rubber ring out against the sides of the container.

This means it makes a friction seal, not a vacuum seal. It works well to stop a spill that happens by accident. However, it is not strong enough to keep working when the temperature changes. If the place where you keep your food gets hot the air inside gets bigger, which can make the lid come loose.

The 6-Month Wear Test: The Ugly Truth

When these things are brand new they look really beautiful. After you have had them for about half a year, the problems with them start to appear. There are three issues that you will notice with these things after a while.

1. The “Scratch Magnet” Issue

The body of this thing is made from a kind of plastic that is safe to use; it is called BPA-free plastic and it can be either SAN or Tritan depending on the batch. While durable against drops, the body is also really soft.

  • The Result: If you use a Scotch-Brite pad to wash your things you will ruin them right away. They will get all cloudy and scratched. You have to use a sponge or a microfiber cloth to clean them. Even scooping granola with a metal spoon can make tiny scratches on the inside after a while.

2. The “Water Trap” Lid

This is the biggest design flaw. The lid is a complex sandwich of plastic, springs, and silicone.

  • The Problem: When you put them in the dishwasher (even though the new 2.0 version says it is dishwasher safe), water gets stuck inside the mechanical button assembly of the lids.
  • The Risk: You might hear a sloshing sound when you shake the lid. This sound is because of the water that gets trapped inside. If this water does not dry out and it is really hard for it to dry out because the space is enclosed then it can grow mold inside the lid mechanism where you cannot reach it to clean it.

3. The Brown Sugar Test

We put brown sugar in a special container made by OXO called a POP container. We compared it to sugar that we stored in a really cheap jar that you have to screw the top on and off.

  • The Result: The OXO sugar started to harden after 4 weeks, which is not that great. The screw-top jar lasted 3 months, so that is a bit better. The problem with the OXO sugar container is the “POP” seal. It is just not tight enough to keep the air out and maintain the humidity for sensitive ingredients unless you add a terracotta disk.

So, Why Are They Best Sellers?

Professional organizers really like these things even though they are not perfect.

  • Modularity: These things are made to stack in a special way. You can put two squares on top of one rectangle and they will fit perfectly. This means you can use all of the space on your shelf without having to play a game of Tetris to get everything to fit in your pantry.
  • Accessibility: This is really important for people who have arthritis or limited hand strength. You do not need to use a lot of grip strength to open a lid. All you have to do is press down on it with your palm.

Is It Worth The Money?

Buy OXO POP Containers If:

  • Looks are really important to you: You want your pantry to look perfect like the pictures you see on Pinterest.
  • You store dry, non-sensitive goods: Things like pasta, beans, pretzels, and white rice work perfectly because they are dry and will not go bad easily.
  • You have dexterity issues: The push-button is the easiest opening mechanism available.

Skip Them If:

  • You want long-term preservation: For flour, sugar, or coffee, get a Rubbermaid Brilliance or a locking clamp jar. They seal tighter for half the price.
  • You hate hand-washing: Disassembling the lid to dry it out properly is a chore you will eventually get tired of.

Fresh Kibble: Why You Need an Airtight Dog Food Container (Review)

We put a lot of time into making sure we have the amount of butter and flour, in our cookies.. Then we often mess them up when we store the cookies. This is the part where we can really ruin our cookies, the cookies.

People think that vintage ceramic cookie jars are the thing to have in the kitchen. They look really nice on the counter. Remind us of the past.. When we think about how well they work vintage ceramic cookie jars are not good at keeping food fresh. The problem is the lid, on ceramic cookie jars. It is heavy. Does not have a special seal to keep air out. This means that moisture can easily get into ceramic cookie jars and make the food go bad.

If you want your biscotti to stay hard and your chewy cookies to stay chewy you need to stop looking at the pattern on the ceramic. You should start looking at the shore hardness of the silicone seal. This is because the shore hardness of the silicone seal is really important, for your biscotti and chewy cookies. The shore hardness of the silicone seal will help your biscotti stay hard and your chewy cookies stay chewy.

Here is the breakdown of the best airtight cookie containers that balance countertop aesthetics with actual pneumatic performance.

The Physics of “Stale”: Why Cookies Fail

Before you buy a container you really need to know what you are up, against which is the enemy, the containers weaknesses and the enemy. So you have to think about the enemy and what the enemy can do to the container. The enemy is important when it comes to buying a container.

  • Crisp Cookies like Oreos and Biscotti get stale fast. This happens because they absorb moisture from the air. Crisp Cookies need to be stored in a place, with no moisture all. This will help keep Crisp Cookies like Oreos and Biscotti fresh for a time.
  • Chewy Cookies are really good when they are fresh. The problem with Chewy Cookies is that they go stale. This happens because Chewy Cookies lose moisture to the air, around them. To keep Chewy Cookies fresh you need to store them in a container that keeps the air from getting in. This container needs to be able to keep the moisture in so Chewy Cookies stay soft and chewy. A high-humidity seal is what Chewy Cookies need to stay fresh for a time.

So, in both situations the thing that matters is air exchange. You need a container that is sealed tightly. Something that a lot of those cute cookie jars just do not have.

The Contenders: Engineered for the Countertop

We looked at three choices to see how well they were sealed, how easy they were to get into and how nice they looked. We wanted to know if you could get your hand into the cookie jar easily so we called this the “Cookie Jar Hand” factor. We also thought about how good they looked because the cookie jar should be nice to look at too.

1. The Accessibility King: OXO Good Grips POP Cookie Jar

Most airtight containers are rectangles that you can put in your cupboards. OXO used their POP technology. Made it into a classic round shape, like a fishbowl, that is perfect for your countertops. This way you can see what is inside the OXO containers. They look nice on your countertops. The OXO containers are really good, for storing things.

  • The Mechanism: This thing works with a button. When the button is up you can get to the handle. When you push the button down a soft silicone part called a flange gets bigger and presses against the wall, which is usually made of glass or plastic. The Mechanism uses this button to control the handle and the silicone flange.
  • The Aesthetic: is really nice. It looks modern. It is very clean and clear. The cookies are, on display and that is a big part of the design. The cookies themselves are a design element that people will notice.
  • The Verdict: This is the option for households that go through things quickly. The container has a seal for storing cookies that you will eat in the next two weeks. But it is not the seal it is just a friction seal, not a clamp. So if your kitchen gets really hot or cold the seal might not be as tight after a while. This container is really good for families, with kids because the plastic body is very strong.

2. The Heavy-Duty Classic: Le Parfait Super Jar (or Kilner)

To keep things good for a long time like several months you need to stop using the push-button and go back, to using mechanical leverage. This is the way you can get absolute preservation for months. You have to use leverage instead of the push-button.

  • The Mechanism: These things work with a wire that goes around and squeezes hard on a special rubber seal. It is a rough way to make sure something is airtight. The wire bail system is what makes the rubber gasket get pressed tightly which is how these things make sure everything stays inside. The rubber gasket is made to be strong because it is vulcanized.
  • The Aesthetic: The look of this thing is really nice. It has a old fashioned feel, to it like a bakery you might find in France. The Aesthetic of this thing is great. When you put The Aesthetic on a granite countertop The Aesthetic looks like it is well made. It looks like it will last a long time.
  • The Verdict: The opening of this thing is pretty small which makes it tough to get the cookie out without getting your hand stuck.. When it comes to keeping things fresh it is really good. If you make a lot of biscotti and you need them to last for a month then this is the thing you should use for storing your biscotti.

3. The Modern Minimalist: Brabantia Window Canister

People who think clear plastic is not wire clamps are too old fashioned the Brabantia steel line is a good choice. It is something in between. The Brabantia steel line is an option, for these people.

  • The Mechanism: is a kind of lid called a “flavor-seal” click lid. This flavor-seal click lid is not too harsh like a clamp. It is tighter than a regular ceramic lid. The flavor-seal click lid is something in, between you know, not too loose and not too tight.
  • The Aesthetic: The look of this thing is really nice. It is made of a kind of steel that does not get fingerprints on it. The steel is matte. It has a small window. This window is useful because it lets you see how stuff you have inside without showing all the crumbs and mess. The Aesthetic of this thing is great because it hides the crumbs while still showing you the inventory level of the stuff you have.
  • The Verdict: This thing is great for kitchens that have an industrial style. It keeps the cookies away from sunlight, which’s good because sunlight can make the chocolate chips go bad. This means the cookies will taste better for longer which is a little better, than using jars for storing cookies like chocolate chip cookies.

The “Sugar Cube” Hack

The best cookie containers that keep air out still cannot stop the air that gets trapped inside the cookie container when you put the lid on. The air that is already inside the cookie container is still there with a really good lid, on the cookie container.

To engineer the perfect humidity level, stop relying solely on the container:

  1. To keep your cookies fresh you can do a simple thing. Throw a slice of bread into the container with your Soft Cookies. Alternatively you can use a sugar keeper, which is usually a small terracotta disc. The white bread or the terracotta disc, from the brown sugar keeper acts like a humidifier. It releases moisture into the air, which helps to keep your Soft Cookies soft.
  2. For Crisp Cookies you should do something. Add a silica gel packet the kind that’s safe to use with food, to the bottom of the jar. This silica gel packet is really helpful because it keeps the air dry. It does this by absorbing any moisture that gets in when you open the lid of the jar. This way your Crisp Cookies will stay fresh.

Final Recommendation

If you have kids and the cookies disappear in 3 days, get the OXO POP Cookie Jar for the ease of use. If you are baking for longevity or living in a very humid climate, trust the mechanical seal of a Glass Clamp Jar. Everything else is just decoration.

Bulk Storage Heroes: Best Large Airtight Containers for Rice and Grains

Buying a 25-pound bag of Jasmine rice is a good way to save money on your groceries. But after you bring that huge bag home, the happiness doesn’t last long. You have to deal with a heavy bag that is hard to handle and spills rice all over the place when you try to get some out.

Leaving grains in the original packaging is a mistake.

  • Pests: It attracts pests like weevils.
  • Mess: Bulk grains can spill all over the place.
  • Humidity: The original packaging exposes grains to moisture, which damages them.

To store that much food, you need containers that are strong enough to hold the weight and engineered to keep air out. Here are the best containers to help you manage your bulk pantry.

The Restaurant Standard: Cambro Square Containers

When you walk into any professional kitchen, you will see these everywhere. They are not pretty to look at, but the good thing about them is that they are indestructible.

  • The Material: Made from polycarbonate, which is incredibly strong. You can drop these containers when they are full of rice, and the plastic will not crack.
  • The Capacity: The 12-quart and 18-quart sizes are great for holding a lot of stuff. You can easily dump 20lb or 50lb bags of rice or flour into them.
  • The Design: One feature that makes this great is the wide opening. This makes it easy to dip a large measuring cup inside without hurting your knuckles much easier than fighting with a plastic bag.

The Aesthetic Choice: OXO Good Grips POP Jars

Sometimes you need storage that looks nice enough to put on your counter. That is where the OXO Good Grips line comes in.

The big rectangular tubs are good for the pantry, but the 3-quart and 5-quart jars are even better for storing smaller grains like quinoa, lentils, or snacks. These are widely considered the best airtight cookie containers on the market because of their special seal.

  • How it Works: The button on the top expands the silicone gasket around the edge. This creates an airtight seal. If it keeps cookies fresh and crunchy for weeks, it will definitely keep your lentils fresh too.
  • The Look: The plastic is crystal clear and the lids are white, so they look very clean. They are perfect for open shelving where your food doubles as decoration.

The Budget Heavyweight: Gamma2 Vittles Vault

The Gamma2 Vittles Vault was originally made for pet food, but now it is used by bakers and bulk buyers everywhere.

  • The Seal: It has a lid that you screw on and off. This lid features a double gasket system, which is arguably better at keeping things airtight than the Cambro.
  • The Shape: They are stackable and designed to hold 15 to 50 pounds of product.
  • The Catch: They are ugly. You would probably stick them on the floor of your pantry or in a garage freezer. They do not look good enough to put on a display shelf.

Does “Airtight” Really Matter for Dry Grains?

You might wonder if it really makes a difference if the container is airtight when storing dry grains. The answer is yes.

Air and moisture are the enemies of bulk grains.

  1. Brown Rice: Contains natural oils. When these oils meet oxygen, they go rancid. An airtight seal prevents this oxidation.
  2. White Rice: Acts like a sponge. If the container isn’t closed tightly, humid air will make the rice stick together and can even encourage mold growth.

Protecting the rice is important so it stays safe to eat and fresh for the long haul.

The Bottom Line

If you need to store massive amounts (20lbs+), do not go to the fancy home stores.

  • For pure durability: Buy a Cambro or a Gamma2. They handle the weight without warping.
  • For the counter: Choose the OXO POP Jars. They work perfectly as airtight cookie containers or grain jars, keeping your food visible, fresh, and stylish.

Classic Meals

- Advertisement -