Home Blog Page 7

Is Ceramic Cookware Safe? The Truth Behind Non-Stick Coatings

Millions of home cooks are searching for the best non stick pans without PFAS to avoid ‘forever chemicals.’ Ceramic cookware, powered by sol gel non stick coating technology, has emerged as the leading toxic-free alternative.

You have seen the beautiful advertisements. “Pastel-colored pans for a toxic-free, non-stick utopia.” Millions of home cooks, driven by the justified fear of “forever chemicals” like PFAS and PFOA in older generations of Teflon-based products, have been throwing away their scratched skillets and asking one simple question: “Are ceramic pans safe?”

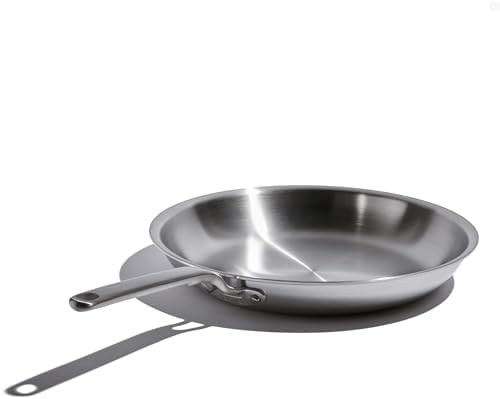
  • 12-PIECE COMPLETE COOKWARE SET: Includes a 10.5″ frying pan, 3 qt. saucepan with lid, 4.5 qt. sauté pan with lid, 6.5 qt…
  • NATURALLY NON-STICK: The kitchen cookware is designed with a slick ceramic surface that smoothly releases food with mini…
  • STOVETOP & OVEN SAFE: Built for versatility, this non-toxic cookware set is compatible with induction, gas, and electric…

To answer this question correctly, we have to put on our scientist hats and dig deeper. We have to dig deeper than the buzzwords and advertising copy and get down to the chemistry of what you are cooking your morning eggs on.

Here is the deep-dive science-backed truth about ceramic cookware, how it works, and what you are actually putting on your stove.

The Great “Ceramic” Illusion

Before we get into how it works, we have to dispel a massive illusion perpetrated by the cookware industry: ceramic pans are almost never made of actual ceramic. That means you are not cooking on a kiln-fired clay pot or a piece of pottery.

Modern ceramic pans are actually just metal pans typically featuring an aluminum or stainless steel core for rapid heat conductivity. The “ceramic” part is simply a micro-thin non-stick coating applied to the cooking surface of this metal.

Sol-Gel Non Stick Coating: The Science of Safety

But if it is not actual ceramic, what is it? The answer involves a fascinating science called Sol-Gel technology.

Manufacturers start with inorganic materials like silicon dioxide, essentially crushed up sand. They mix this crushed-up sand into a liquid solution, called a “sol.” They apply this liquid solution to the metal body of the pan and bake it at high temperatures. During this baking process, this liquid “sol” turns into a solid “gel.”

The result is a shiny and ultra-smooth surface which visually resembles ceramic glaze but has the non-stick properties of the non-stick coating.

So, Is Ceramic Pans Safe?

From a chemical and biological standpoint, the answer is a resounding yes! High-quality ceramic pans are incredibly safe and are the gold standard of non-stick cookware among health-conscious cooks around the world. Here is exactly why the Sol-Gel process is the better alternative to traditional non-stick coatings:

  • Zero Forever Chemicals: Unlike traditional non-stick pans, Sol-Gel coatings are produced completely free of polyfluoroalkyl substances (PFAS) and PTFE (Teflon).
  • No Toxic Off-Gassing: If you forget to turn off the burner and a traditional non-stick pan containing PTFE coating exceeds 500°F (260°C), the non-stick coating begins to melt and off-gas toxic chemicals a known problem called “polymer fume fever” or “Teflon flu.” Sol-Gel ceramic coatings are made of sand and can withstand temperatures of up to 800°F without melting or releasing toxic chemicals into your kitchen.
  • Heavy Metal Free: Reputable manufacturers of ceramic non-stick pans test their Sol-Gel coating formulations and can assure you they are 100% free of lead, cadmium, and other dangerous heavy metals which are known to exist in vintage non-stick paints and glazes.

The Trade-Off: Safety vs. Longevity

Although ceramic non-stick pans are the winner in the safety department, they are the loser in the longevity department due to the Sol-Gel coating being more brittle than the traditional non-stick coating.

If you look online, you will find many people complaining about the same thing: “I loved my ceramic pan, but after three months, everything I make sticks to it.” This is not a flaw in the product, but rather the laws of physics in action.

Eventually, microscopic scratches from a spatula, an abrasive sponge, or stacking one pan on top of another can cause invisible cracks in the Sol-Gel surface. Moreover, high temperatures can also cause microscopic carbonization of the cooking oil, baking this into the cracks. The pan is no longer slick and smooth; rather, it is a frustrating, sticky mess.

How to Protect Your Ceramic Investment

To ensure that your ceramic pans are chemically safe and physically non-stick for as long as possible, you must adhere to a number of strict operational guidelines:

  • Low to Medium Heat Only: The aluminum core of ceramic pans heats extremely fast. You never need to use high heat on a ceramic pan. Doing so only results in the permanent degradation of the non-stick surface through the carbonization of the cooking oil.
  • No Metal Utensils: Never use a metal fork or whisk on a Sol-Gel surface. Only use a wooden, silicone, or plastic spatula.
  • Beware of Thermal Shock: Never run a hot ceramic pan and then immediately run it under cold water. The rapid change in temperature can cause the metal core to warp and the stiff ceramic surface to crack and flake off.
  • Hand Wash Only: Even if the box says “dishwasher safe,” don’t believe the hype. The harsh, abrasive chemicals and hot water forced into the dishwasher will destroy the Sol-Gel coating quickly. A soft sponge and dish soap are all you need.
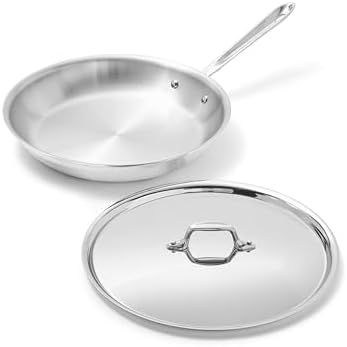
  • SET INCLUDES: 8″ frying pan, 9.5″ frying pan, and 11″ frying pan
  • ATK AWARD-WINNING DESIGN: Valencia Pro recognized by America’s Test Kitchen and Good Housekeeping for exceptional perfor…
  • CUTTING-EDGE CERAMIC NONSTICK: Infused with diamonds, GreenPan’s metal utensil safe ceramic nonstick offers remarkable d…

The Final Verdict

Ceramic cookware is a brilliant, chemically safe alternative to traditional non-stick cookware. With the use of Sol-Gel technology, cookware manufacturers have provided a means to cook sensitive foods without the fear of ingesting toxic chemicals or breathing noxious fumes. It is an exercise in compromise, sacrificing the lifespan and heft of traditional cast-iron cookware for the instant, toxin-free, and feather-light convenience of a product derived from the sands of the earth itself.

Respect the Sol-Gel coating, and reasonable temperatures on your stovetop will make ceramic cookware one of the safest tools available to you.

Tupperware Quick Chef Pro System Review: Is a Premium Manual Chopper Worth It?

Most home cooks assume that efficient food prep requires a power cord and a heavy motor. When analyzing the Tupperware Quick Chef Pro System, the immediate barrier to entry is the price. It costs as much as a mid-tier electric food processor. To determine if this manual chopper justifies its premium price tag, we must analyze the mechanics of rotary chopping and the specific workflow advantages it offers over electric alternatives.

The Myth of Electric Superiority

There is a widespread belief that electric food processors are universally superior for chopping. The reality is that high-speed electric motors often lack nuance. If you process delicate ingredients like basil, cilantro, or onions in a standard electric machine, the high RPMs crush and bruise the cell walls, releasing bitter enzymes and turning your ingredients into a watery mush.

A manual crank system allows for absolute control. You dictate the exact speed and rotational force, ensuring that the stainless steel blades cleanly shear through the food rather than pulverizing it.

The Engineering Reality: Rotary Mechanics and Emulsions

The Quick Chef Pro operates on a geared crank handle. This mechanical advantage multiplies your physical effort, spinning the internal attachments at high speeds with minimal wrist strain. The system ships with two primary tools: a sharp, round stainless steel blade for chopping, and a plastic whisk attachment for whipping.

The true engineering standout of this system is the integrated funnel lid. When making emulsions like mayonnaise or vinaigrettes, oil must be added drop by drop while simultaneously whisking vigorously. Doing this by hand requires two people or exceptional coordination. The Quick Chef Pro’s funnel allows you to pour the oil in once; it then slowly drips the liquid into the chamber at the exact correct rate while you simply turn the handle.

User Experience Analysis: Cordless Workflow

From a workflow perspective, this device eliminates the hassle of finding an open outlet and dealing with heavy, cumbersome machinery. It features a crucial anti-slip base, preventing the unit from sliding across your granite countertops when you are aggressively cranking through hard vegetables like carrots.

Long-term users consistently praise its off-grid utility. Because it requires zero electricity, it is a highly effective tool for RV owners, campers, or anyone working in a kitchen with limited outlet space. While the manufacturer marks the BPA-free plastic bowl as dishwasher safe, we highly recommend hand washing the blade component. Exposing thin stainless steel edges to harsh dishwasher detergents and high-heat cycles will rapidly degrade the cutting edge.

The Financial Verdict on the Tupperware Legacy

Should you spend a premium on a manual food processor? If you only need to chop an onion once a month, you are better off buying a cheap pull-string chopper.

However, cheap manual choppers utilize fragile plastic gears that strip after a year of heavy use. With the Quick Chef Pro, you are paying for Tupperware’s proprietary, high-density plastics and the advanced funnel/whisk ecosystem. If you frequently make fresh salsas, whip heavy cream, or demand a heavy-duty prep tool that will survive decades of cordless use without the motor burning out, this system remains a highly functional piece of kitchen engineering.

Dishwasher Powder vs. Gel: The Eco-Friendly Guide to Cleaner Dishes

You’ve probably noticed that dishwashing detergent comes in more forms than ever: powder, gel, and pods. But if you’re trying to make greener choices in your kitchen, you might be wondering which one is actually better for the planet? When looking at dishwasher powder vs gel, the environmental impact often comes down to packaging and chemical composition.

Let’s start with powder. It’s old-school, sure, but don’t underestimate it. Powder detergents often come in cardboard boxes less plastic, less waste. You control how much you use, and they tend to have fewer added fillers. One downside? They can clump in humid climates, which isn’t ideal unless you live somewhere dry or keep them sealed tightly.

Gels are all about convenience. They dissolve easily, and you can adjust the amount based on your needs. However, most gels are sold in plastic bottles. That means more packaging waste, and depending on the brand, some contain dyes or synthetic fragrances. Not exactly a win for eco-friendliness.

Now, pods or tablets are everywhere. They’re pre-measured, easy to store, and very popular for their no-mess appeal. But many come wrapped in PVA (polyvinyl alcohol), a water-soluble plastic. Some research questions whether PVA fully degrades in water systems. Plus, pods are often over-packaged and priced higher.

So which one’s the best for eco dishwashing? Well, it depends on your priorities. Want less packaging waste? Powder is probably your best bet. Prefer precision without plastic bottles? Tablets might work just check if they’re PVA-free. Still love gels? Look for brands using recycled plastic or bulk refill options.

Eco-friendly choices aren’t always black and white. Sometimes, it’s about choosing better rather than perfect. That might mean switching to a cardboard-packaged powder or just being more mindful of how much detergent you use.

No need to overhaul your whole routine just take a closer look at what you’re putting in your dishwasher. Small changes do add up, especially when they become habits.

How to Soften Hard Brown Sugar: The Marshmallow vs. Bread Trick

We’ve all been there: you reach for the pantry to bake cookies, only to find a solid brown sugar brick that seems impossible to scoop. Don’t throw it away softening hard brown sugar is easier than you think.

It’s really frustrating. Before you go trying to pry it apart with a butter knife and end up breaking your bowl or hurting your wrist, just take a moment to breathe.

If you’re looking at a hard block of brown sugar and wondering how to soften it without messing up your recipe, the answer is probably already right there in your kitchen. Let’s take a look at the two most common pantry tricks and one quick microwave rescue to find out which one really keeps your cookies safe.

Why Does This Keep Happening?

To solve the problem, it’s useful to know why your sugar won’t cooperate.

Brown sugar is basically white sugar combined with molasses, and molasses contains quite a bit of water. If you leave a bag open or put it in a container that’s not completely airtight, the water inside will evaporate. As the moisture dries up, the sugar crystals start sticking to each other.

When your brown sugar gets hard, it’s not bad it’s just dried out. You just need to give it some water.

Method 1: The Classic Bread Trick

This is something your grandmother might have used and it actually works because of science.

  • How to do it: Grab a slice of fresh bread regular white bread works best since it doesn’t have strong flavors like rye or sourdough that might mix in. Then, just put it right inside your airtight sugar container. Close the lid firmly and leave it alone.
  • Why it works: The dehydrated sugar soaks up the moisture in the fresh bread, kind of like a sponge.
  • The Timeline: Check back in about 12 to 24 hours. The sugar will turn soft and easy to scoop once more, while the bread will become stale and as hard as a rock.
  • The Catch: You have to remember to take the bread out after a day or two. If you leave it in the pantry for weeks, it’ll get moldy and spoil the whole batch of sugar.

Method 2: The Marshmallow Trick

If adding a slice of sandwich bread to your baking stuff seems odd or messy, marshmallows make a great and neat option instead.

  • How to do it: Just throw two or three big, fresh marshmallows into your brown sugar container and close it up tight.
  • Why it works: Marshmallows, like bread, actually hold a lot of moisture inside. The sugar will pull the moisture out gradually as time goes by.
  • The Timeline: This method takes a bit more time than the bread trick. It usually takes about 24 hours for noticeable softening to happen.
  • The Catch: If your marshmallows have been in the cupboard for six months and have gone stale, this trick won’t do the job. They should be fresh and squishy.

The “I Need It Right Now” Emergency Fix

Both the bread and marshmallow tricks take some patience. If you’re in the middle of a recipe and need soft sugar right away, the microwave is the way to go.

  1. Put the hard chunk of sugar into a bowl that’s safe to use in the microwave.
  2. Place a damp paper towel over the bowl, making sure it’s not too wet.
  3. Heat in the microwave at medium power for 15 seconds at a time.
  4. After each burst, use a fork to check and break it apart.

Be careful: Do not microwave it too long or on high power. If the sugar gets too hot, the molasses will melt and you’ll end up with a sticky, boiling syrup that’s no good for baking.

A Quick Look at Your Options

MethodTime NeededMess Factor & RiskBest For
The Bread Trick12 – 24 hoursCan get messy (might crumble or mold)Prepping for baking the next day
The Marshmallow Trick24+ hoursLow mess (clean and tidy)Long-term pantry storage
The Microwave30 – 60 secondsMessy (high risk of melting)A baking emergency and quick fix

So, choose the trick that fits your time, mess tolerance, and what you need the most.

Choosing the Right Trick

If you have some time, the bread trick is the best way to soften a rock-hard brick of sugar and bring it back to life fast. It lets out moisture quicker and in a better way than a marshmallow does.

If you’re looking for something you can just throw in a jar and leave alone for a month without any mold worries, marshmallows are the cleaner, safer choice.

The best way is to just stop it before it starts. If you keep your sugar in a good airtight container with a terracotta moisture disc, it won’t dry out, so you won’t have to use the bread trick ever again.

Reviewing the Best Silicone Spatulas for Your Kitchen (Rubber Scrapers)

There are some rubber scraper kitchen tools that we use so infrequently we feel we do not need them at all until the day your favorite spatula snaps in half while mixing a heavy dough.

I was preparing dessert one afternoon and I pushed my spatula too forcefully and it bent. Like, completely lost its shape. Flopped over limply. I was actually disappointed because I thought I had a good one. Apparently, not all spatulas are created equal. Materials matter. And when you’re aiming for clean and modern kitchen style, the difference is huge.

If you’re reading this, you’re probably:

  • Renovating your kitchen,
  • Settling into a new place and needing new utensils, or
  • Just like me, broken your faithful old spatula.

In either situation, this article can help you choose the right one. A good silicone spatula is not just functional it’s deeply satisfying to use. That smooth glide along the bowl, that perfect edge that gets every last bit that’s what we’re aiming for.

Silicone Spatulas That Actually Work: personal favorites

And here are my personal favorites. You can list your own too! To keep this guide short and handy, I’ve given brief descriptions so that you get the gist of each and can do your own additional research if you’d like.

  1. GIR Premium Silicone Spatula: The most vital characteristic in a spatula is pliability, yet it also needs to be durable, so it won’t bend under pressure. This one nails both. Bonus: it comes in a rainbow of colors because pretty tools make your kitchen happy.
  2. OXO Good Grips Silicone Spatula: You’ve probably seen this one bouncing around. What’s special about it? It feels nice in your hand. It’s ergonomic, easy to hold, and strangely satisfying to grasp.
  3. Tovolo Flex-Core All Silicone Spatula: If you like something a little stiffer, this is a great option. The core is rigid, but the edges are flexible, offering more control and a balanced feel kind of like the yoga pose of spatulas.
  4. Le Creuset Craft Series Spatula: If you’re someone who likes to match your kitchen tools to your kitchen aesthetic (guilty), this is the one. The handle is sturdy and feels premium, and, of course, it looks nice too.
  5. StarPack Basics Silicone Spatula Set: If you’re on a budget, this set is a smart investment. It’s affordable, and you get multiple spatulas. I actually have one that I use for baking and one that I only use for sauces it’s just easier and more efficient that way.

What to Look for in Rubber Scraper Kitchen Tools

  • Heat Resistance: You’re stirring over a hot stove you don’t want your spatula melting. Make sure it’s able to handle high heat.
  • One-Piece Design: No seams means no food residue getting stuck. It’s easier to clean and way more hygienic.
  • Looks Matter (Kind Of): Okay, maybe not essential, but if you’re building a modern kitchen, matching, stylish tools do make a difference.

There is a satisfaction in using the proper tool for the job especially when it also manages to be visually appealing. The next time you’re scraping the sides of the bowl for that final bite of cookie dough or mixing whipped cream into melted chocolate (mmm), a quality silicone spatula will get the job done more effectively, simply, and neatly.

Truly, I never thought I’d be this stoked about rubber scraper kitchen tools but here we are.

Advanced Coffee Terms Every Home Barista Should Know (Glossary Level 2)

Introduction

You’ve got the basics down espresso, grind size, and crema are no longer alien words. Now’s the time to step up your home barista game by mastering advanced barista terminology. This Level 2 glossary will introduce you to intermediate and technical coffee jargon that will take your brewing to the next level. If you’re experimenting with manual brewers or mastering your espresso shots, these terms will help you understand the art behind every cup.

Channeling

Channeling occurs when water passes unevenly through the coffee puck during espresso extraction. It is most commonly due to poor tamping or uneven distribution of grounds. Channeling produces under- and over-extraction in the same shot, affecting flavor and crema texture.

Avoid it by spreading your grounds evenly and using consistent tamping pressure.

Dose

Dose refers to the amount of ground coffee used for one shot of espresso, typically measured in grams. A common starting point is 18 to 20 grams for a double shot. Adjusting your dose changes the flavor intensity and extraction time, so it’s essential to dial it in based on taste.

Yield

Yield refers to the amount of liquid espresso that finds its way into your cup. It is typically measured in terms of grams or milliliters. You can establish a standard ratio, say 1:2—20g dose to yield around 40g of espresso. Measuring the yield helps you be consistent and balanced with your brews.

Brew Ratio

Brew ratio compares the amount of coffee to the yield of the beverage. For espresso, this is usually 1:2 or 1:2.5, and for pour-over might be 1:15. This ratio modifies strength and mouthfeel. It is essential to know brew ratios in making recipes.

Total Dissolved Solids (TDS)

TDS measures the level of the soluble content of the coffee that ends up in your cup. TDS is usually expressed as a percentage and read from a refractometer. While not absolutely required for beginners, understanding TDS can help advanced home baristas improve clarity and balance of flavors.

Coffee Accessories on Amazon

Extraction Time

Extraction time is how long water interacts with the coffee grounds. For espresso, this usually falls between 25 to 30 seconds. Timing your shots ensures you’re neither over- nor under-extracting your coffee, both of which can drastically alter flavor.

Pre-infusion

Pre-infusion is a preliminary low-pressure phase of espresso brewing. It allows the coffee puck to become saturated evenly before applying the entire pressure. The technique reduces channeling and provides balanced extraction, especially with fresh, very fine coffee grinds.

Blooming (Extended Concept)

You may already know that blooming releases gases off freshly ground coffee. On a more technical level, the bloom phase can be manipulated in terms of time and amount of water to regulate flavor extraction. Larger bloom phases extract more sweetness and body.

Agitation

Agitation refers to physically disturbing or moving the coffee grounds while brewing—stirring, swirling, or shaking. Used with pour-over, AeroPress, and French press brewing, agitation helps to induce extraction but needs to be controlled to avoid bitterness.

Retention

Retention refers to coffee grounds left behind in your grinder after a grind. Too much retention will lead to inconsistent doses and stale grinds in your subsequent brew. Baristas at home purge a minimal dose of coffee with every session to maintain consistency.

The farther you go on your home barista journey

Stepping into the world of fancy coffee lingo doesn’t mean everything gets confused it means your brewing becomes more intentional. Learning these words gives you the power to troubleshoot problems, refine techniques, and produce more tasty and uniform offerings. The farther you go on your home barista journey, so will your terminology and that’s half the fun.

Classic Meals

What Is a Dosing Funnel and Do You Really Need One?

Dosing coffee into a portafilter can look simple-looking until coffee grounds start flowing all over the place, wasting precious espresso and making a mess....
- Advertisement -