Home Blog Page 26

My Oil Sprayer Stopped Working: How to Deep Clean and Unclog the Nozzle

You know, it’s just the worst when you’re in the kitchen. You go to grab your spray bottle of oil to prep a pan, give the trigger a squeeze, and… Nothing happens.

Home » Page 26

Or even worse, you get a sad, solid stream when you’re expecting a nice mist.

Before you throw this away and just get a new one, hold on a sec. Your sprayer genuinely isn’t broken. It’s just clogged.

Oil is thick. After a while, it dries into this really gummy stuff, kind of like glue, and that clogs up the tiny holes in the nozzle. No matter if you’ve got a Misto, an Evo, or just a plain old glass bottle, this guide will walk you through how to clean an oil sprayer and get it working like new again in about 10 minutes.

Why did the mist just quit?

You gotta figure out what’s wrong before you can make it right. Usually, clogged oil misters stop working right for just a couple of reasons:

  1. Congealed Oil: If you don’t use the sprayer every day, the oil inside the nozzle tube can dry up and get all hard and gunked up.
  2. Particulates: If you used dried herbs, garlic, or chili flakes in your oil, a little bit of something probably got stuck in the spout.

Okay, so here’s how we’re going to get rid of that gunk and clear things up. It’s a simple three-step plan.

Step 1: The “Hot Soap” Flush

Usually, if your sprayer isn’t misting it’s just sputtering or streaming this quick fix takes care of it about 90% of the time.

  1. Empty it: Pour the oil that’s left in the bottle back into your main container or into a cup.
  2. Add Heat: Just fill it up with the hottest water from your tap. Don’t use boiling water, though, because that can mess up the plastic seals.
  3. Soap it up: Just add a tiny bit of dish soap, say, one or two drops. Dawn is a good choice. Grease fighters work best here.
  4. Shake: Just make sure the bottle is closed tight after you shake and spray. Give it a real good shake.
  5. Spray: Next, just spray that soapy water right into your sink. Just keep on spraying until you notice the resistance feels different and the mist starts looking normal again.
  6. Rinse: Once you’ve got all the soap out, just dump the dirty water, fill it up with some clean, warm water, and spray it down again to make sure all the suds are gone.

Step 2: The Vinegar Deep Clean

Okay, so for those really tough clogs, we’re going to move on to Step 2. If you didn’t get results with hot water, it’s probably because the oil residue got super hard, kind of like varnish. You need an acid to break it down.

  1. Mix: Go ahead and mix the solution: put 1/2 cup of hot water and 1/2 cup of white vinegar into the bottle.
  2. Soak: Shake it up, then let it rest for about 15 minutes. The vinegar helps get rid of those sticky oils.
  3. Spray: Just spray all that vinegar right into the sink. That tartness often gets rid of really tough clogs that soap just won’t budge.

Step 3: The “Needle” Surgery (Last Resort)

If nothing’s coming out, you probably have something stuck in the nozzle opening, like a bit of rosemary or a piece of garlic skin.

  1. Find the hole: Check out the sprayer nozzle. You’ll spot a tiny pinhole, and that’s where the oil comes out.
  2. Poke it: Grab a needle or a safety pin. Just poke the hole really gently. Don’t force it too much, or you could make the hole bigger and mess up the spray pattern for good.
  3. Flush: Do another “hot soap flush” right after you poke it to really get that debris out.

Maintenance Tips: Prevent Future Clogs

Keeping your nozzle clear is simpler than you think. A little everyday care can go a long way.

  • Don’t put too much in: If you’ve got a pump sprayer, leaving some room for air is really important so it can build up pressure.
  • Clean it every month: Even if everything looks good, make sure to do a “Hot Soap Flush” around every 4 to 6 weeks.
  • Skip the unfiltered stuff: If you’re into garlic oil, just grab some that’s already infused. Or, if you’re making your own, make sure to strain it through a cheesecloth before it goes into the sprayer.

The Bottom Line

Just because a nozzle is clogged, it doesn’t mean the product itself is broken; it just means it needs a little upkeep. A bit of hot water and vinegar generally does the trick to change a stream back into a mist.
Why I Switched to Refillable Oil Sprayers for My Air Fryer (And Ditched PAM)

When I picked up my first Air Fryer, I honestly thought it was a magic machine. I simply put the dry potatoes in, hit a button, and then it was just a waiting game.

The result? Pale, dry, sad potatoes. That’s what they were.

I figured out pretty fast that “oil-free” cooking isn’t a real thing. You really need some oil to get good heat transfer and that amazing golden crunch. So, I just went to the pantry and grabbed a can of PAM.

Oops, that was another slip-up on my part.

If you’re still spraying that store-bought aerosol stuff in your nice Ninja or Cosori, you could be messing it up bit by bit. I switched to a refillable oil sprayer for my air fryer, and I think you should too. Here’s why.

The Chemistry: Why Aerosols Ruin Air Fryers

So, here’s the deal with aerosols and air fryers: they just don’t mix. It’s a chemistry thing, really, and it can mess up your air fryer over time.

That’s a common thought, but PAM isn’t just for non-stick pans. It’s actually a good choice for any type of cookware where you want to prevent food from sticking, like stainless steel or cast iron. But air fryer baskets are just different.

  • The Problem: You know, a lot of those cooking sprays you find in stores? They’ve usually got soy lecithin in them and some chemical propellants, stuff like butane or propane, just to push the oil out of the can.
  • The Result: So, here’s the thing: when you heat these chemicals up to really high temperatures, like 400°F (that’s 200°C) in an air fryer, they basically polymerize. That sticky, gummy film on your basket? Yeah, soap and water won’t touch it.

When you scrub harder to get rid of that tough stuff, you’re actually scrubbing away the non-stick layer.

You know, for an air fryer, this refillable oil sprayer is pretty cool because it just needs one thing: pure oil. No propellants. No lecithin. No sticky residue.

The Taste Test: The “Crisp” Factor

It’s not just about keeping your appliance safe; there’s also the taste to consider. You can use your good oils with these refillable sprayers.

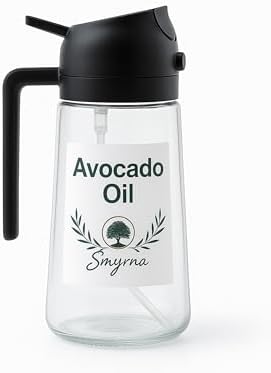
  • Avocado Oil: For air frying, avocado oil is my pick. It has a high smoke point of 500°F. This means it won’t burn or get a bitter taste when you cook with high heat.
  • Olive Oil: Olive oil is solid for cooking, especially if you’re keeping it under 350°F. It really brightens up vegetables with its unique taste.

Whenever I cooked with those aerosol cans, my food always ended up tasting a bit like chemicals. Using a refillable spray bottle means my broccoli actually tastes like broccoli, and my wings always come out nice and crispy. Pure oil just transfers heat way better than that chemical foam stuff.

Which Sprayer Style is Best for Air Fryers?

It really depends on what you like, but generally, a continuous mist sprayer works best for air fryers. They give a nice, even coating of oil without making a mess, which helps your food cook up perfectly crispy.

Alright, after giving a few different styles a shot, here’s what I found to be the most successful when it comes to the air fryer.

1. The Trigger Sprayer (Like the Evo)

  • Why: Air fryer baskets are wide. When you pull the trigger on one of those sprayers, it shoots out a stream that spreads really wide, like a fan. That means you can cover a big area really quickly. It makes it easy to coat a bunch of fries at once.

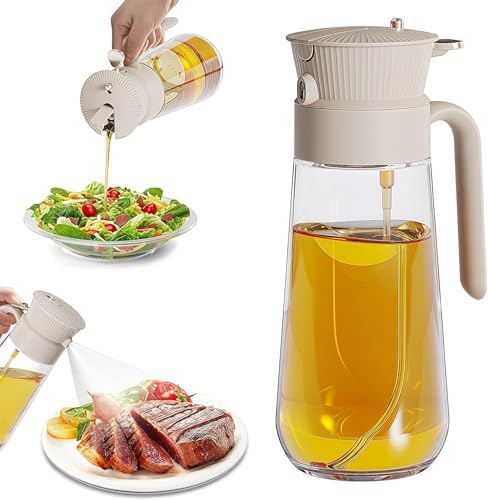
2. The Hybrid/Glass Bottle (Like the YARRAMATE)

  • Why: These 16oz bottles are just perfect if you grab your oil in bigger sizes, like those huge avocado oil bottles from Costco. You won’t be refilling them endlessly, and if they get a little greasy by the stove, they’re a breeze to wash.

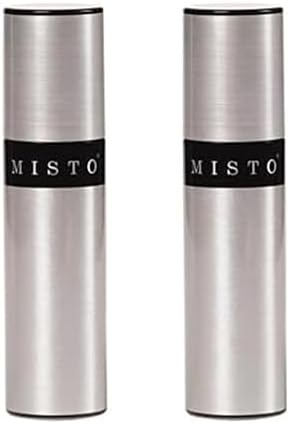
3. The Pressure Pump (Think Misto)

  • Why: This is great for baking things like muffins or using silicone molds in your air fryer because it puts out a light mist instead of globbing on too much oil.

Pro Tip: The “Shake and Spray” Technique

If you want your fries to taste like they came from a restaurant, make sure to spray more than just the top layer when you’re using a refillable sprayer.

  1. Drop the fries in that basket.
  2. Spray liberally.
  3. Give the basket a good shake to get those fries moving around.
  4. Spray again.

This way, every single fry gets a tiny bit of oil all over it, and that’s the secret to making them crunchy instead of soggy.

The Bottom Line

So, what it all comes down to is this: using a refillable spray bottle kept my air fryer basket from peeling, which also made my food taste better.

It’s cheaper over time that way (buying oil in bulk versus expensive cans) and are better for you. If your air fryer is a cherished appliance, consider this: ditch those aerosol sprays.

We’ve created an article where you can find all the products under the The 4 Best Oil Sprayers for Air Fryers brand in one place, allowing you to browse all of them.

Baker’s Signature Liners Review: Is The #1 Best-Selling Air Fryer Accessory Actually Safe?

Everyone loves their air fryer, but we all agree on one thing: cleaning the basket is the worst.

  • HEALTHY MATERIALS – Our air fryer paper liners are crafted from raw wood with a silicone coating. They are unbleached, B…
  • EASIER CLEANUP & TIME SAVINGS – Enhance your cooking with our airfryer paper liners. These parchment paper air fryer ens…
  • NATURAL UNBLEACHED ASSURANCE – Use our unbleached, natural paper liners for air fryer basket for confident cooking. Keep…

Cleaning out the wire mesh, especially when it’s caked with burnt crumbs and caramelized grease, just takes all the fun out of cooking. It’s probably no surprise, then, that Baker’s Signature Air Fryer Paper Liners are crushing it as the #1 Best Seller in Baking Parchment, moving more than 40,000 units every month.

But as an analyst, I have to ask: If an air fryer works by circulating hot air, does covering the bottom with paper ruin the cooking process? Or even worse, could it start a fire?

We really looked into the “Bacon Test,” how air moves in there, and that super important safety heads-up you gotta follow before you even think about putting paper in your machine.

The Promise: “Spotless” Cleanup

It’s pretty straightforward. You just put the paper in, cook, and then get rid of the paper when you’re done. No need to scrub.

Does it work? User Brian Washington says it passed the ultimate stress test: bacon.

“These are absolutely amazing… After the cooldown just throw in the trash, the air fryer remained spotless!”

User Adriana mentioned that the 8-inch square size is just right for typical baskets. She loves that it keeps food from sticking, which saves a lot of time on cleanup. This $10 accessory is a game-changer if you’re sick of soaking your basket in soapy water each night.

The Analyst Warning: The “Flying Paper” Effect

But you can’t just toss these in and leave them. We’ve got a physics problem on our hands. Air fryers work by blowing hot air around with strong fans, and these liners are just light paper.

User Dan Scott brought up a really important point that a lot of first-time users just don’t pick up on:

“They are very light and the air fryer fan can and will fold them over while cooking.”

Watch out! If that paper goes flying, it could hit the heating element and cause a fire.

The Safety Rule:

  • Don’t pre-heat your air fryer with only the paper liner inside.
  • Make sure you always have enough food to keep the paper from flying away.
  • Dan Scott even suggests using “air fryer magnets” to stop the liners from moving around.

Does It Ruin the “Crisp”?

The next thing we need to think about is airflow. So, if you stop up the holes at the bottom of the basket, will your food end up all mushy?

Surprisingly, most people say it barely makes a difference. Dan Scott mentioned that even though they make cleaning up a breeze, they “don’t affect the cooking process much at all.”

You might lose a little airflow at the bottom, but honestly, a clean basket is totally worth it for most things you’re cooking, like chicken wings, veggies, or bacon.

Material & Fit

  • The Shape: These are 8-inch squares, which is perfect for square baskets in popular models like Cosori or Instant Vortex.
  • Durability: Adriana thinks it’s pretty durable; the material holds up to heat and doesn’t rip apart easily.

Verdict: Is It Worth It?

Rating: 4.6/5

Buy It If:

  • You hate scrubbing: This stuff actually puts a barrier on the metal mesh so grease just won’t stick, meaning cleaning up is super quick.
  • You cook messy foods: If you’re cooking anything messy, like sticky marinades or greasy bacon, this thing is a must-have.
  • You have a square basket: This shape is designed to fit those 5-8 quart square baskets just right, so you won’t have any curled-up corners.

Skip It If:

  • You pre-heat empty: Make sure you don’t pre-heat these empty. If you just leave them loose in the machine while it’s heating up, they’ll fly right into the heating element.
  • You want 100% airflow: If you’re really aiming for the absolute crispiest dry fries, where every bit of airflow counts, going with bare metal is still a little better for getting that air all around.

The Bottom Line Honestly, for what a sandwich costs, these liners are a steal because they completely get rid of what bugs us most about air frying. Remember this key thing: always make sure the liner is full before you turn on the fan.

We’ve created an article where you can find all the products under the The 4 Best Oil Sprayers for Air Fryers brand in one place, allowing you to browse all of them.

DeLonghi Stilosa & Dedica Portafilter Upgrade Guide: Sizes & Top 3 Picks

The DeLonghi Dedica, models EC680 and EC685, along with the Stilosa EC260, are really fantastic ways to get started with making espresso. They warm up quickly, they’re small, and you won’t break the bank getting one.

  • 【Compatibility】 This two ears portafilter 51mm fits Delonghi ECP3420/BCO430/EC260 etc 2 ears coffee machine. Please feel…
  • 【Filter Basket Included】Stainless steel 51mm filter basket included and compatible with Delonghi’s stock 51mm filter bas…
  • 【Extraction Improvement】the bottomless design can help observed the flow column, flow rate, color, flow column stripes, …

But, there’s a big problem: the portafilter it comes with from the factory.

It just feels so light, and those plastic parts? Ugh. The worst part is probably those “pressurized” baskets, making you think you’re getting good crema when it’s totally a fake.

  • 【Compatibility】 This two ears portafilter 51mm fits Delonghi ECP3420/EC155/BCO430/EC260 etc 2 ears coffee machine. *×Not…
  • 【Filter Basket Included】Stainless steel 51mm filter basket included and compatible with Delonghi’s stock 51mm filter bas…
  • 【Extraction Improvement】the bottomless design can help observed the flow column, flow rate, color, flow column stripes, …

If you’re serious about taking your coffee game up a notch from just making a drink to really getting into home barista stuff then getting a bottomless portafilter is the key first step.

Alright, so you’re looking for the lowdown on DeLonghi Stilosa portafilter sizes, what works with what, and which three are the best according to folks who actually use them. Here’s what you need to know.

The Magic Number: 51mm (But Be Careful)

It’s pretty common for people to get mixed up here because commercial machines usually take 58mm, but Breville went with 54mm. DeLonghi does things its own way.

  • Diameter: You’ll want a 51mm diameter for your DeLonghi Dedica and Stilosa.
  • The “Ears”: Folks really miss the mark here. You just can’t go buy any 51mm handle. So, basically, depending on your machine, you’ll need the right kind of portafilter.
    • 2 Ears: If you’ve got something like the ECP3420, Stilosa EC260, or BCO430 model.
    • 3 Ears: If you have a Dedica EC680/685, then you’ll need a portafilter that has 3 ears.

Important: It’s really important to always make sure you’re checking your specific model number. Just a heads-up about the Stilosa/ECP stuff: the items I’m talking about here are all the 2-Ear models. They’re made for machines like the Stilosa EC260, the ECP3420, and others that are pretty much the same.

Heads up, everyone: don’t go buying 51mm accessories if they’re supposedly for “La Pavoni” lever coffee makers. You should always make sure the ear count matches your machine.

Why Even Bother with Bottomless?

You’ve probably seen those videos, right, where the espresso, all thick and tiger-striped, just drips right out of a naked portafilter. It might look pretty neat, but really, it’s just a tool for figuring things out.

1. Diagnosing the Shot When you use the portafilter that has that stock spout, you really can’t tell what’s going on in there. When your water makes a hole right through the coffee, you won’t even notice it because the spout covers it up. A bottomless filter really shows you everything. Someone mentioned it lets you “find the defects and errors before extraction,” which is a pretty good way to put it.

2. Real Crema vs. Foam The original DeLonghi handle uses a tiny pinhole to shoot coffee through, which is how it makes those frothy bubbles. That’s not actually crema, it’s just foam. When you use a bottomless portafilter, it’s got a non-pressurized basket. This helps give you a really rich, oily, and authentic crema.

3. Cup Clearance Both the Stilosa and Dedica are pretty compact machines. Taking off the spouts gives you another inch, which means you can fit a taller mug or a scale where you pull your shot.

The Hidden Cost: Your Grinder

Hold on before you grab that bottomless portafilter. Here’s the hard truth nobody tells you: it just doesn’t work with pre-ground coffee.

If you’re using coffee that’s been pre-ground at the store or a cheap grinder with blades, the water will rush through it too quickly, and you’ll end up with coffee spraying all over your kitchen. To use this upgrade, you’ll need a burr grinder that can grind really fine. That fine grind is what creates the right pressure.

Best 3 Portafilter Upgrades for DeLonghi (2-Ear Models)

So, if you’re looking at machines like the Stilosa EC260 and ECP3420, these are the top picks, according to actual users.

1. The “Workhorse” Stainless Steel (ABS Handle)

Best For: Durability and Easy Cleaning This is a pretty basic, no-frills option. It’s got a sturdy feel and gets the job done. This 51mm Bottomless Portafilter from CAPFEI is a real favorite because it’s built to last and super easy to keep clean. It’s got a head made of good quality 304 stainless steel, which is safe for food, and the handle is ABS plastic that you can take off.

  • User Verdict: Someone said it was “pleasantly chunky,” which they liked, and that the “handle is shiny and comfortable,” fitting just right in their hand.
  • Performance: This makes bigger cups of espresso. Someone with a DeLonghi EC702 talked about using a “4 cup basket,” which is plenty deep enough (1.25 inches) to get a really good shot.
  • Honest Feedback: So, you know, some folks have mentioned it’s a little snug or tough to get in there sometimes. But everyone seems to agree that it’s much better for it to be a bit tight than too loose. It definitely works as intended for diagnosing shots.

2. The “Classic Wood” Upgrade

Best For: Aesthetics and Feel If you’re looking to upgrade your coffee setup with something that really looks and feels top-notch, the CAPFEI Wooden Handle Portafilter is definitely a great choice. It swaps out that plastic feel for a nice, smooth wooden grip.

  • User Verdict: People really like how it looks, saying it gives their DeLonghi ECP3420 a “sleek aesthetic boost.” Someone who reviewed it mentioned that the handle “feels premium,” which apparently makes the machine seem way more expensive than it actually is.
  • Performance: It really does make good coffee. A user mentioned they could “whip up a delicious cappuccino with ease,” which really upped their coffee game.
  • Honest Feedback: Wood is a natural material, so sometimes you’ll find little imperfections. Someone mentioned a little crack in the wood, but they just decided to shrug it off since everything else worked just fine. Someone else just took out the basket that came with it and put in a fancy IMS one instead, but they kept the original handle for everyday things.

3. The “Value” Pick

Best For: Beginners on a Budget These are perfect for beginners trying to save some cash; they’re way better deals than the original manufacturer parts. They’re pretty much the same two-ear design compatible with the ECP series, BCO series, or Stilosa models.

  • The Learning Curve: It’s probably going to be a bit messy when you first start learning this stuff. As the product description fairly warns, “Leaking and splatter…” This is what people mean when they talk about espresso channeling. It’s not the tool’s fault; it’s the coffee telling you to grind finer.
  • Pro Tip: If you see a leak where something is sealed, try giving it another twist to really secure it. Someone suggested trying to turn it to the “4 or 5 o’clock position” instead of the usual 6 o’clock to get a good, tight seal.

The Final Verdict

If you want to improve your DeLonghi machine, getting a new portafilter is the best thing you can do.

  • Choose the ABS Handle if you need a handle that can really take a beating and is super easy to clean.
  • Choose the Wooden Handle if you want that premium barista look.

Okay, here’s the deal: you gotta grind finer, make sure you tamp evenly, and then you can truly enjoy that authentic crema.

YARRAMATE 2-in-1 Review: Why 40,000 People Buy This Hybrid Bottle Every Month

It is rare to see a simple kitchen gadget climb to #6 in the entire Kitchen & Dining category, beating out major appliance brands.

But the YARRAMATE Glass Olive Oil Sprayer is doing just that, moving over 40,000 units a month.

Why the frenzy? Because it solves a specific problem that plagues home cooks: Counter Clutter. Usually, you need two bottles: a “cruet” (pourer) for dumping oil into a pan, and a “sprayer” for air frying or salads. This device claims to do both.

We analyzed if this “transformer” gadget actually works, or if it is just a gimmick that does two things poorly.

The Innovation: The “Switch” Mechanism

Most oil sprayers (like the Misto or Evo) are single-purpose tools. If you need 2 tablespoons of oil for a stir-fry, you have to unscrew the top or pump the trigger 20 times. It’s annoying.

The YARRAMATE features a unique “Slide Switch” on the handle.

  • Mode 1 (Pour): Opens the nozzle to let oil flow freely like a standard dispenser.
  • Mode 2 (Spray): Engages the pump to mist the oil.

User Jodi Eppler explains why this became a daily essential for her family:

“With the slide of a button, it switches easily between spraying and pouring… whether we’re cooking in a skillet or lightly spritzing vegetables before roasting.”

Analyst Note: This 2-in-1 functionality is the key selling point. It effectively replaces two separate items on your counter with one 16oz glass vessel.

The “Mist” Test: Reality vs. Expectations

Does it spray like a pressurized aerosol can (like PAM)? No. It is important to manage expectations here.

User Mariah, who has used it for over a year without clogging issues, clarifies the output:

“It does so more of a ‘spritz’ versus a ‘mist’ like you would get with an aerosol can, but that isn’t a big deal.”

This is a critical distinction.

  • It creates a “Fan” pattern: Excellent for coating chicken, veggies, or bread (as user Tammy Sparks loves for her baking).
  • It is NOT a fog: If you need microscopic coverage for a delicate baking mold, an aerosol can is still superior. But for cooking, this “spritz” is perfect.

Capacity & Design

  • Size Matters: Standard sprayers hold a tiny 2-3oz of liquid. The YARRAMATE holds 16oz (470ml). You can dump half a bottle of olive oil in there and forget about refilling for weeks.
  • The “Drip” Factor: A common failure of pourers is the messy ring of oil they leave on the table. Tammy Sparks noted that “the oil stays out perfectly,” meaning the nozzle design cuts the flow cleanly without dripping.

Verdict: Is It Worth The Hype?

Rating: 4.4/5

Buy It If:

  • You value convenience: You want one bottle that does everything sautéing, roasting, and dressing salads.
  • You hate refilling: The large 16oz capacity is a huge upgrade over small pump sprayers.
  • You want healthy materials: The body is glass, not plastic, ensuring no chemical leaching.

Skip It If:

  • You need an ultra-fine mist: It sprays a heavy “spritz,” not a cloud.
  • You have small hands: A full 16oz glass bottle can be heavy to lift and spray repeatedly compared to smaller plastic versions.

The Bottom Line The YARRAMATE isn’t just a sprayer; it is a complete oil management system. By combining a pourer and a sprayer, it justifies its place on the counter better than any single-function tool. No wonder 40,000 people buy it every month.

We’ve created an article where you can find all the products under the The 4 Best Oil Sprayers for Air Fryers brand in one place, allowing you to browse all of them.

Misto vs. Evo: Which Oil Sprayer Actually Survives Daily Use?

We all want to ditch the disposable cans of PAM. They are wasteful, expensive, and often contain propellants that ruin non-stick pans.

  • Evo Stainless Steel Non-Aerosol Oil Sprayer dispenses any cooking oil and vinegar in unique fan pattern without any harm…
  • Made from 18/8 stainless steel; BPA, Latex and DEHP free; won’t clog, melt or shatter or show fingerprints; economical, …
  • Consistently dispenses 1.35-milliliters per trigger pull; unique fan pattern covers more cooking surface using less oil;…

But finding a refillable oil sprayer that doesn’t turn into a clogged, sputtering mess within a month feels impossible.

Two names dominate this category: The Misto (the classic pressure-pump bottle) and The Evo (the modern trigger-sprayer). On paper, both promise a perfect coat of healthy olive oil. In reality, they fail in very different ways.

  • HEALTHY EATING: evenly coats food using minimal oil for meals with less fat and more flavor; includes two 3.2-fluid ounc…
  • KITCHEN ESSENTIAL: provides a quick, easy way to add oil, vinegar, lemon, lime juice, and more to pasta, salads, vegetab…
  • SMART AND SAFE: BPA-free, refillable pump design dispenses contents without using chemicals or propellants

We analyzed the “sputter” complaints, the “falling top” disasters, and the maintenance rituals to decide which one is actually worth your counter space.

The Contender 1: Misto Aluminum Sprayer

The Misto is the veteran. It uses a pump-action cap to pressurize the air inside the bottle, allowing it to spray oil like an aerosol can without the chemicals.

The “Mist” Quality: When it works, it is the closest thing to a commercial spray. However, it is temperamental. User David Hall noted that instead of a fine mist, he often found the oil “seems to be sputtering rather than mist.”

The Hidden Trick (Read This!): Most Misto failures are actually user error. User pfictionfan4life cracked the code:

“Some ppl say it sprays a stream… They overfilled the bottle… It says to only fill the bottle half way… HALF is MAX.”

Because the Misto relies on air pressure, you must leave space for the air. If you fill it to the top, it will stream. If you follow the rules, it works.

The Contender 2: Evo Oil Sprayer (Stainless Series)

The Evo takes a different approach. It doesn’t use pressure; it uses a mechanical trigger (like a Windex bottle) designed specifically for viscous oils.

The “Flow” Factor: Users love the output. User Grimmace, who bought it for grilling, praised the spray pattern, noting it “gets almost every drop and is easy to spray.” Unlike the Misto, you don’t have to pump it 10 times before using it. You just pull the trigger.

The Fatal Flaw: The “Ejection” Seat While the Misto has clogging issues, the Evo has a construction issue. Multiple users reported a messy design flaw where the top sprayer disconnects from the bottle during use. User Joel Bridgwood shared a frustrating experience:

“The spray top will suddenly detach from the bottom. I’ve spilled olive oil all over the kitchen a couple times now… the bottom screw part is very short so it doesn’t take much to detach.”

User G.L.Crow confirmed this, stating the sprayer is “only held on by one thread,” forcing them to use two hands just to keep the bottle from falling apart.

Comparison: The Daily Struggle

1. The Clog Factor

  • Misto: It will clog if you let oil sit in the nozzle. However, the fix is easy. As pfictionfan4life suggests, “run it under hot water for 5-10 seconds and it should be perfect again.”
  • Evo: The trigger mechanism is powerful enough to force oil through, so it clogs less often. But you can’t fix the loose threads with hot water.

2. Refilling

  • Misto: Difficult to see inside (opaque aluminum), but straightforward.
  • Evo: User Grimmace noted the opening is small, making it harder to fill without a funnel.

Verdict: Which One Should You Buy?

Choose the Misto If:

  • You want a true “Aerosol” mist: If you are air frying or greasing baking pans, the pressurized mist covers more evenly than a trigger squirt.
  • You can follow instructions: If you remember to fill it only 1/2 way and release the pressure after use, it will last for years.

Choose the Evo If:

  • You grill or roast veggies: The fan-shaped spray puts out more oil per pull, which is great for coating steaks or large trays of vegetables.
  • You hate pumping: If you just want to grab and spray, the trigger is faster. Just be careful to hold it by the bottle, not just the neck.

The Bottom Line The Misto is a high-maintenance tool that gives a perfect result if treated right. The Evo is a low-maintenance tool with a high risk of mechanical failure (falling apart).

For most home cooks, the Misto remains the safer bet as long as you never fill it past the halfway line.

We’ve created an article where you can find all the products under the The 4 Best Oil Sprayers for Air Fryers brand in one place, allowing you to browse all of them.

Classic Meals

- Advertisement -