Home Blog Page 49

Beginner’s Guide to Using a Countertop Food Waste Caddy (No Smell, No Flies)

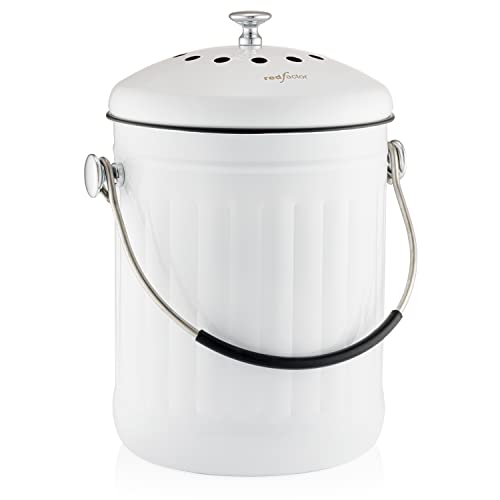
Bringing a food waste caddy into the kitchen is a commitment to reduction of landfill waste, but most people worry about the inevitable: smell and flies. A countertop caddy is the bridge between your kitchen prep and your compost bin, but it can quickly become a point of frustration if managed incorrectly. Happily, preventing odour and pests is straightforward and depends entirely on establishing a few simple habits.

Location: Strategic Placement

Where you put your caddy makes quite a difference in how it functions. Avoid placing it near the stove, oven, or sunny windows. Heat greatly speeds up decomposition, which creates odor and moisture. Put your caddy in the coolest, most shaded part of your counter, away from direct heat. This helps to slow down the process for the bacteria. Using a small caddy, sized appropriately for one or two days’ worth of scraps, also encourages frequent emptying, minimizing the time decaying food sits inside.

Materials: What Goes In

What goes into the caddy is what makes it turn foul. Most of what goes into your scraps caddy should be fresh fruit and vegetable cuttings. There are, however, some materials that you should add in sparing quantities or, better yet, not at all, if you want No Smell, No Flies.

  • Avoid: Meat, dairy, fats, and oils. These break down very quickly and can cause unpleasant odors and even attract pests right away. Ideally, they should go straight into a safe, outdoor composter.
  • Balance: Mix in “brown” materials, such as small amounts of shredded paper or dried leaves, with your “greens,” or vegetable scraps. This will absorb excess moisture, preventing the bottom layer from turning into a thick, odorous sludge.

Liner and Cleaning: Basic Maintenance

While using a proper liner can make for quick cleanup, the container itself requires regular attention. Compostable liners are available and work better than using a standard plastic bag. Compostable liners allow for a small amount of air exchange that is needed while containing the moisture.

  • Cleaning: Even when using a liner, rinse the caddy every time you empty it. A quick scrub with vinegar or a simple, nontoxic cleaner will neutralize lingering odors. Allow the caddy to air-dry completely before inserting a new liner; a dry caddy equals a clean, low-odor environment.

The Best Tool: Activated Charcoal

If you are more sensitive to smell, then look for caddy designs that incorporate a ventilated lid with a slot for an activated charcoal filter. Activated charcoal is highly porous and naturally absorbs odor molecules, trapping them before they can make their way out of the unit. Replacing the filter in a couple of months is a minor maintenance task that has one great payoff: having a truly fresh-smelling kitchen as you strive toward sustainability.

The Lifespan of Beeswax Wraps vs. Silicone Lids: Cost-Per-Use Analysis

Moving away from single-use plastic wrap is a major step toward sustainability, leaving many cooks to choose between two reusable favorites: beeswax wraps and silicone lids. While both offer excellent food storage, their durability, required maintenance, and eventual cost-per-use diverge significantly. The long-term value of your investment will depend entirely on which material best fits your kitchen habits.

Beeswax Wraps: The Maintenance Requirement

Beeswax wraps create a beautifully natural, biodegradable wrap for food. They mold easily around containers using the warmth of your hands and are ideal for wrapping produce, sandwiches, and cheeses. However, their lifespan is most dependent on their care.

related article: How to Wash Bamboo Cutting Boards (Without Ruining Them)

  • Durability: A good-quality beeswax wrap, if cleaned gently, would usually serve for six months up to one year. Exposing the wraps to hot water, heat, or very greasy foods can shorten this period significantly, as it degrades the wax coating.
  • Cost: Because wraps have a limited life, cost per use increases after about 100 to 150 uses. They also have to be re-waxed periodically to extend their life, which encompasses some labor and material costs.

Silicone Lids: The Permanent Solution

Silicone lids, on the other hand or rather, stretch lids offer a very different proposition altogether. Made from flexible, food-grade silicone, they create an airtight, spill-proof seal on nearly any container. Their core advantage is longevity and tolerance for extremes.

  • Durability: Silicone is virtually indestructible in a typical kitchen environment. It stands up to boiling water, microwave heat, and the dishwasher without degrading its structure or sealing ability. Their life actually measures in years instead of months.
  • Cost: While the upfront cost of a set of silicone lids may be marginally higher versus wraps, their calculated service life reaches well into the thousands of uses. This makes the long-term Cost-Per-Use Analysis figure extremely low; therefore, the initial cost is rather quickly justified.

Cleaning: A Simple Comparison

The main difference in required effort comes into play during cleaning. Beeswax wraps must be hand-washed with cool water and mild soap, then air-dried. Silicone lids can just be thrown directly into the dishwasher or steam-sterilized and put away. This simple maintenance difference is key for busy households. Ultimately, both tools eliminate disposable plastic, but the Lifespan of Beeswax Wraps vs. Silicone Lids points to silicone as a more durable, zero-maintenance, and affordable solution over several years.

How to Make Your Own Citrus Enzyme Cleaner for a Zero-Waste Kitchen

Turning food scraps into effective cleaning agents is an easy way to tackle cleaning up in the kitchen without using harsh chemicals or excessive plastic waste. The process is simple: fermenting citrus peels to create a natural Citrus Enzyme Cleaner Zero-Waste solution. Non-toxic, it will cut grease with ease, and it’ll leave behind a beautiful scent, so fresh. This is the ultimate move toward a sustainable kitchen.

The Process: Simple Fermentation

To make enzyme cleaner, three simple ingredients are needed: citrus peels, brown sugar, and water. The brown sugar works as a catalyst in kicking off the fermentation process, which takes several weeks. Over this period, the citrus peels release enzymes that break down dirt and grease.

  • Ingredients & Ratios: You need a container (a plastic soda bottle works well, since glass can break due to buildup of created gases), 1 part brown sugar, 3 parts citrus peels (or other fruit scraps), and 10 parts water. For example, 1 cup sugar, 3 cups peels, and 10 cups water.
  • Instructions: Mix all ingredients in the container. Leave plenty of headspace since fermentation will produce a gas. Cover the container, leaving it loose.

Time and Patience: The Waiting Game

Fermentation does not occur instantly. The cleaner needs to ferment for at least three months for the best outcome and highest concentration. This is necessary in order for the enzymes to develop fully.

  • Carbonation or Gas Release: Within the first month, the mixture will be in an active stage of producing gas carbon dioxide. You should relieve the pressure daily by unscrewing the bottle cap. This is why plastic bottles are safer. If this is not done, the container is in danger of bursting. After the first month, gas production slows down and you don’t have to release so frequently.
  • Indicator: When the liquid becomes clear with no more gas production, it’s ready. The spent peels will sink to the bottom.

Straining and Use: Final Steps

Once fermentation is complete, the concentrated cleaner is ready for use as an all-purpose, nontoxic household solution. This makes a perfect Citrus Enzyme Cleaner Zero-Waste.

  • Straining: Line a fine-mesh strainer over a clean storage bottle and carefully pour the liquid through it, discarding the solids into your compost bin.
  • Dilutions: For general use on countertops, stovetops, and floors, the concentrate should be diluted with water in a 1-to-10 ratio. The concentrate can also be used on stubborn grease spots at full strength. Cut through grease with this effective homemade cleaner that gets rid of odors and is totally kid- and pet-friendly.

Wok Materials Comparison: When to Choose Stainless Steel Over Carbon Steel

Carbon steel is often referred to as the king of woks, for it responds so well to heat and can build up a fine seasoning. This traditional material is not always the best choice, though. There are specific cooking scenarios and kitchen environments where choosing Stainless Steel Over Carbon Steel is not just preferable, but necessary. Understanding these distinctions saves time, effort, and frustration.

Maintenance: The Low-Effort Appeal

The biggest single draw of stainless steel is its simplicity. Unlike carbon steel, stainless steel requires absolutely no seasoning whatsoever. You can wash it right after use, soak it overnight, and even scrub it with soap and scouring pads without fear of rust or ruining a protective layer. For cooks who want low-effort maintenance and do not want the commitment of regular re-seasoning, stainless steel offers undeniable convenience.

Acidity: Balancing Bright Flavors

Traditional carbon steel seasoning does not take well to acidic foods like vinegar, tomatoes, citrus juice, and wine, which strip the seasoning layer off and make food stick, forcing the cook to have to re-season the pan at a later time. Stainless steel is non-reactive, meaning that when preparing dishes with heavy reliance on bright, acidic flavors, like sweet and sour shrimp, vinegar chicken, or some Thai curries, the seasoning stays intact and the flavor profile of the food remains clean and pure.

Consistency: For Delicate Dishes

While carbon steel has excellent heat responsiveness, it also creates hot and cold zones. Stainless steel woks, especially those with triple-ply or aluminum-core bases, distribute heat far more evenly across the cooking surface. For delicate tasks like deep-frying, braising, or preparing large batches of rice, which demand consistent, uniform temperature, stainless steel performs reliably, reducing the risk of scorching in one spot and undercooking in another. This consistency makes it the clear choice when preferring Stainless Steel Over Carbon Steel for certain applications.

Kitchen Environment: When High Humidity is a Factor

Carbon steel rusts in a very short period, especially if not dried immediately and thoroughly re-oiled in humid environments. If you live near the sea, have poor ventilation, or just air-dry your dishes, then stainless steel is the practical choice. Naturally resistant to corrosion, you can afford to leave it on the drying rack, safe in the knowledge it won’t be sporting pitting or rust spots in a few hours’ time. Often, the choice between Stainless Steel Over Carbon Steel comes down to practical kitchen reality.

The Complete Guide to Cleaning and Storing Your Carbon Steel Wok

A carbon steel wok is a strong, high-performance tool that requires special care to maintain the nonstick seasoning and prevent rust. Unlike most stainless steel cookware, a carbon steel wok should never see soap. Poorly managing the cleaning and storage process is the surest way to ruin the seasoning, which can cause sticking and corrosion. Mastering the proper aftercare is just as important as mastering the stir-fry itself.

Golden Rule of Immediate Cleaning

Cleaning the wok immediately after use while it is still warm is the most important thing to do to maintain the seasoning. Do not soak. Soaking waterlogs the metal and encourages rust. The residual heat in the wok aids the cleaning.

  • Cleaning method: Using a bamboo whisk or a soft sponge with hot water, scrub gently to remove any food residue. (If necessary, place the wok over low heat, with a few inches of water inside, and boil for a few seconds to loosen stuck food particles.) Never use steel wool or harsh scouring pads, as they will scrape away all your hard-won seasoning.

Drying: Banish All Moisture

After cleaning the food particles, the wok needs to be completely dried to avoid oxidation. This is an absolute must for carbon steel; merely wiping with a towel will not suffice.

  • Technique: Put the clean wok on the stove over medium-high heat. The heat flashes off any residual water. When the wok is properly dry, the metal displays a uniform gray color with no more droplets of moisture. This should take less than a minute.

Re-Oiling: Maintaining the Finish

This means after drying, the surface of the wok is fragile and should just be sealed with a thin layer of oil to maintain its protective seasoning barrier. This simple step protects the metal from moisture in the air.

  • Procedure: Turn the heat off. Dip a paper towel into a high smoke point oil, such as peanut or refined avocado oil. Rub the oil all over the inside of the wok so that it has a very thin, almost invisible sheen to it. You want the surface to be conditioned, not dripping with a thick residue that could become sticky.

Storage: Air Circulation is Essential

Proper storage comes last. Stacking the wok with other pans or covering it right away can lock in humidity, creating rust spots. To store, place the wok in a dry location, uncovered. Many wok owners prefer to hang their wok in order to maximize airflow. If you are unable to hang your wok and have to stack it, separate your wok from other cookware using a paper towel or clean dishcloth to absorb humidity and protect the finish of your wok. Proper storing will have your wok ready for the next immediate high-heat use.

related article: What Is Wok Hei? The Secret Flavor of Great Stir-Fry Dishes

Why Your Stir-Fry Is Steaming, Not Searing (Common Heat Mistakes)

Searing imparts the classic stir-fry with its superior texture: crisp, tender, and lightly caramelized. If your wok seems to be producing clouds of gray steam instead of a satisfying sizzle, you are battling a fundamental lack of heat transfer. The desired result is flash-cooked ingredients that maintain their distinct texture, not softened, waterlogged vegetables. Addressing these common heat mistakes is the fastest route to authentic Asian cooking.

Overcrowding: The Quantity Conundrum

The single biggest obstacle to searing is cooking too much food at once. When the wok surface is covered in a thick layer of ingredients, the temperature of the metal drops immediately and drastically. This rapid temperature loss inhibits the Maillard reaction the browning process responsible for deep flavor and draws moisture out of the food. That moisture instantly turns into steam, effectively making your stir-fry a steam bath. Always cook in small, manageable batches, giving the food room to breathe and letting the wok temperature recover between additions quickly.

Moisture: The Enemy of the Sear

Adding cold or wet ingredients to a hot wok is a surefire way to encourage steaming. Moisture is searing’s greatest nemesis. Take the time to thoroughly dry any protein or vegetable before adding it to the high heat. Pat sliced meat dry and wipe off vegetables with a paper towel to remove moisture from their surfaces. For marinades, make sure they are wiped off of the surface of the protein so that only a light coating remains. This will prevent the initial temperature crash and ensure the oil remains hot enough to start searing immediately.

The Stove: Power Limitations

The problem is that many home stoves just don’t have the heat output (BTUs) to maintain the searing temperature that the wok requires. A standard residential burner usually can’t heat up the high volume of food required for a family meal. If you have addressed the issues of overcrowding and moisture and you still see steam, then your stove’s power is the choke point. If looking for true searing power, consider a dedicated outdoor high-BTU burner, or if using an electric or induction cooktop, make sure your wok has a wide, flat bottom for maximum contact.

Oil Temperature: The Timing

Adding ingredients before your oil has reached its smoke point is a rookie mistake. The first ingredient should not touch the metal until your good high-smoke-point oil is shimmering and almost smoking. Oil is the heat transfer medium. If it’s not hot enough, heat from the metal cannot jump quickly enough to the food, giving the ingredients time to release moisture and start steaming. Listen for the sizzle; if you don’t hear it, wait another thirty seconds.

read more: Troubleshooting Common Carbon Steel Wok Issues: Causes and Solutions

Classic Meals

- Advertisement -