Home Blog Page 47

The Best Oil for Wooden Cutting Boards: Mineral Oil vs. Synthetic Alternatives

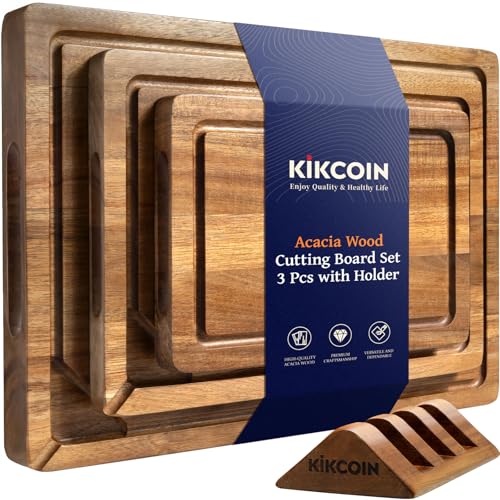
Maintaining a wood cutting board is important, not only for its beauty but also for food safety. An unoiled board dries out, cracks, and becomes a prime harbor for bacteria. When choosing a conditioning agent, the debate often falls to Mineral Oil vs. Synthetic Alternatives. Making the right choice requires understanding food safety standards, absorption rates, and long-term durability elements that are so important for preserving your investment.

Traditional Choice: Food-Grade Mineral Oil

And food-grade mineral oil also commonly referred to as “butcher block oil” remains the gold standard for professional woodworkers and culinary experts the world over, for reasons rooted in its chemistry.

  • Experience & Expertise: Mineral oil, by standards set by the U.S. Food and Drug Administration (FDA), is considered non-toxic, non-allergenic, and perfectly safe for contact, both indirect and direct, with food. It is a non-drying oil, meaning it will not polymerize (harden and become tacky) within the wood grain, thus keeping the board smooth and supple.
  • Application: Applied monthly, mineral oil deeply works its way into the wood fibers, repelling water and preventing the cracking and warping that occurs when wood loses moisture. Such deep conditioning assures the longevity of a board, something testified to by decades of professional use.

Synthetic Alternatives: The Wax Option

While pure mineral oil is liquid, many modern alternatives blend mineral oil with natural waxes, primarily carnauba or beeswax. These products offer a different kind of protection.

  • Authoritativeness: These wax-oil blends sold under various names, such as “board creams” offer a bit more resistance to water. The wax seals the surface of the wood, adding a strong, visible sheen and protective layer against stains and spills. However, they do not penetrate as deeply as pure mineral oil.
  • Trade-offs: The waxy finish can indeed build up over time, and the added layer of wax means the conditioning must be reapplied more often than a deep mineral oil treatment to maintain optimal protection. They are great for waterproofing the surface, but not quite as effective with the replenishment of deep moisture.

Related article: Santoku vs. Chef’s Knife: Which Blade Shape is Best for General Use?

Why You Should Avoid Common Cooking Oils: The Risk of Oxidation

One important area of expertise is the risk associated with using common vegetable oils, such as olive, coconut, or sunflower oil. These are drying oils; they oxidize over time.

  • Trust & Safety: Oils, such as olive oil, go rancid when they oxidize inside the wood grain. This brings in foul odors and sticky residues that might promote bacterial growth and render the board unsafe for food. For food contact surfaces, only stable, non-drying oils are acceptable. When comparing Mineral Oil vs. Synthetic Alternatives, the key distinction is stability against rancidity.

High-Carbon vs. Stainless Steel Knives: A Complete Care and Rust Prevention Guide

Choosing a new knife means committing to a material, and the perennial debate between high-carbon and stainless steel is about more than just performance. it’s about lifestyle. Each material demands a drastically different level of maintenance. While high-carbon steel offers superior sharpness and edge retention, stainless steel provides unmatched convenience. Deciding between High-Carbon vs Stainless Steel Knives hinges on your willingness to embrace meticulous daily care.

Performance: Edge Retention and Sharpness

High-carbon steel contains more iron and less chromium, allowing it to take and hold a finer, sharper edge. This material is favored by professional chefs for its precision. The trade-off is vulnerability. Stainless steel, by containing at least 10.5% chromium, sacrifices some edge capability for durability. While it requires more frequent honing, stainless steel is generally the preferred choice for those who value practicality over peak performance.

Rust Prevention: The Immediate Threat

The most significant difference between High-Carbon vs. Stainless Steel knives has to do with their reaction to moisture. If left wet or exposed to acidic foods like tomatoes and citrus, Carbon steel will rust rapidly, often within minutes. Rust prevention is an immediate concern.

  • Care for Carbon Steel: Always wash the knife immediately by hand and completely dry it with a towel. Many cooks apply just a bit of food-safe mineral oil to the blade before storage, to create a barrier against moisture.
  • Care of Stainless Steel: Stainless steel is very resistant to corrosion. While you still shouldn’t let it soak, it is far more forgiving of air-drying or brief exposure to moisture.

Patina: The Carbon Steel Shield

As carbon steel is used, it develops a natural, grayish-blue or brownish discoloration known as a patina. This patina is not rust; it’s a protective layer formed by oxidation, and it actually helps shield the metal from the red, flaky, destructive form of rust. Many cooks actively encourage the patina for its beauty and utility. You should never attempt to scrub the patina off. If you like your knife to be looking shiny and new forever, High-Carbon vs Stainless Steel Knives comparison strongly favors stainless steel.

Cost: Long-Term Value

While high-end carbon knives are often much more expensive upfront, they can pay for themselves over a very extended period of time. Stainless steel knives are usually more affordable and, being easier to care for, are less likely to be ruined through accidental rust, making them the safer bet for the average home kitchen.

Knife Blocks vs. Magnetic Strips: Which Storage Method Protects Blades Best?

Proper knife storage isn’t strictly about aesthetics or convenience; it’s about edge integrity and safety. After taking the time to sharpen your favorite chef knife, the last thing you want is for it to dull prematurely in storage. Of the two most popular methods, Knife Blocks Magnetic Strips, each offers a vastly different approach when it comes to protecting the blade edge. Deciding which method works best for your collection involves understanding how each interacts with the delicate cutting edge.

Knife Blocks: The Friction Factor

But the classic wooden knife block, while safe and easily accessible, introduces the risk of dulling the blade.

  • Dulling risk: Every time a knife is pulled out or slid back into the block’s slot, the edge inevitably rubs against the wood. This constant friction causes microscopic rolling and dulling of the edge, forcing the cook to sharpen more frequently.
  • Hygiene: The other major disadvantage is hygiene. Slots in knife blocks are very hard to clean and may collect crumbs, moisture, and bacteria that are then transferred back onto the clean blade. To reduce friction, always push the knife into its slot spine-first so that only the front or back of the slot touches the edge but not the surfaces of the wood.

read more: Pyrex Freshlock Glass Food Storage Containers Set Review

Magnetic Strips: The Edge Safety Solution

Magnetic strips, installed on the kitchen wall, provide maximum visibility and superior edge protection.

  • Zero Contact: A blade hangs suspended in the air when utilizing Magnetic Strips. When placing or removing the knife correctly by pivoting the spine away from the strip rather than pulling straight off the cutting edge never touches another surface, eliminating the block’s inherent dulling friction.
  • Hygiene: The surface of the magnet is non-porous and completely exposed; hence, it is very easy to wipe after every use, thus offering a high level of hygiene. This makes the magnetic strip the clear winner in maintaining a clean workspace.

Storage Space: Kitchen Layout

The choice between Knife Blocks Magnetic Strips has much to do with space availability. Blocks consume a lot of countertop real estate, which is a big deal in small kitchens. Strips, on the other hand, take up wall space vertically and leave the counter free for preparation. The Verdict: Blade Protection While blocks provide safety visually by covering the edges, magnetic strips provide better long-term protection to the sharpness of the blade. For chefs who value edge longevity and ease of cleaning, the magnetic strip is the better option.

Mastering the Whetstone: A Step-by-Step Guide to Consistent Sharpening Angles

A truly sharp knife edge isn’t magic; it’s geometry. Many home cooks own a whetstone for sharpening but struggle to maintain the crucial, consistent angle required to effectively create a new edge. Inconsistency leads to a rounded, dull edge that wastes time and precious blade material. Mastering the Whetstone Sharpening Angles means adopting a technique that turns an intimidating process into a precise, repeatable ritual.

Preparation: Securing the Stone

Before you even touch the knife to the stone, the stone itself must be secured. A rocking or sliding stone is dangerous and makes consistent angles impossible.

  • Technique: The procedure for most stones involves soaking in water for 5–10 minutes, or until the bubbles stop rising. Set the stone on a non-slip base ideally a dedicated rubber holder or even a simple wet towel to keep it from moving around during the sharpening stroke. Always start with the coarsest grit, around 1000, to set the primary bevel.

The Angle: Finding the Sweet Spot

The correct angle is the single most challenging aspect of using a whetstone. Most Western knives use a 15- to 20-degree angle per side, while Japanese knives are often narrower (10 to 15 degrees). The most common mistake by far is raising the angle too high.

  • Fingertip Gauge: To give you a more visual idea, place the blade flat on the stone and then raise the spine the backside of the blade until there’s a slight gap. One trick with which many advanced sharpeners supplement this height is by sliding two dimes or quarters under the spine of a thin knife to help physically guide the right height. Maintaining this tilt for the duration of your stroke is key to mastering whetstone sharpening angles.

Stroke: The Push & Pull

Grinding should be smooth, controlled, using the full length of the stone. Apply light, consistent pressure.

  • Edge Leading: When pushing the knife away from your body, use light pressure driving the cutting edge against the stone.
  • Spine Leading: When you pull the knife back toward your body, use very light pressure, dragging the spine across the stone.
  • Consistency: Always count your strokes, for example, 20 strokes per side, to achieve even metal removal.

Finishing: The Burr and Finer Grit

You will know you’ve created the right geometry when you feel a small, wire-like curl of metal the burr on the other edge of the blade. When you get the burr, go on to a finer grit stone (such as 3000 or 6000) and polish in the new edge to remove the burr, completing your mastery of Whetstone Sharpening Angles.

read more: A Fisherman’s Guide to the Best Fillet Knives

Honing Steel vs. Sharpening Stone: When to Hone and When to Sharpen

The distinction between honing and sharpening seems to get confused by home cooks more than anything, yet it’s one of the most important basics to keeping a quality kitchen knife. Using a dull knife is inefficient and hazardous. The key to keeping your edge perfect is understanding the difference in purpose between the Honing Steel Sharpening Stone. One straightens the edge; the other removes metal. Confusing the two can permanently damage your blade.

Honing Steel: Edge Alignment

The honing steel, often mistakenly called a sharpener, does not actually remove any significant amount of metal from the blade. Its purpose is purely maintenance.

  • When to Hone: Use the steel frequently ideally before or after every few uses. Over time, the knife edge, which is microscopically thin, bends slightly to one side (creating a “burr”) after hitting a cutting board or bone. The steel gently nudges this edge back into the center, realigning it.
  • Result: Honing immediately reinstates a knife’s sensation of sharpness because it straightens the existing edge. It is a speedy, necessary process that extends the interval between proper sharpenings.

Sharpening Stone: Creation of Edge

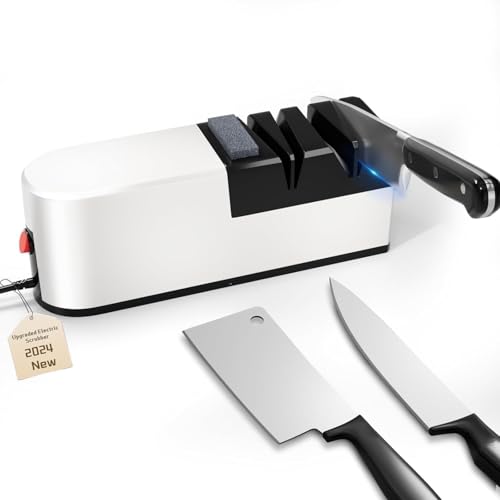
The sharpening stone, or whetstone, is the tool that actually grinds away material to create a brand-new, fresh edge. Stones are available in various grits, measured in microns.

  • When to Sharpen: This is necessary much less frequently, maybe once every six to twelve months for a quality home knife, depending on use. You need to sharpen when the knife feels persistently dull even after honing meaning the physical edge has been worn round or chipped.
  • Result: Sharpening removes the damaged metal and creates a new apex; this is the peak sharpness of the blade. This aggressive step is indispensable for long-term edge creation.

The Synergy: Honing Steel Sharpening Stone

These two tools work together, not in competition. The steel takes care of the daily wear and tear, keeping the edge straight. The stone takes care of the long-term deterioration, bringing a truly dull knife back into a working state. Neglecting to steel frequently means reverting to the stone too often, which reduces your knife’s lifespan by removing unnecessary amounts of steel. Knowing the rhythm of when to hone and when to sharpen marks the seasoned cook.

read more: Honing Steel vs. Sharpening Stone: When to Hone and When to Sharpen

The Role of Static Electricity in Grinding Consistency and Dosing

The chaos of static electricity inevitably haunts every serious home barista. Instead of smoothly falling into the dosing cup or portafilter basket, the freshly ground coffee clings stubbornly to the grinder chute and scatters across the counter. That messy annoyance is more than just a cleanup issue; it directly undermines the precision required for pulling a perfect shot. The reason grinding consistency is so important is because of static, which is the direct cause of clumping and inaccurate dosing.

Clumping: The Enemy of Even Extraction

Static charge causes fine coffee particles to attract each other, forming small, dense clumps. These clumps, when introduced into the portafilter basket, resist the efforts of distribution tools such as the WDT tool and tamping. That results in areas of high and low density in the puck. The water prefers to flow through the low-density areas when brewing, which creates channeling, poor extraction, and unevenness, hence a sour or bitter taste. Without intervention, it is impossible to achieve Static Electricity Grinding Consistency.

Dosing: Weight Inaccuracy

Static cling is defined as the adherence of coffee particles to the inside of the grinder’s chute, the dosing cup, and surrounding counter. If you base your dose on weighing, the most accurate method, retained coffee translates directly into an inaccurate weight in the basket. For example, if two grams of grounds cling to the chute, your intended 18-gram dose becomes 16 grams. This inconsistency in the actual dose will ruin the intended recipe and make elusive consistent results.

The Fix: Introducing Moisture

The traditional antidote to static is moisture. Water vapor serves as a conductor, neutralizing the static charge.

  • Ross Droplet Technique (RDT): This involves adding a tiny droplet of water literally, a single spritz from a fine mist bottle or a wet fingertip to the whole beans immediately before grinding. The small amount of surface moisture is enough to eliminate static entirely without impacting the taste of the final shot.
  • Humid Environment: If you live in a dry climate, increasing the humidity around the grinder will passively reduce the static buildup. However, RDT is the fastest and most reliable method for controlling Static Electricity Grinding Consistency regardless of the ambient environment. With RDT, the grinds flow freely and cleanly to make for proper dosing, which in turn makes the needed distribution, WDT, much more effective in ensuring a foundation is laid for excellent espresso.

read more: What Is a WDT Tool and Why Every Espresso Enthusiast Needs One

Classic Meals

- Advertisement -