Home Blog Page 11

How Many Quart Dutch Oven for Sourdough? (5 Qt vs 7 Qt Guide)

When choosing between a 5 qt vs 7 qt dutch oven, many bakers wonder how many quart dutch oven for sourdough is actually necessary for the perfect rise.

You spend 24 hours fermenting the perfect dough, only to watch it flatten in the oven. Often, the culprit is not your starter. It is the physical geometry of your baking vessel. Choosing the correct volume and shape dictates exactly how your bread will trap steam and expand.

The Problem: The Danger of the Wrong Dimensions

If you drop a standard 1-kilogram dough into a massive 9-quart pot, the evaporating moisture dissipates into the vast empty space. You lose the tight steam seal required for a blistered, chewy crust.

Conversely, cramming that same dough into a 3-quart pot severely restricts the oven spring. The dough hits the cast iron lid as it rises, resulting in a dense crumb and a scorched, blackened top. We frequently see home bakers on forums complaining about burned crowns simply because they misjudged their vertical headspace.

How Many Quarts for Sourdough? Matching Capacity to Dough Weight

To avoid structural failure, you must match the vessel to your standard flour weight.

  • 4 to 4.5 Quarts: Ideal only for micro-loaves or small batch baking (300g flour recipes).
  • 5 to 5.5 Quarts (The Sweet Spot): This is the universal standard for a sourdough boule dutch oven setup. It comfortably houses a loaf made with 500g of flour (yielding an 800g to 900g baked loaf). It provides roughly two inches of vertical headspace, ensuring the dough has plenty of room to stretch upward without hitting the iron dome.
  • 7 Quarts and Above: Reserve these massive pots for 1.5-kilogram family loaves or heavy, multi-purpose cooking. Beware the extra weight; hoisting a screaming-hot 16-pound pot out of the oven requires serious wrist strength.

Troubleshooting Shapes: Batards, Boules, and Bannetons

The shape of your pot dictates the shape of your bread. A round Dutch oven is engineered for a circular boule. An oval Dutch oven is built for an elongated batard.

Can you bake a batard in round dutch oven? Yes, but it requires geometric compromise. You must bake a slightly shorter batard and place it diagonally across the circular base. If the tips of the dough touch the hot sidewalls before expanding, the loaf will warp, trap heat unevenly, and bake with a lopsided crumb.

The most common sizing error actually happens before the dough ever hits the oven. You must rigorously align your banneton size for dutch oven dimensions. If you proof your dough in a 10-inch oval banneton, it physically cannot sit flat inside an 8-inch round pot. Always measure the interior diameter of your cast iron base, and buy a proofing basket that is at least one to two inches smaller. This guarantees your dough has room to spread radially for a few minutes before the crust sets.

The Golden Rule of Headspace

Steam needs physical confinement to keep the crust soft, but yeast needs vertical clearance to explode. When calculating your measurements, prioritize the lid’s height over the base’s width. A tight, tall, domed environment forces the dough to expand vertically rather than flattening out into a pancake. Measure your favorite proofing basket today, add two inches of clearance, and you will know the exact cast iron dimensions you need to purchase.

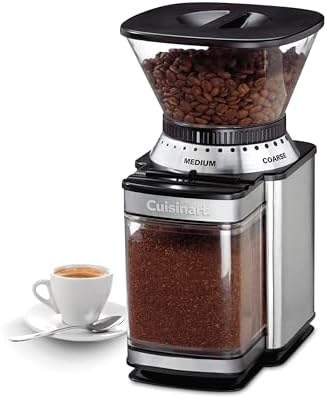
Why Home Baristas Are Switching to Single Dose Grinders (And Top Picks)

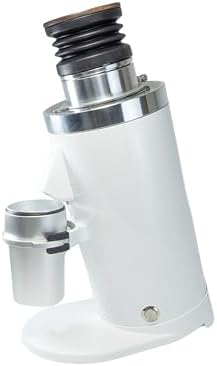
The era of the giant plastic bean hopper is ending. If you look at the counter of any serious home barista today, you won’t see a machine storing a pound of beans. You will see a compact, “single dose” grinder.

This isn’t just an aesthetic shift. It is a fundamental change in how we approach coffee freshness and waste.

For decades, the standard was simple: fill the hopper on Monday, grind all week. The problem is that oxygen kills coffee. By Wednesday, the beans sitting in that clear plastic tower are stale. Worse, standard grinders suffer from “retention.”

The “Retention” Problem

In a traditional grinder, the path between the burrs and the chute is often long. If you put 18 grams of coffee in, you might only get 16 grams out. The remaining 2 grams get stuck inside the chamber.

The next morning, when you grind your fresh coffee, those 2 grams of stale, oxidized grounds from yesterday are pushed out first. You are effectively starting every cup with old coffee.

Single dose grinders solve this with “Zero Retention” engineering.

  • Bellows System: Many use a silicone bellow to blow air through the chute, forcing every last particle out.
  • Slanted Geometry: Brands like Niche and Turin tilt the motor so gravity helps the grounds fall straight down, leaving nothing behind.

The Workflow Shift

Switching to single dosing changes your morning ritual. You don’t just push a button. You weigh your beans on a scale before you grind them.

This allows for Frequency Flexibility. In the morning, you can dial in a dark roast espresso. At noon, you can switch to a light roast Ethiopian for a pour-over. With a traditional hopper grinder, switching beans is a nightmare because you have to purge the old beans first. With a single doser, there is no cross-contamination.

For home baristas who like to switch between different coffee beans daily, replacing your standard bean container with a single dose hopper ensures maximum freshness and zero retention.

The Top Picks Leading the Trend

If you are ready to ditch the hopper, these are the three models currently defining the market.

1. The Gold Standard: Niche Zero This grinder started the revolution. It uses massive 63mm conical burrs, famous for its workflow; it is quiet, simple, and has virtually zero retention without needing bellows. It produces a thick, syrupy espresso body.

2. The Flat Burr Powerhouse: Turin DF64 Gen 2 For those who prefer the clarity of flat burrs (better for light roasts), the DF64 is the value king. It includes an anti-static plasma generator to stop grounds from flying everywhere, which was a major issue with earlier models. It punches way above its price class.

3. The Entry Point: Fellow Opus If you aren’t ready to drop $500+, the Opus is a solid all-rounder. It has a high-torque motor and handles everything from espresso to cold brew. It retains a bit more coffee than the Niche, but for the price, it is an excellent introduction to single dosing.

Should You Switch?

If you just want caffeine efficiently, stick to a hopper. But if you chase flavor notes and like buying different bags of beans, a single dose grinder is the single best upgrade you can make for your setup.

Nonoji MAX Shredder Review: The Tool That Makes Cabbage Worth Eating

If you are tired of using a standard chef’s knife, upgrading to a specialized tool like the nonoji max cabbage peeler can cut your prep time in half while delivering consistently paper-thin slices.

Most cabbage prep ends one of two ways: uneven chunks from a knife or obliterated mush from a food processor. The Nonoji MAX produces a third result that neither of those tools can match: consistent, paper-thin shreds in under five minutes. That specific output is why 9,500+ buyers have reviewed this tool and why it keeps showing up in Japanese cooking videos and TikTok meal prep content.

  • Double the cabbage, double the delight! Unleash the power of twin blades for a julienning experience like never before.
  • Precision meets perfection with our high-tech triangular blades, ensuring a light texture without the hassle of sideways…
  • Effortless mastery is at your fingertips. The soft hand grip requires minimal pressure, making slicing a breeze.

What the Dual-Blade Design Actually Does

The Nonoji MAX uses two triangular stainless steel blades set close together. As you pull the shredder across a cabbage head, both blades cut simultaneously, creating the ultra-fine tendrils associated with tonkatsu restaurant cabbage salad. Linda, who had been trying to replicate that texture with a knife, put it directly: if you’ve ever wondered how Japanese restaurants shred their cabbage so finely, this is the tool.

The blades are sharp enough to require attention. LinSoo noted that once the cabbage head gets small, the wide blade area gets dangerously close to fingers. The standard recommendation from multiple reviewers is to either stop when the head gets too small and finish with a knife, or use a cut-resistant glove. Raven Z, who has arthritic hands, shredded a full head for sauerkraut in under 20 minutes and called it the most comfortable prep tool she has used.

Learning Curve and Technique

There is a brief adjustment period. Several reviewers mention taking a few tries to find the right angle. 808 described it as a slight learning curve, but noted that once the angle clicks the shredder moves smoothly and produces beautiful lacy shreds. JCismylord added a useful tip: soak the shredded cabbage in ice water for 10 to 15 minutes for maximum crunch.

pzee offered the most practical technique note: the shredder works best on fresh, tightly packed cabbage. Loose leaves that flop apart as the head shrinks make it harder to maintain control. One workaround is wrapping the outside of the cabbage in plastic wrap to keep it compact.

What People Are Actually Making With It

The use cases in reviews go well beyond basic coleslaw. CVK makes Japanese-style addicting cabbage slaw with salt, sugar, sesame oil, and white pepper. Nathan uses it for colcannon, tonkatsu accompaniments, and any slaw variation. Selena Lehman adds shredded cabbage to sandwiches, wraps, and salads regularly. BRENDA W. uses it for sauerkraut prep alongside her husband. The cleanup comment from Nathan is worth noting: rinse immediately after use. Tiny cabbage shreds dry onto the blades quickly and become difficult to remove without damaging a sponge.

One Honest Limitation

mlin212 noted the shred is almost too fine for some applications. If you want a slightly thicker cut for heartier slaws or braised cabbage, this tool will not give you that option. The blade gap is fixed. For ultra-fine salad shreds it is unmatched. For anything thicker, a mandoline or knife gives more control over the cut width.

The Tool That Changes How Often You Use Cabbage

Sonu’s review is the most concise summary of what this tool does to your cooking habits: “I buy cabbage to use this.” At under $8, the Nonoji MAX costs less than a head of cabbage and produces results that no knife technique or food processor attachment can replicate. The learning curve is brief. The safety awareness is real but manageable. For anyone who makes slaws, salads, or Japanese-style cabbage dishes regularly, this is the tool that removes the friction from that prep.

Nuovva Dutch Oven Review: The Best Budget Sourdough Pot?

The appeal of baking a massive, blistered sourdough boule in an expensive French enameled cast iron pot is undeniable. However, not everyone wants to spend $350 on a single piece of cookware, especially when they are just starting their bread journey. You need heavy thermal mass to trap steam, but you do not necessarily need a luxury brand name. The Nuovva 6.4-Quart Enamelled Cast Iron Dutch Oven promises heavy-duty heat retention and a sleek, naturally non-stick finish for a fraction of the premium price.

  • LOW MAINTENANCE: a great alternative to the traditional bare cast iron pot for busy working individuals, our ovenproof c…
  • PERSONALISE YOUR KITCHEN: coming in a superb range of colours you choose between red, blue, grey, and green for your ena…
  • VERSATILE USE: the excellent heat retaining nature of ovenproof enamelled cast iron allows for flexible cooking, brown a…

The Thermodynamics of Budget Enamel

Baking artisan bread relies on two physical principles: thermal mass and steam retention. When you preheat a heavy cast iron pot to 500°F, it acts as a massive thermal battery. When you drop your cold dough inside, the heat shocks the yeast into rapid expansion (oven spring). Furthermore, the heavy lid seals the evaporating water inside the vessel, keeping the crust pliable enough to stretch.

The Nuovva Dutch Oven weighs a substantial 6.46 kilograms (about 14.2 pounds). This weight guarantees the pot holds onto high heat effortlessly, even when you open the oven door. The 6.4-quart capacity is also a massive advantage. It provides enough vertical headspace for a large boule to expand aggressively without sticking to the lid.

However, you must understand the material science behind budget enamel. Premium brands apply highly engineered, multi-layered glass coatings designed to withstand extreme thermal shock. The Nuovva utilizes a standard 100% PFOA-free ceramic surface. While this glaze creates a wonderful, low-maintenance non-stick surface for braising Sunday stews, it requires careful handling for bread baking.

While some bakers specifically search for a nuovva double dutch oven to use the lid as a shallow baking skillet, the deep 6.4-quart capacity of this classic enameled version provides more than enough room to drop your dough in safely without the need for a convertible lid.

The “Dry Preheat” Warning

Most sourdough recipes instruct you to place an empty Dutch oven into a 500°F oven for 45 to 60 minutes. This is called “dry preheating.” While bare cast iron (like a Lodge) survives this easily, dry heating budget-friendly enamel at extreme temperatures can eventually cause the glass coating to develop micro-cracks (crazing).

To protect this specific pot and ensure it lasts for years, you should utilize the “cold-bake” method. Simply place your scored dough into the room-temperature Nuovva pot, put the lid on, and place the entire vessel into a cold oven. Then, set the temperature to 450°F. The heavy iron and tight-fitting lid will still trap the steam beautifully as the oven heats up, giving you excellent oven spring without risking thermal shock to the enamel glaze.

User Experience Analysis

The market clearly responds to this price-to-performance ratio. The Nuovva holds the #4 spot overall in Dutch Ovens on Amazon, boasting a 4.6 out of 5-star rating from over 6,300 reviews. Buyers purchased over 3,000 units just last month.

Users frequently praise its versatility and size. Verified buyer “mrs.truthquest” explicitly bought this pot for baking no-knead artisan loaves. She noted that the heavy lid completely eliminated her problem of baking “flat round loaves.” Furthermore, international buyer “Juan mena araya” specifically confirmed its high utility for baking sourdough bread (pan de masa madre).

The Value Verdict

Priced at a fraction of luxury French competitors, the Nuovva 6.4-Quart Enamelled Cast Iron Dutch Oven offers exceptional value. It delivers the heavy thermal mass and tight steam seal required for beautiful sourdough oven spring. It also seamlessly transitions into a low-maintenance, easy-to-clean braiser for everyday cooking. As long as you respect the limitations of budget enamel and avoid aggressive, 500°F dry preheating, this massive pot will reliably produce stunning artisan loaves without emptying your wallet.

Maple, Walnut or Cherry? The Best Woods for Cutting Boards

Wood is not wood. If you cut a chicken on an oak board you are creating a germ hazard. Choosing the woods for cutting boards depends on how the wood is made and its strength, not just matching your kitchen.

  • Solid Wooden Cutting Board: Elevate your food prep with a John Boos R-Board series wood cutting board. It’s ideal for sl…
  • Crafted for Your Home: This thick wooden charcuterie board boasts reversible sides, recessed finger grips, an oil finish…
  • Made for Life: Available in 3 different sizes for your serving and charcuterie-board needs, this large wooden cutting bo…

To survive hits from a cleaver and resist soaking up juices from meat a cutting board needs two important things: a tight structure and the right density.

The Facts: How Wood is Made and the Janka Scale

We measure wood strength using the Janka Hardness Scale. It shows the pounds-force needed to push a steel ball into the wood. If a wood is too soft, like pine or cedar it breaks into your food. If it is too hard, like bamboo or teak it damages your knife. The best strength for a cutting board is between 900 and 1,500 pounds-force.

  • Solid Wooden Cutting Board: Elevate your food prep with a John Boos R-Board series wood cutting board. It’s ideal for sl…
  • Crafted for Your Home: This thick wooden charcuterie board boasts reversible sides, recessed finger grips, an oil finish…
  • Made for Life: Available in 3 different sizes for your serving and charcuterie-board needs, this large wooden cutting bo…

The way the wood is made is also important. Woods with pores like oak or ash soak up liquid, germs and bad fats. You should only use woods with a structure. Here’s how maple, walnut and cherry work in the kitchen.

Hard Rock Maple

Maple is very strong and good for kitchens and butcher shops. It blocks germs and wetness well. People say it lasts a time; heavy users note that maple boards withstand years of chopping without getting damaged. The downside is its color. If you cut beets, berries or turmeric the pale surface will show stains.

  • END GRAIN BOARDS PROTECT KNIVES & SELF HEAL — End grain cutting boards are renowned for extreme durability, and gentlene…
  • ELEGANT, HYGIENIC, & DURABLE AMERICAN BLACK WALNUT — Elevate your kitchen with the luxurious tones of a Black Walnut cut…
  • STABLE & ORGANIZED PREP W/ NON-SLIP FEET & SORTING WELLS — The removable feet on this non slip cutting board provide sec…

Black Walnut

Walnut is a choice if you want a dark luxury look. It also helps protect your knives. Owners say their blades stay longer on walnut than on maple. However users warn that walnut soaks up a lot of oil. If you don’t treat it with mineral oil it will. Crack. The dark color hides food stains well.

Cherry

Cherry is a middle ground. It is soft enough to protect your knife but strong enough for prep. Long-term users like how it changes color over time; it starts light pink. Turns deep red with regular oiling and light.

The Serrated Knife Exception: Why You Still Need a Bread Board

Don’t use your hardwood block to cut a bread. Serrated bread knives act like saws. Damage the wood. This is where a dedicated bread board is needed. A slotted board for bread catches crumbs. Takes the abuse saving your expensive maple or walnut surface for precise work.

Matching the Wood to Your Technique

Your choice of wood dictates your kitchen workflow. If you want an hygienic cutting board that survives heavy use invest in hard rock maple. If you prioritize protecting knives and want a dark centerpiece black walnut is the better material. Pick the wood that matches your habits oil it regularly and keep your serrated knives away, from it.

End-Grain vs. Edge-Grain Cutting Boards: What’s the Difference?

When you decide to upgrade to a premium hardwood prep surface, you’ll likely face the choice between wood edge grain and end grain cutting boards. While they may look similar, the physics of each cut changes everything.

  • END GRAIN BOARDS PROTECT KNIVES & SELF HEAL — End grain cutting boards are renowned for extreme durability, and gentlene…
  • ELEGANT, HYGIENIC, & DURABLE AMERICAN BLACK WALNUT — Elevate your kitchen with the luxurious tones of a Black Walnut cut…
  • STABLE & ORGANIZED PREP W/ NON-SLIP FEET & SORTING WELLS — The removable feet on this non slip cutting board provide sec…

If you are trying to decide between an edge-grain and an end-grain cutting board, the decision comes down to how much you value your knife’s edge and how much maintenance you are willing to perform. Here is the physical difference between the two.

Edge-Grain: The Reliable Workhorse

Visually, an edge-grain board looks like long, continuous strips of wood running parallel to each other. To build this, woodworkers take long slats of hardwood, lay them side-by-side, and glue the edges together.

The Physics: Because the wood fibers are running horizontally across the surface, your knife blade strikes directly across the fibers. While premium hardwoods like maple or walnut are tough enough to withstand this, repeated chopping will eventually sever those surface fibers, leaving visible score marks and scratches over the years.

The Verdict: Edge-grain boards are incredibly durable, less prone to warping, and generally more affordable because they require less labor to manufacture. If you want a heavy, reliable butcher block that requires moderate maintenance and you do not mind your board showing a bit of “character” over the years, an edge-grain board (like the classic John Boos R-Board) is an exceptional choice.

  • PERFECT GIFT – classic gifts for housewarming, weddings, Christmas, Thanksgiving,birthdays, Mother’s and Father’s Day, o…
  • SUPERIOR END-GRAIN CONSTRUCTION – brings more benefits compared to others. They are somewhat “self-healing” because wood…
  • 24x18x2 IN EXTRA LARGE AND THICK- you need a large cutting board, because the bigger the better. It’s perfect for cuttin…

End-Grain: The Self-Healing Investment

Visually, an end-grain board is instantly recognizable by its distinct checkerboard or patchwork pattern. To create this, woodworkers take those edge-grain strips, cut them into small blocks, and glue them together with the end pieces facing up much like looking down at the rings of a tree stump.

The Physics: This vertical orientation of the wood fibers changes everything in the kitchen. When your razor-sharp chef’s knife strikes an end-grain board, it does not sever the fibers. Instead, the blade glides between the vertical fibers. When you lift the knife away, the fibers naturally squeeze back together.

This incredible “self-healing” property means two things: the board will show significantly fewer knife marks over a lifetime of use, and more importantly, your knife’s delicate edge will stay sharper for much longer. It is the ultimate shock absorber for high-carbon steel.

  • Solid Wooden Chopping Block: Elevate your food prep with a John Boos CCB series wood chopping block. Slice, chop, and di…
  • Crafted for Your Home: This thick wooden charcuterie cutting board boasts reversible sides, recessed finger grips, an oi…
  • Made for Life: Available in 3 different sizes for your serving and charcuterie-board needs, this durable wooden cutting …

The Verdict: Because of the complex, labor-intensive manufacturing process, end-grain boards are luxury items. They are also notoriously “thirsty.” Because the wood fibers point upward, they absorb moisture (and dry out) rapidly, meaning you must commit to a strict, frequent oiling routine. If you own expensive Japanese knives and want the absolute pinnacle of culinary protection, an end-grain block (like the John Boos CCB Series or Sonder LA Alfred) is the ultimate investment.

Classic Meals

- Advertisement -